Homemade Pink Nouga
Homemade Pink Nouga is one of those sweet little kitchen projects that feels old-fashioned in the best way. The first time you pull that glossy pink mixture into a soft, chewy slab, with toasted nuts peeking through like tiny treasures, you understand why this candy has stayed loved for generations.
It is sweet, soft, nutty, and just a little fancy without trying too hard. Trust me, you’re going to love this, especially when the vanilla aroma meets that pretty rosy color and the whole kitchen starts smelling like a candy shop.
A Soft Pink Candy That Feels Like a Little Celebration
There is something charming about making nouga at home. It starts simple, just sugar, honey, egg whites, nuts, and flavoring, then suddenly turns into a glossy candy that looks like it belongs in a gift box.
This version is chewy but not rock hard, sweet but balanced by toasted almonds and pistachios, and soft pink for that playful bakery-style look. This one’s a total game-changer when you want a homemade treat that feels special.
The Sweet Story Behind This Pretty Nouga
Nouga, often known as nougat in many places, has roots across the Mediterranean and Middle Eastern sweet-making traditions. Different regions make it with honey, nuts, egg whites, wafers, or dried fruit, and each version has its own little personality.
The pink color gives this version a cheerful homemade candy-shop feel. It is not meant to be overly complicated, just a beautiful chewy sweet that brings together honey, sugar, vanilla, and crunchy nuts in a way that feels timeless.
Why This Sweet Treat Works So Well
Before we step into the pot and sugar thermometer moment, let’s talk about why this recipe is so worth making. It looks impressive, but the method is very doable once everything is measured and ready.
Versatile: You can serve it as a holiday candy, party treat, edible gift, or small after-dinner sweet with tea.
Budget-Friendly: It uses simple pantry ingredients, and the nuts make it feel luxurious without needing anything complicated.
Quick and Easy: The active cooking time is short, and most of the magic happens while the nouga sets.
Customizable: You can change the nuts, flavoring, or shade of pink to fit your style.
Crowd-Pleasing: Soft chewy candy with toasted nuts is always easy to love.
Make-Ahead Friendly: It sets beautifully and keeps well, which makes it perfect for preparing before gatherings.
Great for Leftovers: Small pieces can be chopped into desserts, folded into ice cream, or packed into treat boxes.
Candy-Maker Tips for a Better Batch
Nouga is simple, but candy likes attention. A few small habits make a big difference here.
Use a thermometer: Sugar temperature matters, and guessing can make the candy too soft or too hard.
Toast the nuts first: Warm toasted nuts blend better and add deeper flavor.
Work quickly: Once the mixture is ready, it thickens fast, so have your pan prepared before cooking.
Use rice paper if possible: It keeps the candy neat and easy to slice.
Oil your knife lightly: A very lightly greased knife helps you cut cleaner pieces.
Tools You’ll Want Nearby
Before the sugar starts bubbling, gather everything first. Candy making feels calm when your tools are already waiting.
Medium saucepan: For cooking the sugar, honey, water, and corn syrup into a glossy syrup.
Candy thermometer: This helps you reach the right temperature for a chewy set.
Stand mixer or hand mixer: For whipping the egg whites while the hot syrup is added.
8-inch square pan: This gives the nouga a nice thickness for slicing.
Parchment paper or edible rice paper: Helps prevent sticking and gives the candy clean edges.
Spatula: A sturdy silicone spatula is best for folding in nuts and spreading the mixture.
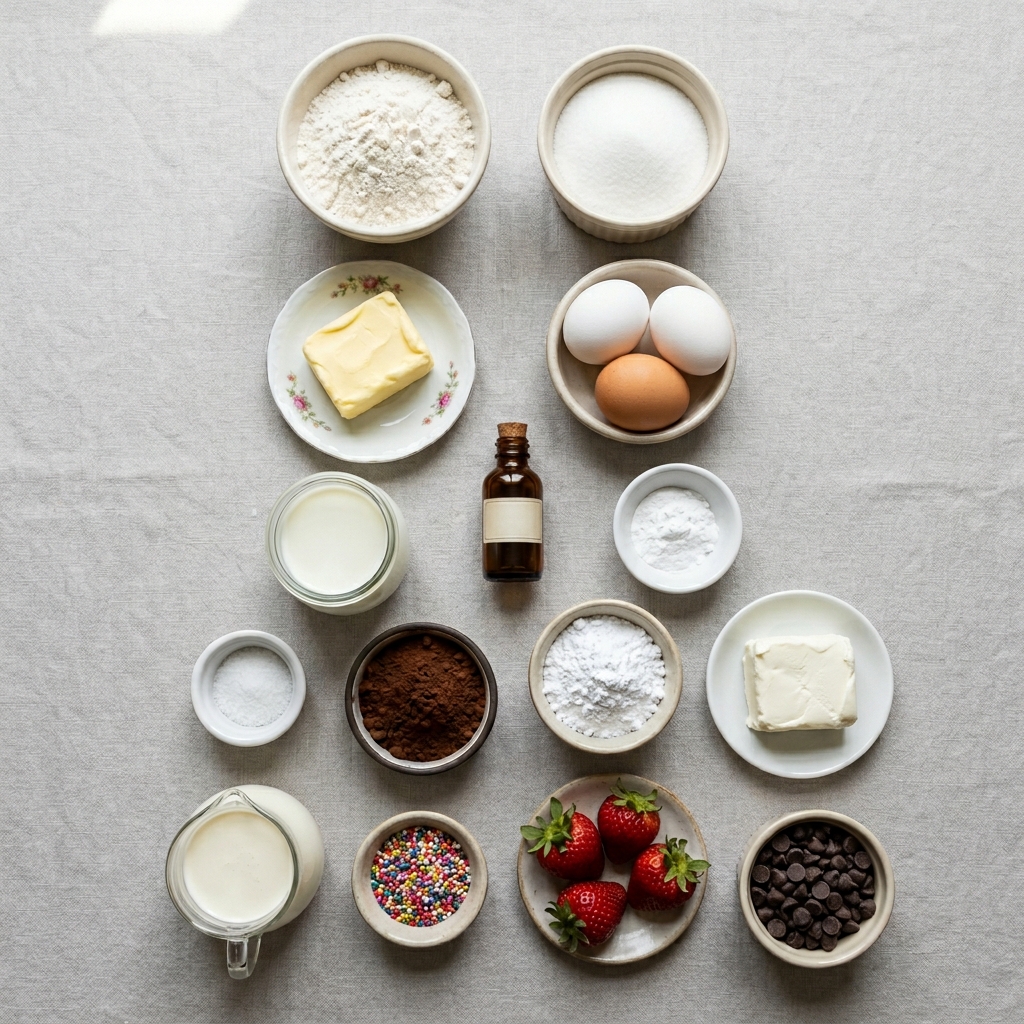
Ingredients You Will Need for This Pink Nouga
Now that the tools are ready, let’s bring the ingredients together. Each one has a job, and when they meet, you get that soft pull, sweet aroma, and nutty bite.
- Granulated Sugar: 2 cups, this gives the candy its structure and classic sweetness.
- Honey: 1/2 cup, this adds floral flavor and helps create that traditional chewy texture.
- Light Corn Syrup: 1/3 cup, this helps keep the sugar smooth and reduces graininess.
- Water: 1/4 cup, this helps dissolve the sugar evenly before the syrup thickens.
- Egg Whites: 2 large, room temperature, these whip into the fluffy base that gives nouga its airy chew.
- Vanilla Extract: 1 teaspoon, this rounds out the sweetness with a warm candy-shop aroma.
- Almond Extract: 1/4 teaspoon, this adds a delicate bakery-style flavor.
- Pink Gel Food Coloring: 2 to 3 drops, this gives the candy its soft pink color without adding extra liquid.
- Roasted Almonds: 1 cup, roughly chopped, these add crunch and a warm nutty flavor.
- Roasted Pistachios: 1/2 cup, roughly chopped, these bring color, crunch, and a lightly buttery taste.
- Salt: 1/8 teaspoon, this keeps the sweetness balanced.
- Edible Rice Paper: 2 sheets, optional but helpful, this keeps the top and bottom neat and easy to handle.
Easy Swaps for What You Have
And now, if your pantry is not perfectly stocked, don’t worry. This candy gives you a little room to play.
Light Corn Syrup: Glucose syrup can be used in the same amount.
Roasted Almonds: Hazelnuts or cashews work well if you want a different nutty flavor.
Roasted Pistachios: More almonds can replace them if needed.
Vanilla Extract: Orange blossom water can be used for a floral twist.
Pink Gel Food Coloring: A tiny amount of red gel coloring works if you use it very carefully.
Edible Rice Paper: Parchment paper works for setting, but remove it before serving.
The Ingredients That Make It Shine
A candy this simple depends on a few stars. These are the ones that really shape the final bite.
Honey: Honey gives the nouga its soft chew and gentle floral sweetness. It makes the flavor warmer and more rounded than plain sugar alone.
Roasted Nuts: Almonds and pistachios break up the sweetness with crunch, color, and toasted flavor. Let me tell you, it’s worth every bite.
How to Make This Sweet Pink Nouga
This is where the fun begins. Have your pan lined, your nuts ready, and your mixer nearby, because once the syrup reaches the right temperature, things move quickly.
- Preheat Your Equipment: Toast the almonds and pistachios if they are not already roasted, then keep them warm in a low oven at 200°F while you prepare the syrup.
- Combine Ingredients: In a medium saucepan, combine the granulated sugar, honey, light corn syrup, water, and salt. Stir gently over medium heat until the sugar dissolves, then stop stirring and let it boil.
- Prepare Your Cooking Vessel: Line an 8-inch square pan with parchment paper or edible rice paper. If using parchment, lightly grease it so the candy releases more easily.
- Assemble the Dish: While the syrup cooks, beat the egg whites in a stand mixer until soft peaks form. When the syrup reaches 250°F, slowly pour it into the egg whites with the mixer running on low.
- Cook to Perfection: Increase the mixer speed to medium-high and beat for 6 to 8 minutes, until the mixture becomes thick, glossy, and stretchy. Add vanilla extract, almond extract, and pink gel food coloring, then mix until evenly pink.
- Finishing Touches: Fold in the warm roasted almonds and pistachios with a sturdy spatula. Quickly spread the mixture into the prepared pan and press another sheet of rice paper or parchment on top.
- Serve and Enjoy: Let the nouga set at room temperature for at least 4 hours. Slice into small pieces with a lightly greased knife and enjoy the soft chew, nutty crunch, and sweet vanilla aroma.
How the Texture and Flavor Come Together
As the syrup whips into the egg whites, the candy changes from liquid sweetness into something glossy, thick, and cloudlike. That is where the chewy texture begins.
The honey gives warmth, the vanilla softens the sugar, and the toasted nuts add contrast. Each bite starts sweet and soft, then finishes with a cozy nutty crunch.
Helpful Candy Tips and Tricks
Once you make this once, you will feel much more confident. These little tips help keep the process smooth.
- Keep the nuts warm: Warm nuts fold in more easily and help prevent the candy from seizing too fast.
- Do not stir boiling syrup: Stirring after it boils can encourage crystals.
- Use gel coloring: Liquid coloring can loosen the texture.
- Cut small pieces: Nouga is rich, so bite-sized squares are perfect.
Common Mistakes to Avoid
Candy can be a bit dramatic, but it is also very forgiving when you know what to watch for.
- Skipping the thermometer: The texture may turn too soft if the syrup is undercooked.
- Overbeating the mixture: It can become too stiff to spread neatly.
- Using cold nuts: Cold nuts make folding harder and can affect the final texture.
- Cutting too soon: Let it set fully so the pieces hold their shape.
Nutrition Facts for Each Sweet Piece
Servings: 36 pieces
Calories per serving: 92
Note: These are approximate values.
Preparation Time for This Candy
Prep Time: 20 minutes
Cook Time: 20 minutes
Total Time: 40 minutes, plus 4 hours setting time
Make-Ahead and Storage Tips
This is a lovely make-ahead treat because it actually gets easier to slice once it has fully rested. Store the pieces in an airtight container with parchment between layers.
Keep it at cool room temperature for up to 2 weeks. Avoid humid areas because moisture can make the surface sticky. Freezing is not ideal since it can change the texture. Reheating is not needed, just let the pieces sit at room temperature before serving if your kitchen is cool.
How to Serve This Pretty Pink Candy
Serve small squares with coffee, mint tea, hot chocolate, or a simple dessert board. It also looks beautiful wrapped in wax paper for edible gifts.
For parties, place the pieces in mini candy cups. The pink color and green pistachios make them look extra sweet on a dessert table.
Creative Leftover Transformations
If you have extra pieces, chop them into tiny bits and fold them into vanilla ice cream. You can also sprinkle chopped nouga over cupcakes, brownies, or yogurt bowls for a chewy crunch.
Another fun idea is to tuck little pieces into homemade cookie dough. They melt slightly and leave sweet nutty pockets.
Additional Tips for Best Results
Keep your workspace lightly greased but not oily. Too much oil can make the surface feel slick.
If your knife sticks while cutting, wipe it clean and lightly grease it again. A little patience gives you those clean candy-shop edges.
Make It a Showstopper
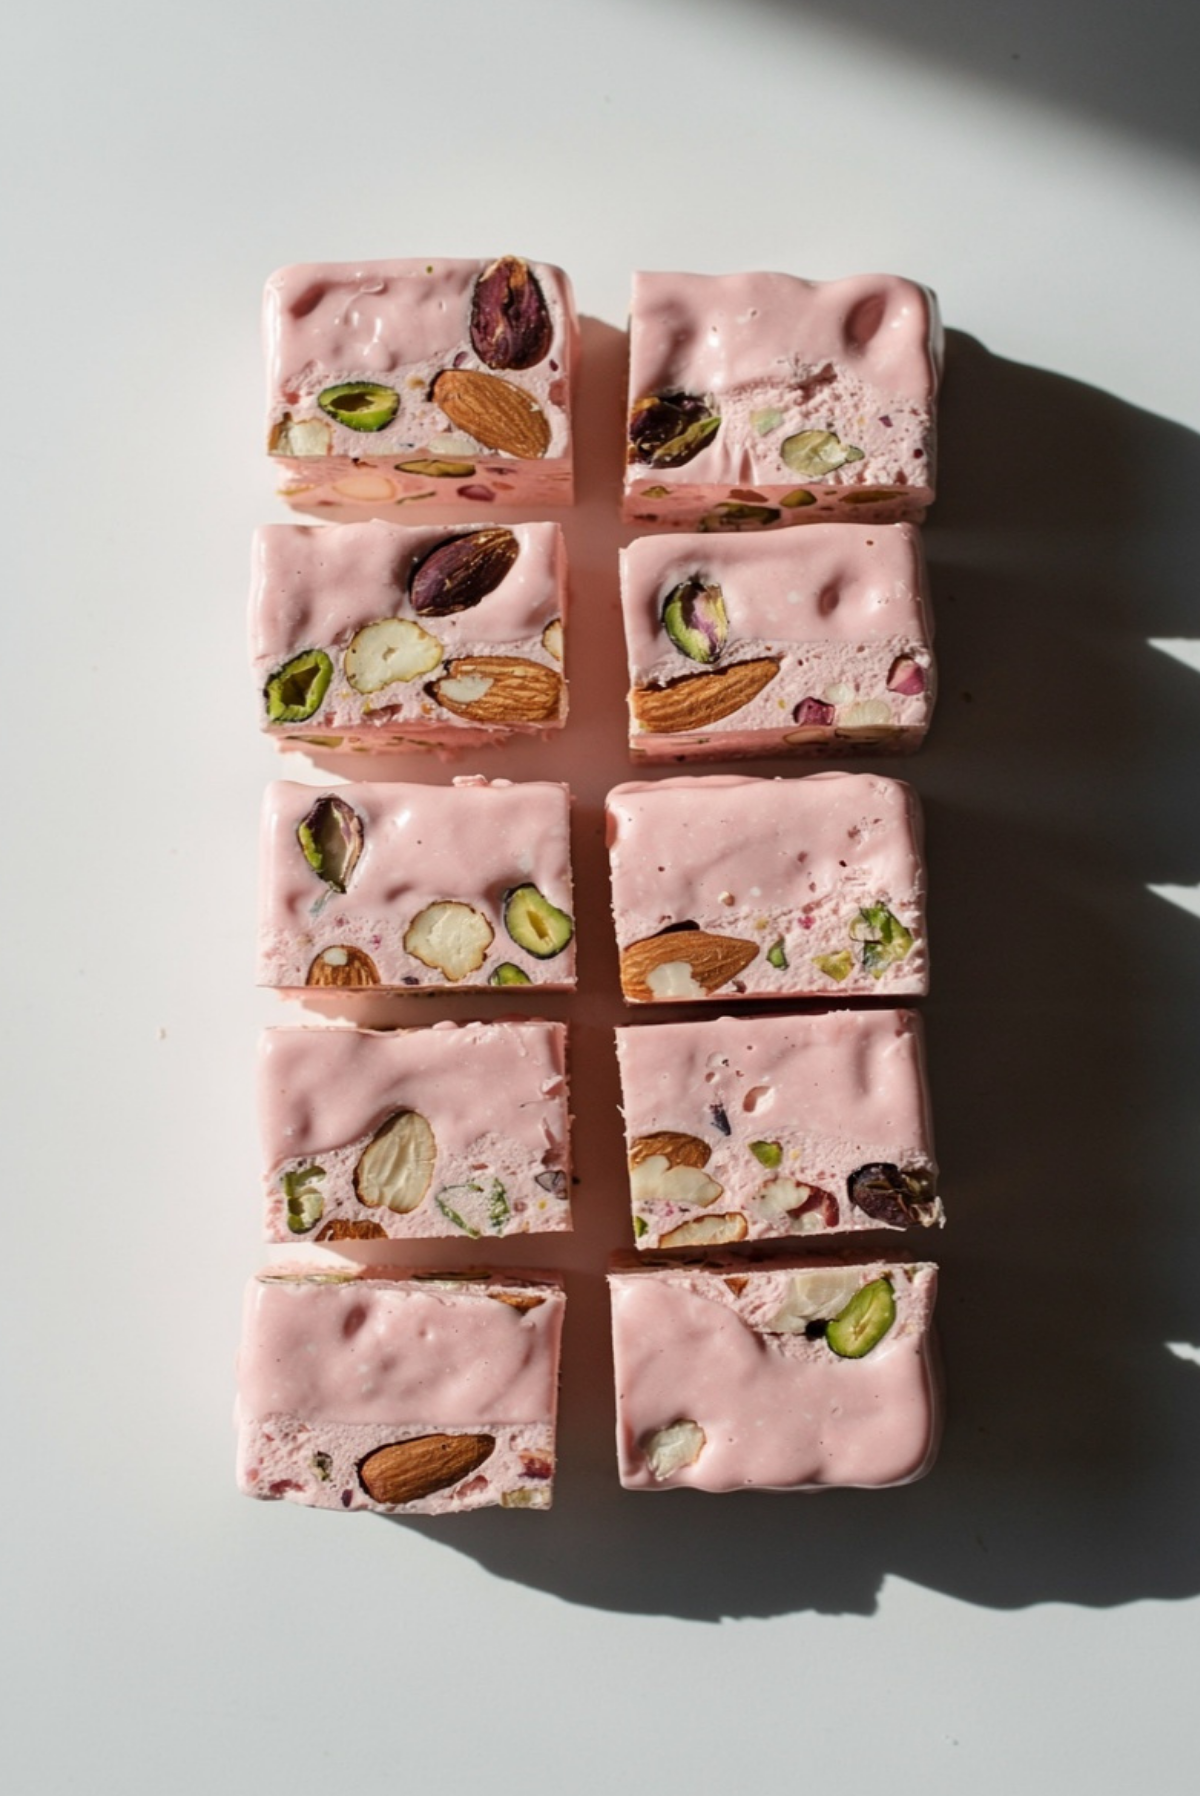
For a beautiful finish, cut the nouga into even rectangles and arrange them in neat rows on a white platter. The pink candy with green pistachios already has a pretty look, so simple styling works best.
You can wrap each piece in clear candy paper or place them in a small gift tin. It instantly feels homemade and thoughtful.
Variations to Try
- Rose Pink Nouga: Add 1/2 teaspoon rose water with the vanilla for a floral version.
- Citrus Almond Nouga: Add 1 teaspoon orange zest for a fresh, bright flavor.
- Berry-Tinted Nouga: Use a little freeze-dried strawberry powder for a soft fruity note.
- Extra Nutty Nouga: Use 1 cup almonds and 1 cup pistachios for a denser crunch.
- Vanilla Bean Nouga: Add vanilla bean paste instead of extract for tiny fragrant specks.
FAQ’s
Q1: Can I make this without a candy thermometer?
A1: It is possible, but not recommended. A thermometer gives the most reliable chewy texture.
Q2: Why is my nouga too sticky?
A2: It may need more setting time, or the syrup may not have reached the right temperature.
Q3: Can I use only almonds?
A3: Yes, use 1 1/2 cups roasted almonds and skip the pistachios.
Q4: Can I make it less sweet?
A4: Candy needs sugar for structure, but the salt and toasted nuts help balance the sweetness.
Q5: Can I add dried fruit?
A5: Yes, add up to 1/2 cup chopped dried cranberries or cherries with the nuts.
Q6: Why did my mixture harden before spreading?
A6: It likely cooled too quickly. Keep the nuts warm and spread the candy immediately.
Q7: Can I skip the food coloring?
A7: Yes, it will taste the same, just with a natural creamy color.
Q8: Is rice paper necessary?
A8: No, but it makes the candy easier to handle and gives it a classic finish.
Q9: How long should it set?
A9: At least 4 hours, although overnight gives cleaner slices.
Q10: Can I double the recipe?
A10: Yes, but use a larger mixer and work quickly because the mixture thickens fast.
Conclusion
Homemade Pink Nouga is sweet, chewy, nutty, and honestly such a joy to make. It feels like a tiny celebration in candy form, with its soft pink color, glossy texture, and crunchy almonds and pistachios tucked inside.
Make it for gifting, sharing, or keeping in a little tin for yourself. Once you slice that first piece and taste the honeyed vanilla chew, you will understand why this treat is so special.
Print
Homemade Pink Nouga
- Prep Time: 20 minutes
- Cook Time: 20 minutes
- Total Time: 40 minutes, plus 4 hours setting time
- Yield: 36 pieces 1x
- Category: Candy
- Method: Stovetop
- Cuisine: Mediterranean-inspired
- Diet: Vegetarian
Description
A soft, chewy pink nouga made with honey, whipped egg whites, vanilla, almonds, and pistachios for a beautiful homemade candy-shop style treat.
Ingredients
- 2 cups granulated sugar
- 1/2 cup honey
- 1/3 cup light corn syrup
- 1/4 cup water
- 2 large egg whites, room temperature
- 1 teaspoon vanilla extract
- 1/4 teaspoon almond extract
- 2 to 3 drops pink gel food coloring
- 1 cup roasted almonds, roughly chopped
- 1/2 cup roasted pistachios, roughly chopped
- 1/8 teaspoon salt
- 2 sheets edible rice paper, optional
Instructions
- Toast the almonds and pistachios if needed, then keep them warm in a low oven at 200°F.
- Line an 8-inch square pan with parchment paper or edible rice paper.
- In a medium saucepan, combine sugar, honey, corn syrup, water, and salt. Stir over medium heat until dissolved.
- Stop stirring and boil the syrup until it reaches 250°F.
- While the syrup cooks, beat the egg whites until soft peaks form.
- Slowly pour the hot syrup into the egg whites while mixing on low speed.
- Increase speed to medium-high and beat for 6 to 8 minutes, until thick, glossy, and stretchy.
- Add vanilla extract, almond extract, and pink gel food coloring, then mix until evenly colored.
- Fold in the warm roasted almonds and pistachios.
- Spread the mixture quickly into the prepared pan and cover with rice paper or parchment.
- Let set at room temperature for at least 4 hours.
- Slice into small pieces with a lightly greased knife and serve.
Notes
- Use a candy thermometer for the best chewy texture.
- Keep the nuts warm so they fold into the candy more easily.
- Use gel food coloring instead of liquid coloring to protect the texture.
- Store in an airtight container with parchment between layers.
Nutrition
- Serving Size: 1 piece
- Calories: 92
- Sugar: 15g
- Sodium: 12mg
- Fat: 3g
- Saturated Fat: 0.3g
- Unsaturated Fat: 2.5g
- Trans Fat: 0g
- Carbohydrates: 16g
- Fiber: 1g
- Protein: 2g
- Cholesterol: 0mg
Keywords: homemade pink nouga, pink nougat, chewy nougat candy, homemade candy, almond pistachio nougat