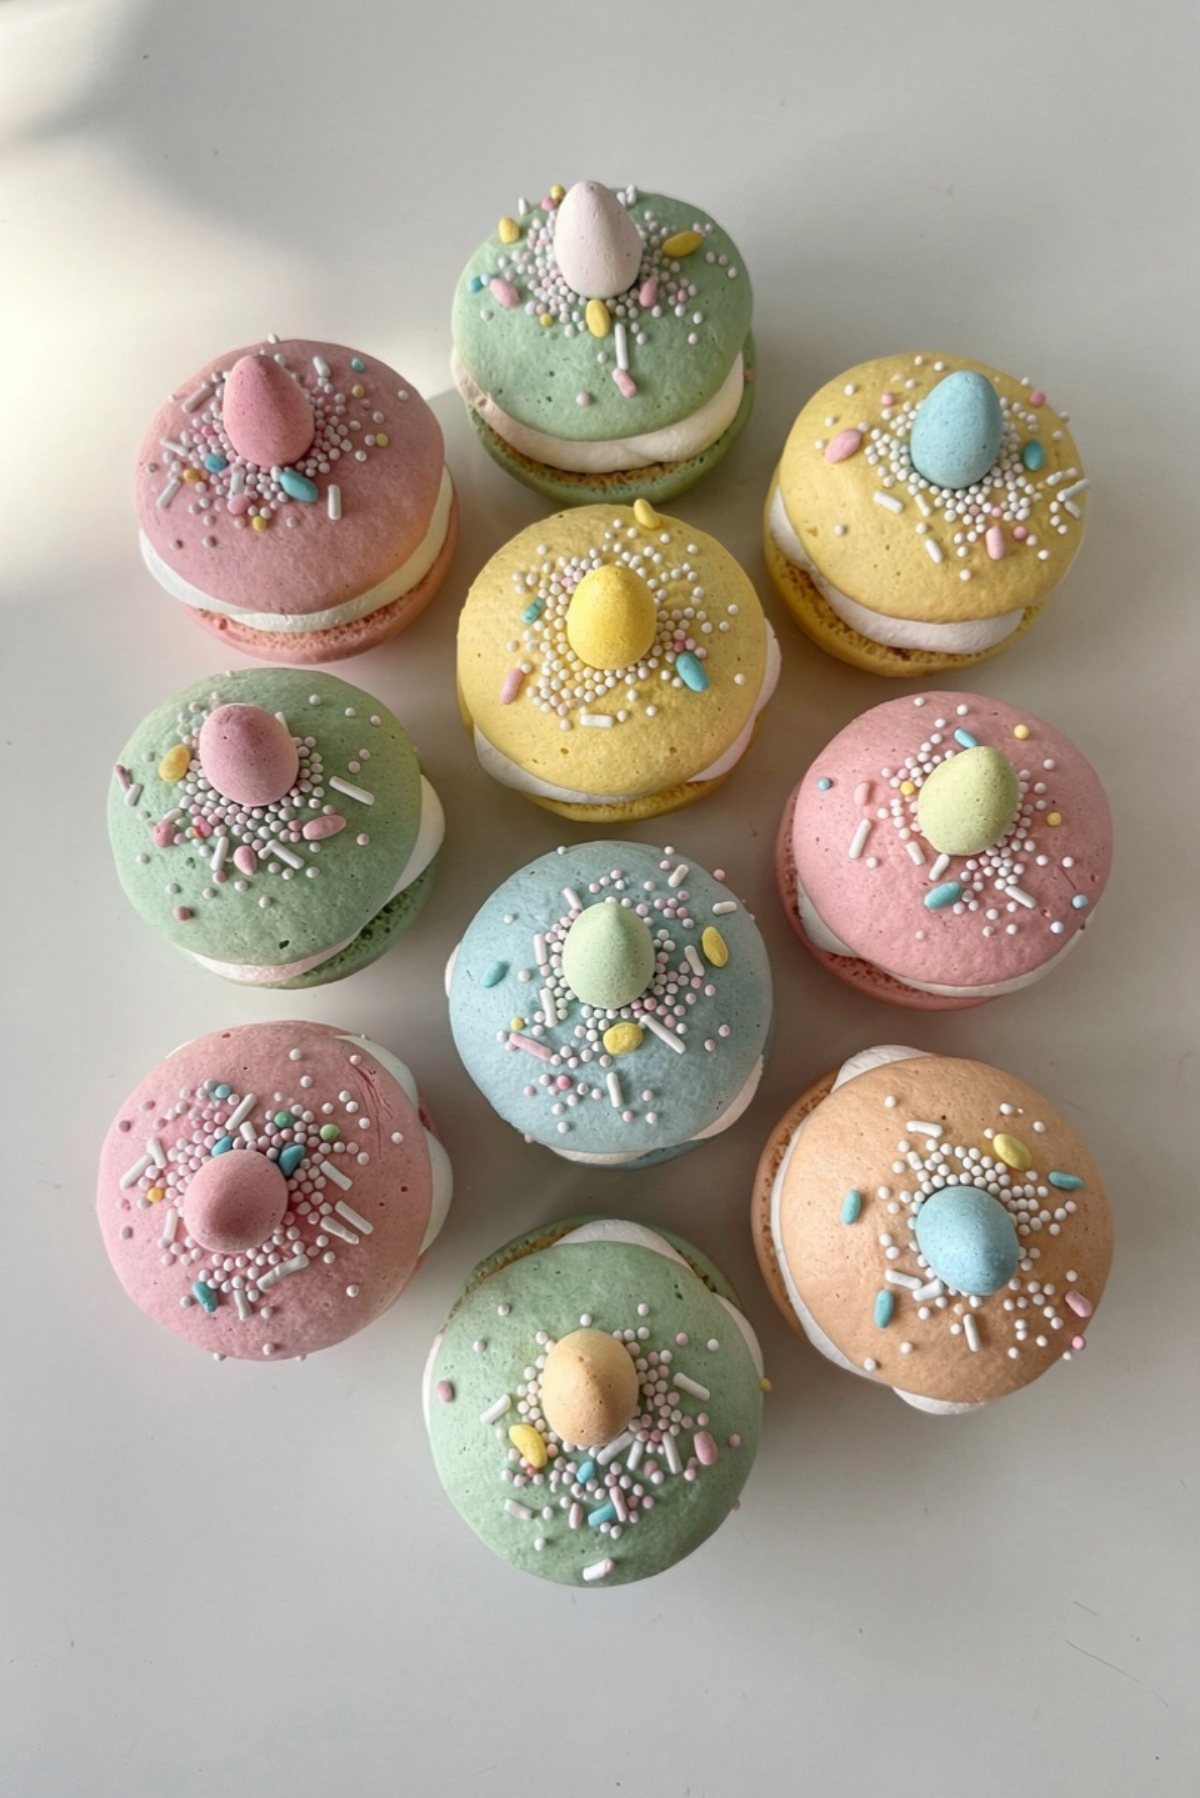
Easter Whoopie Pies Recipe
There is something about pastel desserts sitting on the table during spring that instantly makes the whole kitchen feel happier. These soft Easter whoopie pies are the kind of sweet treat people grab before dinner is even finished. The fluffy cake-like cookies sandwich a creamy marshmallow filling that feels light, rich, and nostalgic all at once. Trust me, you’re going to love this. Every bite melts softly with hints of vanilla and buttery sweetness, while the cheerful Easter colors make them impossible to resist.
Why These Spring Treats Always Steal the Spotlight
As soon as these little sandwich cookies hit the dessert table, everyone notices them first. The soft texture feels somewhere between cake and cookie, which honestly makes them dangerously addictive. The pastel colors bring a playful spring vibe, and the creamy filling adds just enough sweetness without becoming heavy.
What makes them extra special is how comforting they feel. They remind people of bakery treats from childhood, but homemade somehow tastes even better. Let me tell you, it’s worth every bite.
A Sweet Tradition Behind These Colorful Sandwich Cookies
Whoopie pies are believed to have roots in Amish baking traditions, especially in Pennsylvania. They became popular because they were simple, satisfying, and perfect for sharing. Traditionally, they were made with chocolate cake rounds and creamy filling, but over time bakers started creating colorful seasonal versions.
And now, Easter-inspired versions have become a spring favorite. Pastel shades, festive sprinkles, and soft vanilla flavors transform this classic into something bright and cheerful that fits perfectly into holiday gatherings.
Reasons These Easter Treats Work Every Single Time
These soft cookies are not only adorable, they are incredibly reliable too. And now that you know a little of their story, let’s talk about why people keep baking them year after year.
Versatile: These can be customized with different pastel colors, fillings, and decorations depending on your Easter theme.
Budget-Friendly: Most ingredients are pantry basics, which means you can make a beautiful dessert without spending too much.
Quick and Easy: The batter comes together quickly, and the cookies bake fast enough for busy holiday prep days.
Customizable: Add lemon zest, almond extract, or colorful sprinkles to create your own version.
Crowd-Pleasing: Kids absolutely love the bright colors, while adults appreciate the nostalgic bakery-style flavor.
Make-Ahead Friendly: The cookies can be baked ahead and assembled later, which makes entertaining easier.
Great for Leftovers: They stay soft for days, and honestly taste even better after the filling settles overnight.
Baker’s Secrets for Perfectly Soft Whoopie Pies
Before jumping into the ingredients, a few simple baking tricks can make a huge difference in texture and appearance.
- Use room temperature ingredients so the batter mixes evenly and smoothly.
- Avoid overmixing once the flour is added because it can make the cookies dense.
- Use a cookie scoop for evenly sized rounds.
- Let the cookies cool fully before adding filling or the cream will melt.
- Chill the assembled pies for 15 minutes if you want cleaner sandwich layers.
Helpful Kitchen Tools That Make Baking Easier
Having the right tools nearby keeps the process smooth and stress-free.
Mixing Bowls: Large bowls make combining wet and dry ingredients much easier.
Electric Mixer: Helps create a fluffy batter and creamy filling with less effort.
Cookie Scoop: Keeps all the cookies evenly sized for neat sandwich pairs.
Baking Sheets: Flat baking trays help the cookies bake evenly.
Parchment Paper: Prevents sticking and keeps cleanup simple.
Cooling Rack: Allows air circulation so the cookies cool properly.
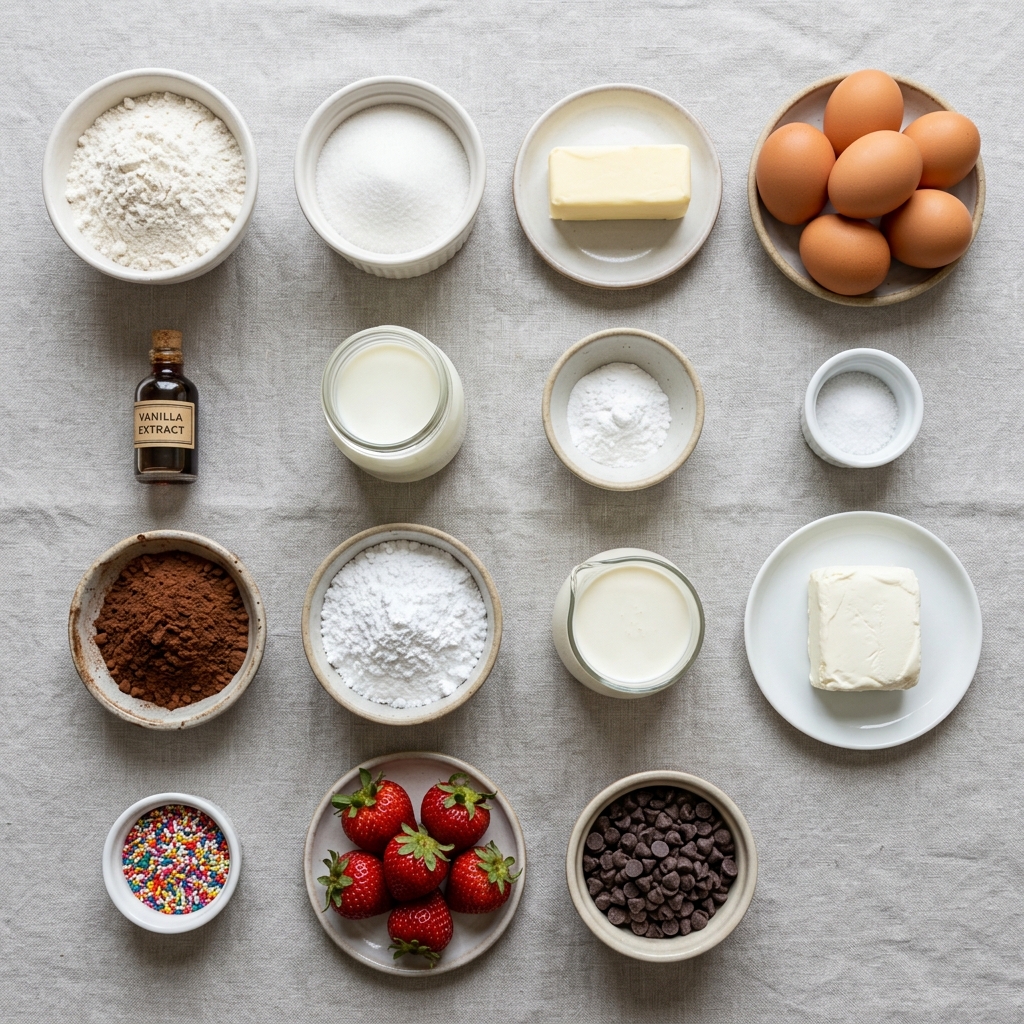
Ingredients That Bring These Easter Treats to Life
The beauty of this dessert comes from simple ingredients working together perfectly. The buttery vanilla flavor, soft texture, and fluffy filling all start right here.
- All-Purpose Flour: 2 ½ cups, gives structure while keeping the cookies tender.
- Baking Powder: 1 ½ teaspoons, helps create a soft fluffy texture.
- Baking Soda: ½ teaspoon, adds lift and softness.
- Salt: ½ teaspoon, balances the sweetness beautifully.
- Unsalted Butter: ½ cup softened, creates richness and moisture.
- Granulated Sugar: 1 cup, sweetens the cookies while helping with texture.
- Large Eggs: 2, help bind everything together smoothly.
- Vanilla Extract: 2 teaspoons, adds warm bakery-style flavor.
- Whole Milk: 1 cup, keeps the batter soft and smooth.
- Pastel Gel Food Coloring: assorted colors, gives the cookies their festive Easter look.
- Marshmallow Fluff: 1 ½ cups, creates the fluffy filling.
- Powdered Sugar: 1 cup, sweetens and stabilizes the filling.
- Unsalted Butter for Filling: ½ cup softened, creates creamy texture.
- Easter Sprinkles: ¼ cup, adds festive crunch and color.
Easy Ingredient Swaps for Flexible Baking
Sometimes you need quick substitutions, and luckily this recipe adapts beautifully.
Whole Milk: Almond milk or oat milk.
Vanilla Extract: Almond extract for a sweeter bakery flavor.
Marshmallow Fluff: Cream cheese frosting for a tangier filling.
Unsalted Butter: Plant-based butter alternative.
Easter Sprinkles: Colored sanding sugar or pastel candy pieces.
The Star Ingredients That Make These So Special
A couple of ingredients really define the personality of this dessert.
Marshmallow Fluff: This creates the signature airy filling that feels creamy without being overly heavy.
Pastel Gel Food Coloring: The soft Easter tones instantly make these cookies feel festive and playful.
Let’s Bake These Soft Easter Favorites Together
Now comes the fun part, and honestly your kitchen is about to smell incredible.
- Preheat Your Equipment: Preheat the oven to 350°F and line baking sheets with parchment paper.
- Combine Ingredients: In one bowl whisk together flour, baking powder, baking soda, and salt. In another bowl beat butter and sugar until fluffy, then mix in eggs, vanilla, and milk. Gradually combine wet and dry ingredients. Divide batter and tint with pastel food coloring.
- Prepare Your Cooking Vessel: Scoop small rounds of batter onto prepared baking sheets, leaving space between each cookie.
- Assemble the Dish: Add Easter sprinkles lightly over the tops before baking for extra color and texture.
- Cook to Perfection: Bake for 10 to 12 minutes until the cookies are puffed and lightly set. Cool completely on a wire rack.
- Finishing Touches: Beat marshmallow fluff, powdered sugar, and butter until creamy. Spread or pipe filling onto half the cookies, then sandwich with the remaining cookies.
- Serve and Enjoy: Arrange on a platter with pastel decorations and enjoy every soft sweet bite.
The Texture and Flavor That Make These Irresistible
The first thing you notice is the incredibly soft cookie texture. They almost melt as soon as you bite into them. Then the creamy marshmallow filling adds this fluffy sweetness that feels smooth and light at the same time.
The vanilla flavor stays warm and comforting, while the sprinkles bring tiny crunchy pops that make every bite more exciting. This one’s a total game-changer for spring desserts.
Smart Baking Tips for Better Results Every Time
A few extra tricks can really take these to bakery-level quality.
- Chill the filling slightly before assembling for cleaner sandwiches.
- Use gel coloring instead of liquid food coloring for vibrant pastel shades.
- Rotate baking sheets halfway through baking for even cooking.
- Pair cookies by size before filling for a polished presentation.
Mistakes You’ll Want to Skip While Baking
Even simple desserts can have a few tricky moments, but these are easy to avoid.
- Overbaking can make the cookies dry instead of soft and cake-like.
- Filling warm cookies may cause the cream to slide out.
- Adding too much food coloring can affect batter consistency.
- Uneven cookie sizes can make assembling difficult.
Nutrition Information Worth Knowing
Servings: 12 whoopie pies
Calories per serving: 340
Note: These are approximate values.
Timing Breakdown for Easy Planning
Prep Time: 25 minutes
Cook Time: 12 minutes
Total Time: 37 minutes
Make-Ahead Tricks and Storage Ideas
These Easter treats actually hold up beautifully, which makes holiday prep easier. You can bake the cookies one day ahead and store them in an airtight container before filling.
Once assembled, keep them refrigerated for up to 4 days. Let them sit at room temperature for a few minutes before serving so the filling softens perfectly again.
They also freeze surprisingly well. Wrap each one individually and freeze for up to 2 months.
Fun Ways to Serve These Easter Desserts
These look gorgeous stacked on pastel cake stands or dessert platters. Pair them with hot coffee, milk, or spring-inspired tea blends.
They also make adorable Easter basket treats or dessert table centerpieces during brunch gatherings.
Clever Leftover Ideas You’ll Actually Want to Try
If you somehow end up with leftovers, there are fun ways to reuse them.
- Crumble them over vanilla ice cream.
- Turn them into mini ice cream sandwiches.
- Chop them into parfait layers with whipped cream.
- Serve alongside hot chocolate for an extra indulgent dessert plate.
Extra Little Tricks for Bakery-Style Results
Sometimes the smallest details create the biggest difference.
Use piping bags for cleaner filling layers. Let the cookies cool completely before stacking. And if you want extra softness, store them overnight before serving because the filling slightly softens the cookies even more.
Make These Easter Treats Look Absolutely Stunning
Presentation makes these even more festive. Arrange them with pastel candies, soft spring flowers nearby, or decorative Easter eggs around the serving tray.
A light dusting of powdered sugar also creates a beautiful bakery-style finish.
Creative Flavor Twists Worth Trying
Once you master the classic version, there are so many fun ways to switch things up.
- Lemon Vanilla Version with fresh lemon zest in the batter.
- Strawberry Cream Filling using freeze-dried strawberry powder.
- Chocolate Pastel Cookies with cocoa powder added to the batter.
- Funfetti Style with extra colorful sprinkles inside the cookies.
- Coconut Cream Variation with shredded coconut folded into the filling.
FAQ’s
Q1: Can I make these ahead of Easter brunch?
Yes, they stay soft and delicious for several days when stored properly.
Q2: Can I freeze them?
Absolutely. Wrap individually and freeze for up to 2 months.
Q3: Why are my cookies dry?
They were likely overbaked. Remove them once lightly set.
Q4: Can I use liquid food coloring?
You can, but gel coloring gives brighter colors without thinning the batter.
Q5: What filling alternatives work well?
Cream cheese frosting and buttercream are both delicious.
Q6: How do I keep them soft?
Store them in an airtight container once cooled.
Q7: Can kids help decorate them?
Definitely. Decorating with sprinkles is the fun part.
Q8: Do they need refrigeration?
Yes, especially after adding the filling.
Q9: Can I make smaller mini versions?
Yes, simply reduce the baking time slightly.
Q10: What flavors pair well with vanilla?
Lemon, strawberry, coconut, and almond all work beautifully.
Conclusion
These Easter whoopie pies bring together everything people love about spring desserts, soft textures, creamy filling, cheerful pastel colors, and that comforting homemade sweetness that instantly makes gatherings feel special. They look impressive, taste incredible, and honestly disappear faster than you’d expect. Trust me, once you make them, they’ll become part of your Easter tradition every single year.
Print
Easter Whoopie Pies Recipe
- Prep Time: 25 minutes
- Cook Time: 12 minutes
- Total Time: 37 minutes
- Yield: 12 whoopie pies 1x
- Category: Dessert
- Method: Baking
- Cuisine: American
- Diet: Vegetarian
Description
Soft pastel Easter whoopie pies made with fluffy cake-like cookies and creamy marshmallow filling. These festive spring treats are colorful, sweet, and perfect for Easter dessert tables.
Ingredients
- 2 ½ cups all-purpose flour
- 1 ½ teaspoons baking powder
- ½ teaspoon baking soda
- ½ teaspoon salt
- ½ cup unsalted butter, softened
- 1 cup granulated sugar
- 2 large eggs
- 2 teaspoons vanilla extract
- 1 cup whole milk
- Pastel gel food coloring, assorted colors
- 1 ½ cups marshmallow fluff
- 1 cup powdered sugar
- ½ cup unsalted butter, softened for filling
- ¼ cup Easter sprinkles
Instructions
- Preheat the oven to 350°F and line baking sheets with parchment paper.
- In a medium bowl whisk together the flour, baking powder, baking soda, and salt.
- In a separate large bowl beat the butter and sugar until fluffy. Add the eggs, vanilla extract, and milk, then mix until smooth.
- Gradually combine the dry ingredients with the wet ingredients until a soft batter forms.
- Divide the batter into portions and tint each portion with pastel gel food coloring.
- Scoop small rounds of batter onto the prepared baking sheets, leaving space between each cookie.
- Top lightly with Easter sprinkles.
- Bake for 10 to 12 minutes until puffed and lightly set.
- Allow the cookies to cool completely on a wire rack.
- For the filling, beat together marshmallow fluff, powdered sugar, and softened butter until creamy.
- Spread or pipe the filling onto half the cookies, then top with the remaining cookies to create sandwiches.
- Serve immediately or chill briefly before serving.
Notes
- Use gel food coloring for vibrant pastel shades without thinning the batter.
- Allow cookies to cool completely before filling to prevent melting.
- Store leftovers in an airtight container in the refrigerator for up to 4 days.
- Freeze individually wrapped whoopie pies for up to 2 months.
Nutrition
- Serving Size: 1 whoopie pie
- Calories: 340
- Sugar: 28g
- Sodium: 180mg
- Fat: 14g
- Saturated Fat: 8g
- Unsaturated Fat: 5g
- Trans Fat: 0g
- Carbohydrates: 49g
- Fiber: 1g
- Protein: 4g
- Cholesterol: 55mg
Keywords: Easter whoopie pies, spring dessert, pastel cookies, marshmallow filling, Easter treats, homemade whoopie pies, festive dessert