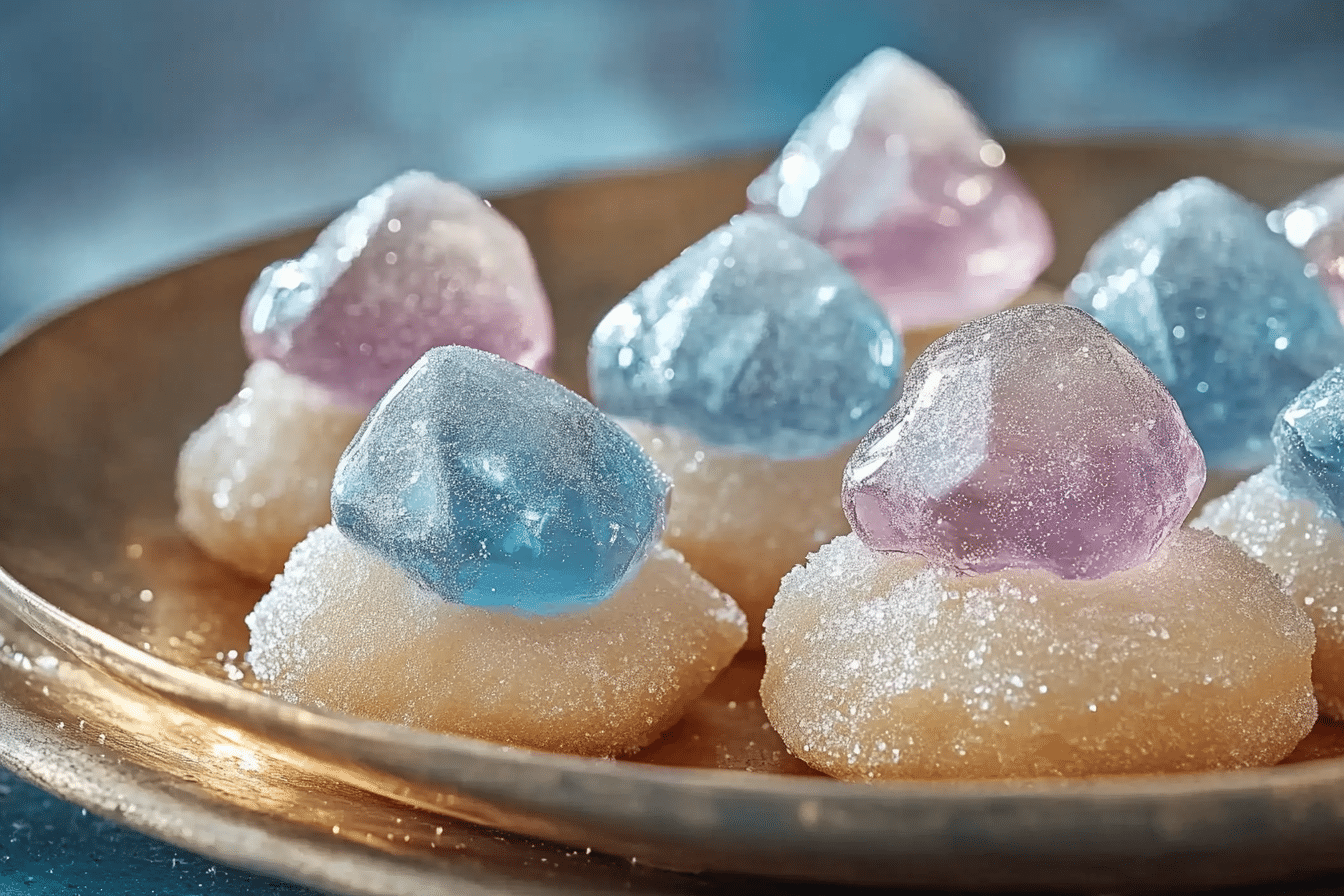
Iced Gems
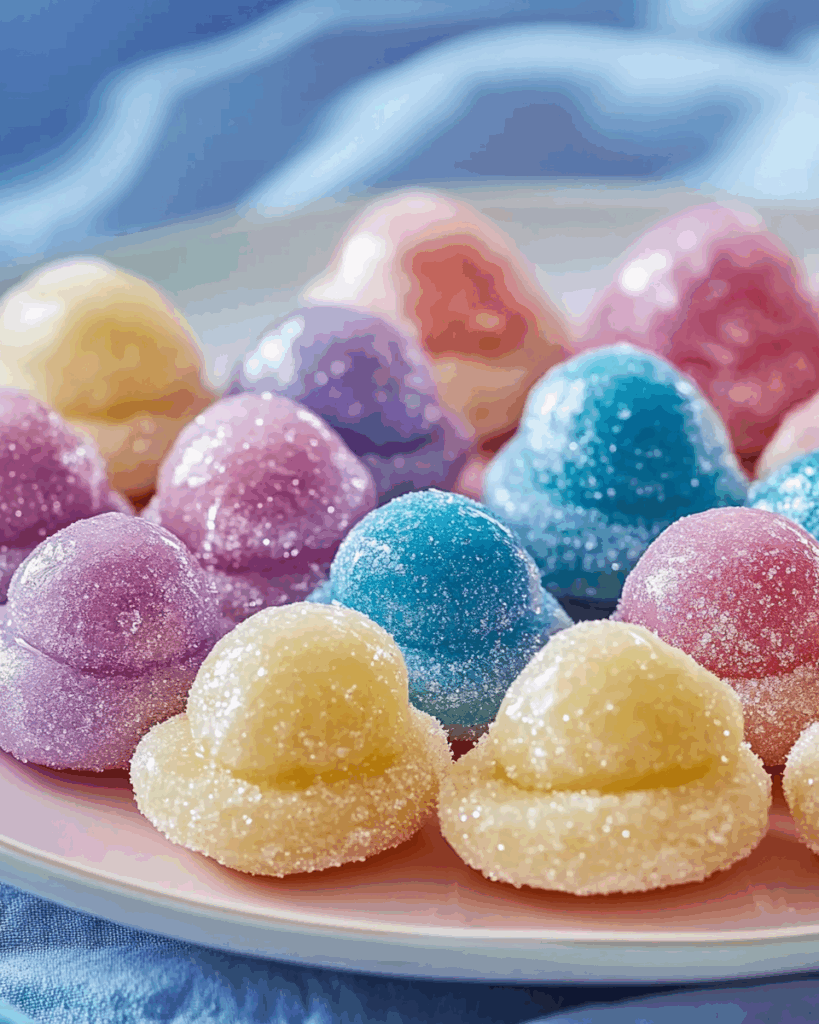
Get ready to take a trip down memory lane we’re talking about Iced Gems! These teeny-tiny biscuits topped with colorful swirls of royal icing are a nostalgic treat that brings out everyone’s inner child. Crisp, bite-sized, and topped with a satisfying sugary crunch, they’re just the right mix of cute and crave-worthy. Whether you remember picking off the icing first or popping them whole into your mouth, one thing’s for sure Iced Gems are pure joy in snack form.
They’re as fun to make as they are to eat, and they’re perfect for parties, tea time, or just adding a dash of whimsy to your day. Trust me, friend once you make these homemade, you’ll never go back to store-bought.
Why You’ll Love Iced Gems
This recipe isn’t just about the ingredients — it’s about creating moments. Whether you’re cooking for a casual family dinner, hosting a get-together with friends, or simply indulging in some comforting flavors for yourself, this dish is versatile enough to fit the occasion. Here’s why it’s a favorite:
Versatile: Great for parties, lunchbox treats, or an afternoon pick-me-up they’re bite-sized fun for any time of day.
Budget-Friendly: Made with basic baking staples you probably already have on hand.
Quick and Easy: A simple dough and quick icing make this recipe perfect for beginner bakers or fun baking with kids.
Customizable: Play around with colors and flavors in the icing make them as pastel or bold as you like!
Crowd-Pleasing: A guaranteed hit with both kids and adults. It’s always a win when a single dish can satisfy everyone at the table. This recipe strikes the perfect balance of flavor and comfort, making it a universal favorite.
Ingredients in Iced Gems
Here’s the charm of these little beauties simple ingredients come together to create something truly delightful. Let’s break it down:
All-Purpose Flour: The base of our biscuit dough keeps the texture crisp but light.
Powdered Sugar: Adds just the right touch of sweetness to the dough without overpowering it.
Butter: Cold and cubed, it creates that crumbly, shortbread-like bite we all love.
Egg: Helps bind the dough together and adds richness.
Vanilla Extract: A splash of warm, comforting flavor in every biscuit.
Salt: A tiny pinch that brings balance to all that sweetness.
Royal Icing Ingredients (Powdered Sugar, Egg White or Meringue Powder, Water): This is where the magic happens stiff peaks and vivid colors make those iconic swirls stand tall.
Food Coloring: Pastels, brights, or even ombré make it your own!
Instructions
Let’s dive into the steps to create this flavorful masterpiece:
Preheat Your Equipment: Start by preheating your oven to 350°F (175°C). A hot oven helps your little biscuits bake evenly and stay crisp.
Combine Ingredients: In a bowl, mix together flour, powdered sugar, and salt. Rub in the cold butter with your fingertips until the mixture resembles breadcrumbs. Add in the egg and vanilla, then mix until the dough just comes together. Be gentle — overworking the dough will make the biscuits tough.
Prepare Your Cooking Vessel: Line a baking sheet with parchment paper to prevent sticking and ensure easy cleanup.
Assemble the Dish: Roll the dough out on a lightly floured surface and cut into small circles (about the size of a coin). Place the rounds on the prepared sheet, leaving a bit of space between them.
Cook to Perfection: Bake for about 10–12 minutes, or until just turning golden on the edges. Don’t overbake you want a light snap, not a rock!
Finishing Touches: Let the biscuits cool completely before icing. Meanwhile, make your royal icing by beating powdered sugar with egg white and a few drops of water until thick and glossy. Divide and tint with your chosen colors. Pipe small swirls on top of each cooled biscuit using a star nozzle for that classic Iced Gem look.
Serve and Enjoy: Serve warm and enjoy! Okay maybe not warm this time, but once that icing sets, they’re good to go. Crisp, sweet, and irresistible.
Nutrition Facts:
Servings: 6
Calories per serving: Approximately 160
Preparation Time
Prep Time: 25 minutes
Cook Time: 12 minutes
Total Time: 37 minutes
How to Serve Iced Gems
This dish pairs wonderfully with various sides and accompaniments. Here are a few serving suggestions to enhance your dining experience:
Serve with a pot of tea, a tall glass of cold milk, or set them out as part of a dessert platter with cookies, macarons, and fruit. They also make lovely party favors or edible gifts when packed in a clear bag with a cute ribbon.
Additional Tips
Here are some extra tips to help you get the most out of this recipe:
– Use a piping bag with a small star tip for the most authentic swirl.
– Let the icing dry completely before storing overnight is best!
– Store in an airtight container to keep them crisp.
– Play around with the size mini gems are traditional, but slightly larger ones make for a fun twist.
FAQs
1 Can I use store-bought icing instead of making royal icing?
You can, but royal icing gives the best texture and classic look. Store-bought will work in a pinch though!
2 How long do Iced Gems stay fresh?
Up to a week in an airtight container. Just make sure the icing is fully set before storing.
3 Can I make the dough ahead of time?
Yes! You can refrigerate the dough for up to 2 days, or freeze it for later use.
4 Do I need to chill the dough before baking?
Not necessary, but if your dough feels too soft, a quick chill helps keep the shapes neat during baking.
5 What if I don’t have a piping bag?
You can use a zip-top bag with the corner snipped off not as precise, but still super cute!
6 Can I flavor the icing?
Definitely! Try a drop of lemon, almond, or peppermint extract to mix things up.
7 Can kids help with this recipe?
Absolutely cutting the shapes and piping the icing is a fun and creative way for kids to join in.
8 What’s the best way to color the icing?
Gel food coloring works best — a little goes a long way and gives vibrant color without thinning the icing.
9 Are Iced Gems gluten-free?
Not this version, but you can substitute a gluten-free flour blend to make them celiac-friendly.
10 Can I double the recipe?
Yes! This recipe doubles beautifully perfect for big batches during holidays or parties.
Conclusion
Iced Gems are more than just a snack they’re a cheerful, nostalgic bite of sweetness that brings smiles with every crunch. Whether you’re reliving a childhood favorite or introducing them to someone new, this recipe brings all the charm and flavor of the originals, with a homemade touch that’s even better. Colorful, crisp, and downright delightful, these little treats are sure to steal the show wherever they go. Happy baking, gem-lover!
Print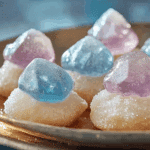
Iced Gems
- Prep Time: 25 minutes
- Cook Time: 12 minutes
- Total Time: 6 hours (including drying time)
- Yield: 60 mini iced gems 1x
- Category: Snack, Dessert
- Method: Baking
- Cuisine: British
- Diet: Vegetarian
Description
Iced Gems are mini bite-sized biscuits topped with colorful swirls of hard royal icing. These nostalgic treats are crunchy, sweet, and perfect for parties, gifting, or a fun homemade snack.
Ingredients
- 1 cup all-purpose flour
- 1/4 cup unsalted butter, softened
- 1/4 cup granulated sugar
- 1/2 teaspoon baking powder
- 1/4 teaspoon salt
- 1/2 teaspoon vanilla extract
- 2–3 tablespoons milk
- 1 egg yolk (optional, for richness)
- 1 1/2 cups powdered sugar (for icing)
- 1 egg white (for icing)
- Food coloring (various colors)
Instructions
- Preheat oven to 350°F (175°C) and line a baking sheet with parchment paper.
- In a bowl, cream together the butter and granulated sugar until light and fluffy.
- Add vanilla extract and egg yolk (if using), then mix well.
- In a separate bowl, whisk flour, baking powder, and salt. Gradually mix into the butter mixture.
- Add milk slowly until a soft dough forms. Roll out on a lightly floured surface to 1/4-inch thickness.
- Cut small rounds (around 1 inch) using a piping tip or small cutter and place on baking sheet.
- Bake for 10–12 minutes until lightly golden. Let cool completely.
- To make icing, whisk powdered sugar and egg white until stiff peaks form. Divide and tint with food coloring.
- Pipe small swirls onto each cooled biscuit using a star tip. Let the icing dry and harden completely (about 4–6 hours).
Notes
- Store in an airtight container for up to a week to keep them crisp.
- Use gel food coloring for vibrant icing colors without thinning the mixture.
- You can also flavor the icing with extracts like lemon or almond for a unique twist.
Nutrition
- Serving Size: 5 iced gems
- Calories: 110
- Sugar: 10g
- Sodium: 40mg
- Fat: 4g
- Saturated Fat: 2.5g
- Unsaturated Fat: 1g
- Trans Fat: 0g
- Carbohydrates: 17g
- Fiber: 0g
- Protein: 1g
- Cholesterol: 15mg
Keywords: iced gems, mini biscuits, royal icing cookies, british snacks, colorful cookies, kids treats