Rich Rice Balls
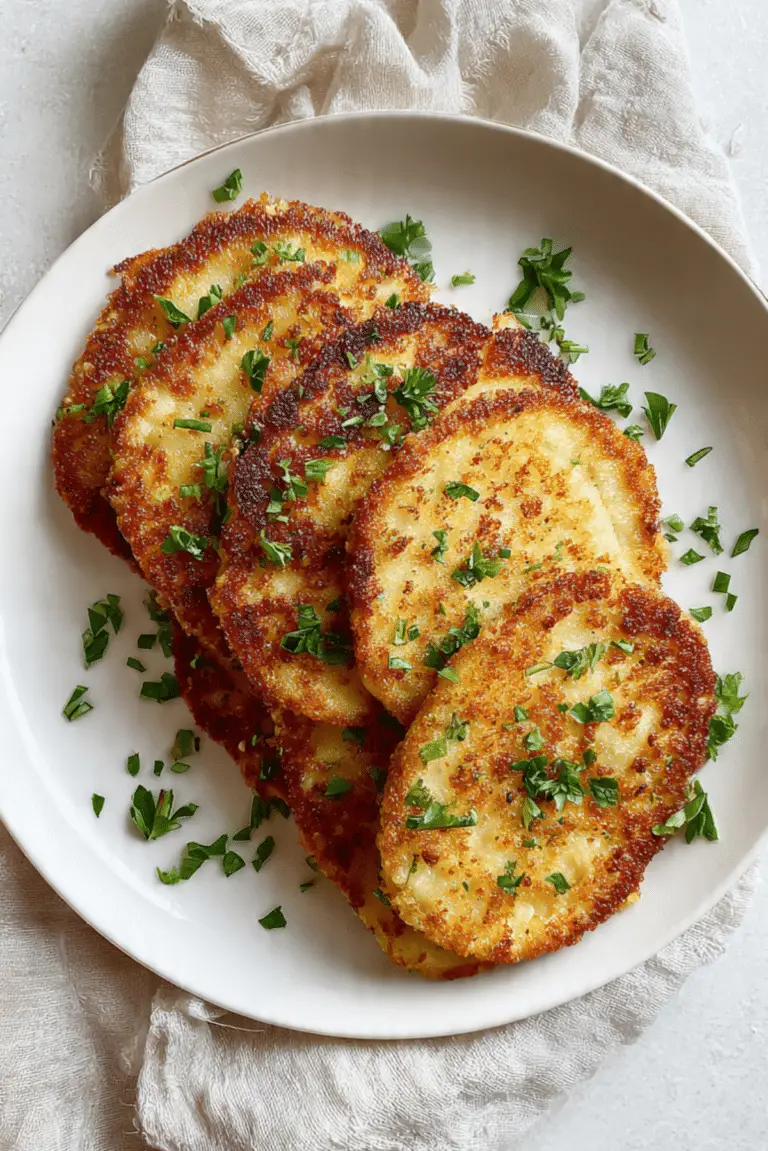
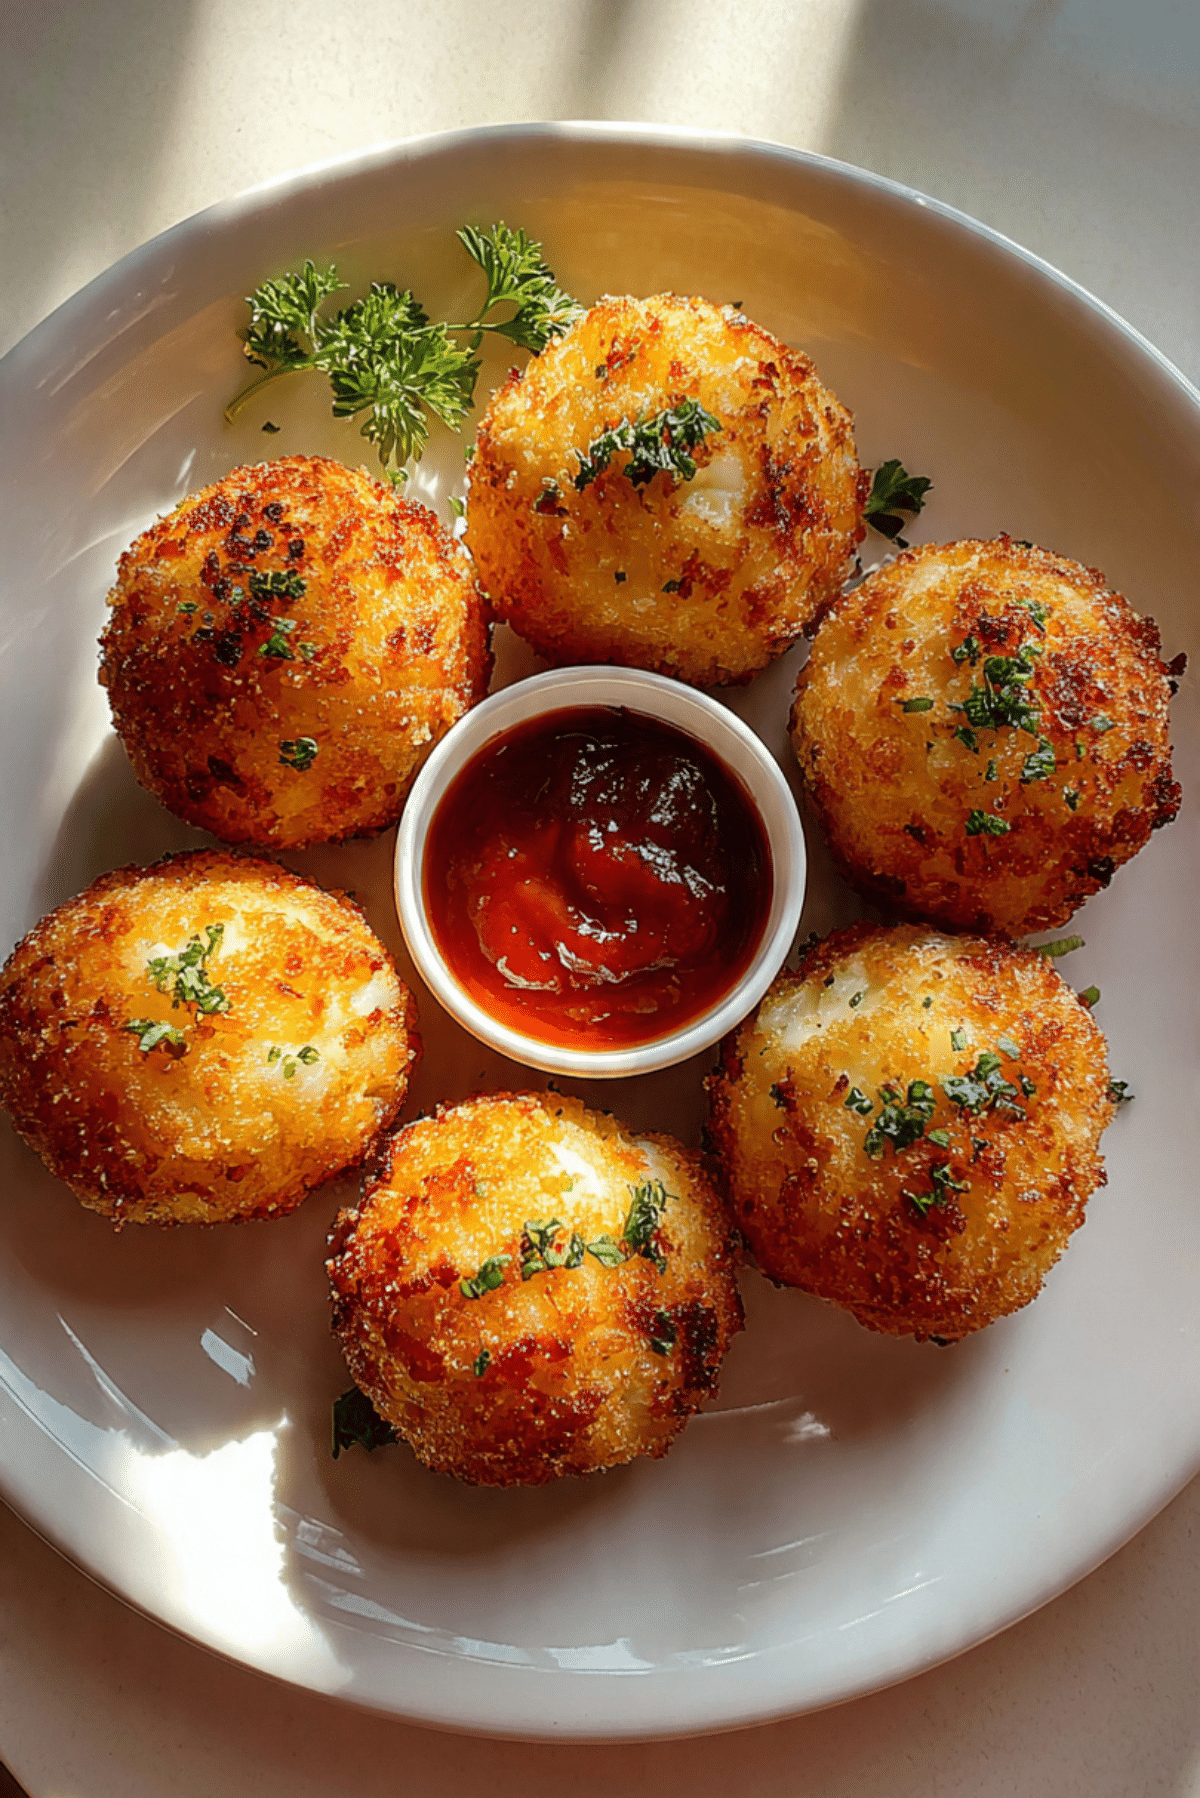
Golden, crispy on the outside and gooey, cheesy on the inside, these rich rice balls are the kind of comfort food that never fails to delight. Each bite delivers a mix of creamy risotto, herbs, and melty mozzarella that warms you right up. Whether you’re serving them as appetizers for a dinner party or enjoying them as a cozy snack, they always seem to disappear faster than you can fry them.
Crispy, Cheesy, and Just Plain Addictive
There’s something about that first bite into a warm rice ball that stops you in your tracks. The crust crackles slightly under your teeth, revealing a rich and savory filling that’s both soft and slightly stretchy from melted cheese. The contrast is everything. Paired with a little dipping sauce on the side, it’s basically perfection.
From Italian Streets to Home Kitchens
These delightful bites come straight from Southern Italy, where they’re famously known as arancini. Traditionally made with leftover risotto and stuffed with various fillings, they were originally designed as a frugal yet delicious way to repurpose food. Over time, they’ve evolved into a beloved street food staple and a festive dish that shows up on tables during holidays and special occasions.
Why This Recipe Wins Every Time
This isn’t just a recipe, it’s a repeat favorite. Here’s why you’ll be coming back to it:
Versatile: Make them plain, cheesy, herby, or even toss in some veggies or meat.
Budget-Friendly: Uses simple, affordable ingredients you probably already have.
Quick and Easy: With pre-cooked rice, it comes together faster than you think.
Customizable: Swap the cheese, herbs, or coatings to suit your taste.
Crowd-Pleasing: Perfect for parties, game nights, or movie snacks.
Make-Ahead Friendly: You can shape and chill them in advance, then fry when ready.
Great for Leftovers: Great use for that leftover risotto or plain rice in your fridge.
Pro Tips for the Perfect Batch
Nailing the texture and flavor takes just a little know-how. Here’s how to step up your rice ball game:
- Use Day-Old Rice: Cold rice holds together better when shaping.
- Keep Your Hands Damp: Lightly wet hands prevent sticking as you roll the balls.
- Chill Before Frying: A short rest in the fridge helps them firm up.
- Use a Cheese Cube Center: A chunk of mozzarella inside melts beautifully.
- Double Coat for Crunch: Dip twice in breadcrumbs for extra crispiness.
Essential Tools for Rice Ball Success
Before you get started, gather these simple tools to make the process smooth:
Mixing Bowls: For combining rice, cheese, and seasonings.
Small Ice Cream Scoop: Helps portion evenly for uniform balls.
Baking Sheet: To chill and rest the rice balls before frying.
Heavy-Bottomed Skillet or Fryer: Ensures even heat and crispy results.
Slotted Spoon or Tongs: For safe, easy handling while frying.
Ingredients You Will Need
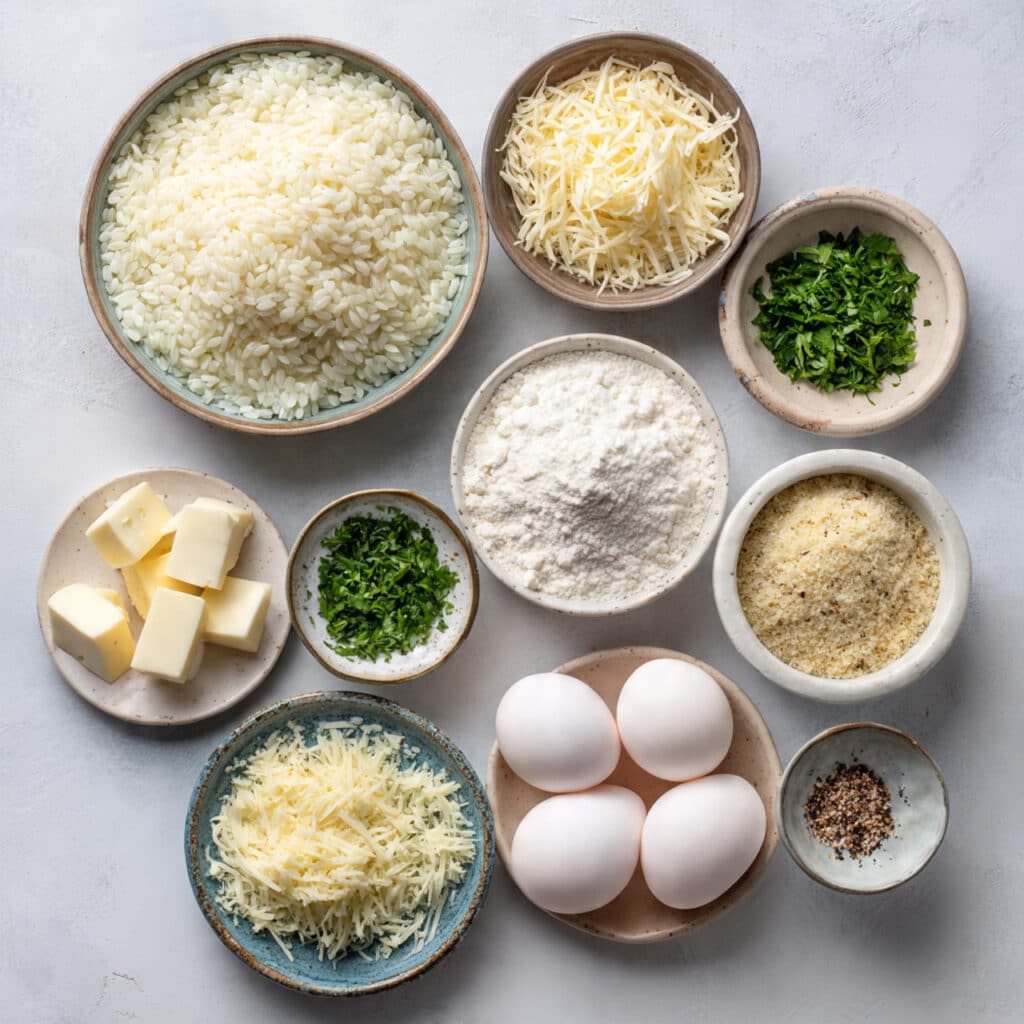
To bring these comforting bites to life, you only need a few pantry staples that work in delicious harmony:
- Cooked Arborio Rice: 2 cups – The starchy base that holds everything together with a creamy interior.
- Mozzarella Cheese: 4 ounces, cut into small cubes – Melts into gooey centers inside each ball.
- Grated Parmesan: 1/4 cup – Adds salty, nutty depth to the rice mixture.
- Fresh Parsley: 2 tablespoons, finely chopped – Brightens and lifts the flavor.
- Eggs: 2 large – Help bind the mixture for easy shaping.
- All-Purpose Flour: 1/2 cup – First step in the coating for that crispy shell.
- Breadcrumbs: 1 cup (preferably Italian seasoned) – Adds crunch and seasoning.
- Salt: 1 teaspoon – Brings out all the flavors.
- Black Pepper: 1/2 teaspoon – Adds a gentle warmth.
- Vegetable Oil: For frying (about 2 cups) – Neutral oil that crisps up the outer shell perfectly.
Easy Ingredient Swaps
Don’t worry if you’re missing something. Here are a few smart substitutions:
Mozzarella: Use provolone or gouda.
Parmesan: Try pecorino romano for a sharper kick.
Parsley: Swap with fresh basil or oregano.
Breadcrumbs: Panko gives extra crunch if that’s your thing.
Arborio Rice: Any short-grain rice will do in a pinch.
Star Players That Make the Magic
Arborio Rice: This creamy, starchy rice is what gives the rice balls their dreamy, melt-in-your-mouth texture.
Mozzarella Cheese: Melts into the perfect pocket of stretchy, salty indulgence in the center.
Let’s Make Magic Happen in the Kitchen
Cooking these is just as satisfying as eating them. Let’s break it down step by step:
1. Preheat Your Equipment:
Heat oil in a deep skillet or fryer over medium-high heat until it reaches 350°F.
2. Combine Ingredients:
In a large bowl, mix together the rice, grated parmesan, chopped parsley, salt, pepper, and one beaten egg.
3. Prepare Your Cooking Vessel:
Set up three shallow bowls – one with flour, one with the second beaten egg, and one with breadcrumbs.
4. Assemble the Dish:
Scoop a bit of the rice mixture, flatten slightly, place a cube of mozzarella in the center, then shape into a ball around it.
5. Cook to Perfection:
Roll each ball in flour, dip in egg, then coat with breadcrumbs. Fry in batches until golden brown and crispy, about 3–4 minutes per batch.
6. Finishing Touches:
Drain on a paper towel–lined plate to remove excess oil.
7. Serve and Enjoy:
Serve hot with your favorite marinara or aioli for dipping.
Crispy Outside, Melty Inside
When you bite into these, the crunch gives way to a soft, savory filling that stretches just a little with the cheese. The rice stays moist and flavorful, the herbs fresh, and the coating golden and satisfying. It’s texture contrast at its best.
Tried-and-True Kitchen Hacks
A little confidence and these handy pointers go a long way:
- Keep a bowl of water nearby to dampen your hands.
- Chill the formed rice balls for at least 30 minutes before frying.
- If baking instead of frying, brush with oil and bake at 400°F until golden.
Avoid These Mistakes
Even pros can slip up. Here’s what to watch for:
- Skipping the Chill: Warm rice balls fall apart in the oil.
- Oil Too Cool or Too Hot: Too cool, and they get soggy. Too hot, and they burn outside before heating through.
- Underseasoning: Taste your mixture before shaping to make sure it sings.
Nutrition Breakdown
Servings: 4
Calories per serving: 385
Note: These are approximate values.
Time to Prep and Sizzle
Prep Time: 25 minutes
Cook Time: 15 minutes
Total Time: 40 minutes
Storing and Reheating Tips
You can absolutely prep these ahead of time. Shape the balls and store them chilled for up to 24 hours before frying. Leftovers can be stored in an airtight container in the fridge for 3 days or frozen for up to a month. Reheat in the oven or air fryer to restore the crunch.
Serving Suggestions
These are perfect as appetizers, snack plates, or party bites. Pair them with a tangy marinara, spicy aioli, or even a fresh green salad for balance. They also make a great lunchbox treat.
Fun Ideas for Leftovers
Turn extra rice balls into:
- Mini sliders: Slice in half and serve in slider buns with greens and sauce.
- Stuffed peppers: Break apart and mix into halved bell peppers, then bake.
- Soup toppers: Crisp and float them in tomato soup for a cozy twist.
Last Little Extras
- Add a pinch of red pepper flakes to the rice for heat.
- Try lemon zest in the filling for brightness.
- Use a melon baller for perfectly sized mini bites.
Turn It Into a Party Favorite
Garnish with a dusting of parmesan, a sprinkle of parsley, and serve on a rustic platter with colorful dipping sauces. Trust me, they’ll steal the show.
Variations to Try
- Spicy Version: Add chopped jalapeños or red pepper flakes.
- Mushroom Delight: Stir in sautéed mushrooms with the rice.
- Vegan Friendly: Use plant-based cheese and flax egg.
- Stuffed Surprise: Fill with sun-dried tomatoes or caramelized onions.
- Baked Instead: Skip frying and bake them until golden and crispy.
FAQ’s
1. Can I make these without eggs?
Yes, try using a flax egg or even mashed potatoes as a binder.
2. Can I bake instead of fry?
Absolutely. Bake at 400°F for 20 minutes, turning halfway through.
3. What’s the best rice to use?
Arborio is best for texture, but any short-grain rice works.
4. Can I make them gluten-free?
Yes, just use gluten-free flour and breadcrumbs.
5. How long do they stay crispy?
They’re best fresh but stay fairly crispy for a few hours after frying.
6. Can I freeze them before frying?
Yes. Shape, then freeze on a tray before storing in a bag. Fry from frozen.
7. What sauce goes best?
Classic marinara is always a hit, but pesto or spicy mayo works too.
8. Do they need to be served hot?
Warm is best, but room temperature still works for snacking.
9. Can I make mini versions?
Yes, just adjust the frying time to 2–3 minutes.
10. Are they kid-friendly?
Totally! Leave out spicy ingredients and serve with a mild dip.
Conclusion
There’s just something irresistible about a crispy little ball of cheesy rice goodness. Whether you’re making them for friends, family, or just treating yourself, rich rice balls deliver every time. Trust me, it’s worth every bite.
Print
Rich Rice Balls
- Prep Time: 25 minutes
- Cook Time: 15 minutes
- Total Time: 40 minutes
- Yield: 4 servings 1x
- Category: Appetizer
- Method: Frying
- Cuisine: Italian
- Diet: Vegetarian
Description
Golden and crispy on the outside with a cheesy, savory center, these rich rice balls are a crowd-pleasing favorite that are perfect for snacking, appetizers, or entertaining.
Ingredients
- 2 cups cooked Arborio rice
- 4 ounces mozzarella cheese, cut into small cubes
- 1/4 cup grated Parmesan
- 2 tablespoons fresh parsley, finely chopped
- 2 large eggs
- 1/2 cup all-purpose flour
- 1 cup Italian seasoned breadcrumbs
- 1 teaspoon salt
- 1/2 teaspoon black pepper
- 2 cups vegetable oil (for frying)
Instructions
- Heat oil in a deep skillet or fryer over medium-high heat until it reaches 350°F.
- In a large bowl, mix together the rice, grated Parmesan, chopped parsley, salt, pepper, and one beaten egg.
- Set up three shallow bowls: one with flour, one with the second beaten egg, and one with breadcrumbs.
- Scoop a portion of the rice mixture, flatten it slightly, place a cube of mozzarella in the center, and shape it into a ball around the cheese.
- Roll each rice ball in flour, dip in egg, then coat with breadcrumbs.
- Fry in batches for 3–4 minutes, or until golden brown and crispy.
- Drain on a paper towel–lined plate before serving.
Notes
- Use day-old rice for better texture and easier shaping.
- Chilling the rice balls before frying helps them hold together.
- Double-coat in breadcrumbs for an extra crispy exterior.
Nutrition
- Serving Size: 1 serving
- Calories: 385
- Sugar: 1g
- Sodium: 620mg
- Fat: 21g
- Saturated Fat: 8g
- Unsaturated Fat: 11g
- Trans Fat: 0g
- Carbohydrates: 38g
- Fiber: 2g
- Protein: 11g
- Cholesterol: 70mg
Keywords: rich rice balls, arancini, Italian rice balls, cheesy appetizers, crispy snacks