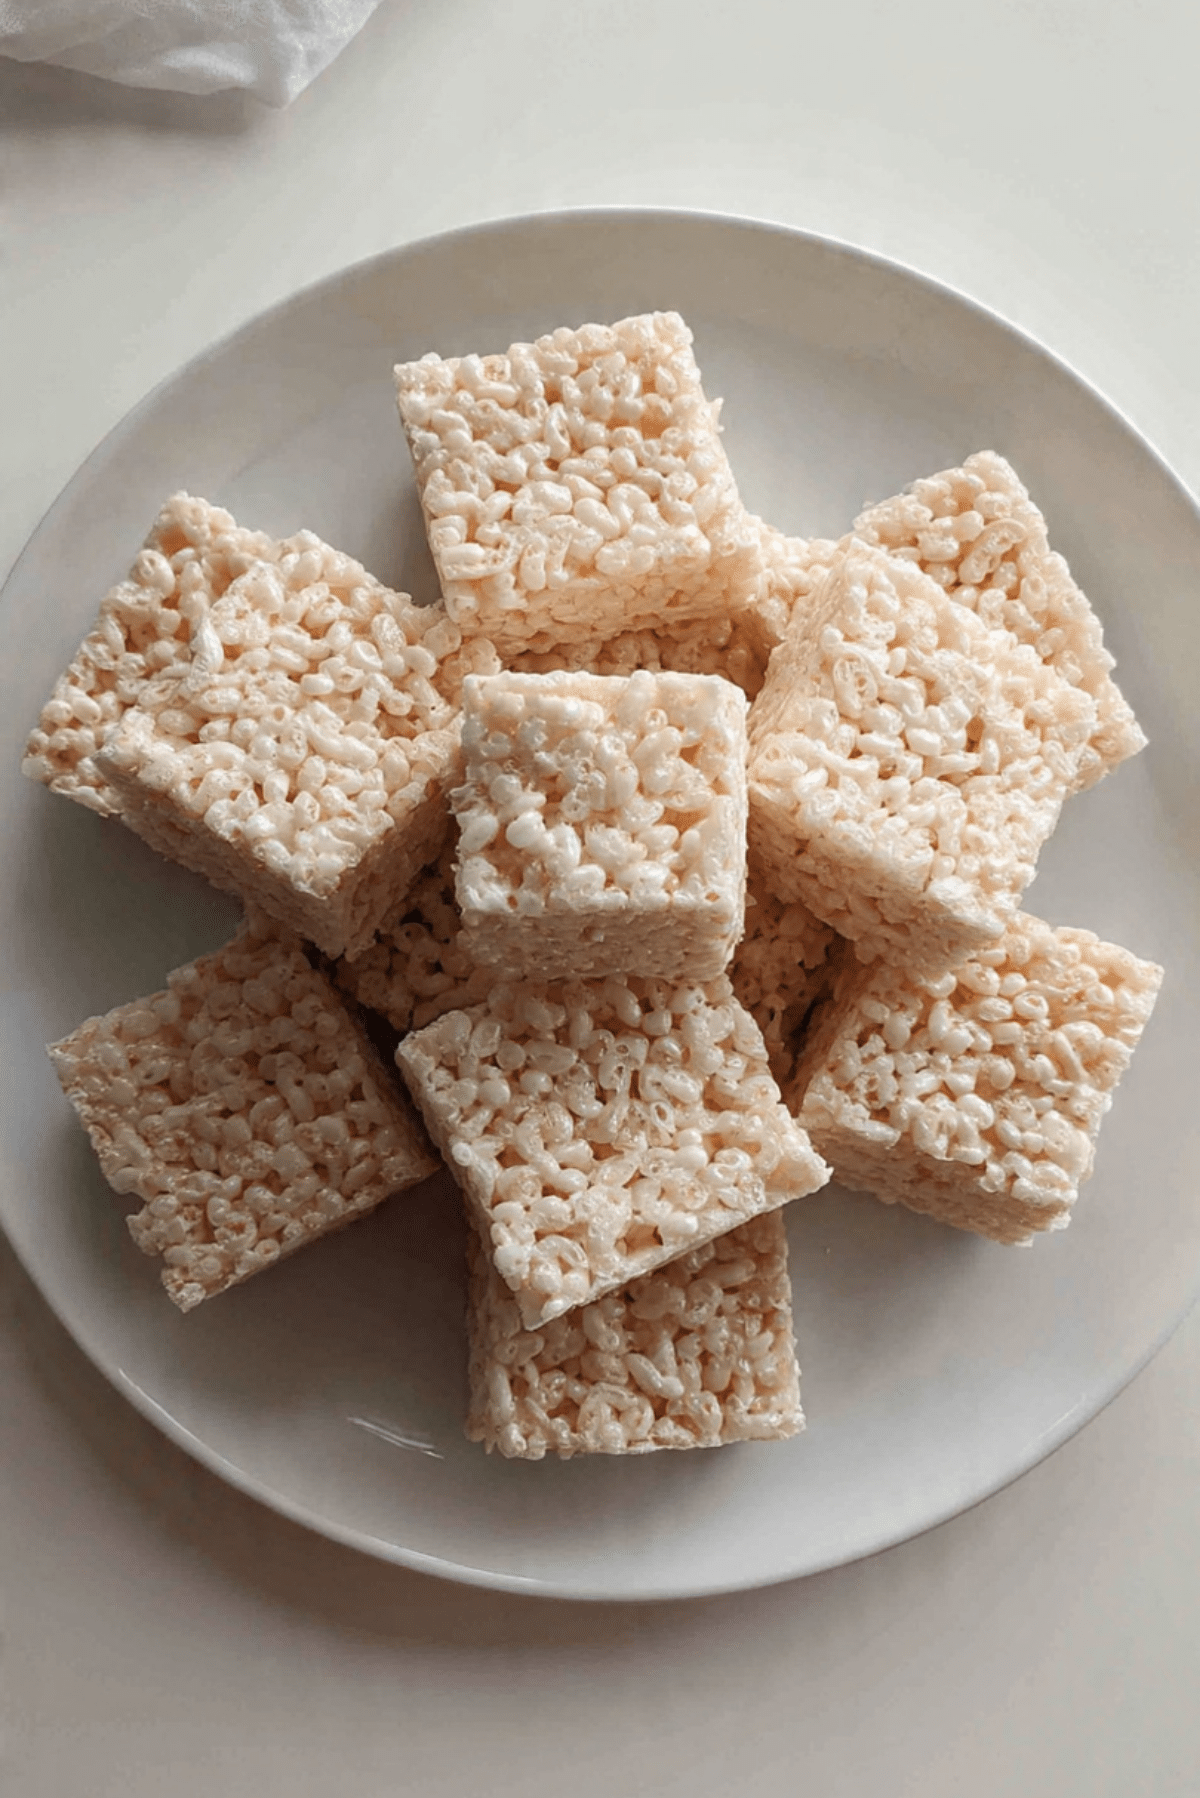
Rice Krispie Treats Recipe
Soft, chewy, and brimming with that nostalgic marshmallow pull, these little squares of joy are the kind of treat that instantly brings back warm kitchen memories. The crispy crunch of puffed rice wrapped in a sweet, gooey hug of melted marshmallow is just magic. Whether you’re whipping them up for a party, packing them into lunchboxes, or simply craving a late-night bite, they never disappoint.
Why These Little Squares of Sweetness Are Everyone’s Favorite
There’s something undeniably comforting about the texture and taste of a classic rice krispie treat. It hits that perfect spot between simple and indulgent. And the best part? You don’t need to be a kitchen pro to get them right.
The Sweet Origin of This Iconic Snack
Rice krispie treats first popped up in the 1930s, thanks to clever minds at Kellogg’s who were brainstorming new ways to enjoy their cereal. Originally crafted as a fundraiser for the Camp Fire Girls, it didn’t take long before these bars gained nationwide popularity. Their ease, affordability, and no-bake charm made them a staple in American homes, and now they’re loved all over the world.
Why This Recipe Deserves a Spot in Your Rotation
Let me tell you, this one’s a total game-changer. Whether you’re a newbie or a seasoned home cook, you’ll fall in love with just how satisfying it is to make and munch on these.
Versatile: You can jazz these up with chocolate chips, peanut butter, or even sprinkles.
Budget-Friendly: Only three main ingredients, and none will break the bank.
Quick and Easy: 10 minutes and you’re done, no oven required.
Customizable: Add-ins, shapes, sizes—you call the shots.
Crowd-Pleasing: Kids and adults both light up at first bite.
Make-Ahead Friendly: They keep beautifully for days.
Great for Leftovers: If you even have any left, that is.
Mastering the Marshmallow Magic
Want that perfect chewy pull without turning into a sticky mess? Here’s what the pros know:
- Use fresh marshmallows. Older ones don’t melt as smoothly.
- Low and slow. Melting over low heat keeps the texture just right.
- Grease that spatula. It makes spreading the mixture into the pan way easier.
- Don’t press too hard. Gently pat the mixture down to avoid dense bars.
- Let them rest. Give them time to set before cutting to get clean squares.
Tools That Make This Treat a Breeze
You don’t need much, but these will make the process smoother:
Large Pot: For melting the butter and marshmallows evenly.
Rubber Spatula: Grease it and it becomes your best friend.
9×13 Inch Pan: Standard size for perfect thickness.
Parchment Paper: Makes for easy removal and cleanup.
Sharp Knife: For neat and clean cutting.
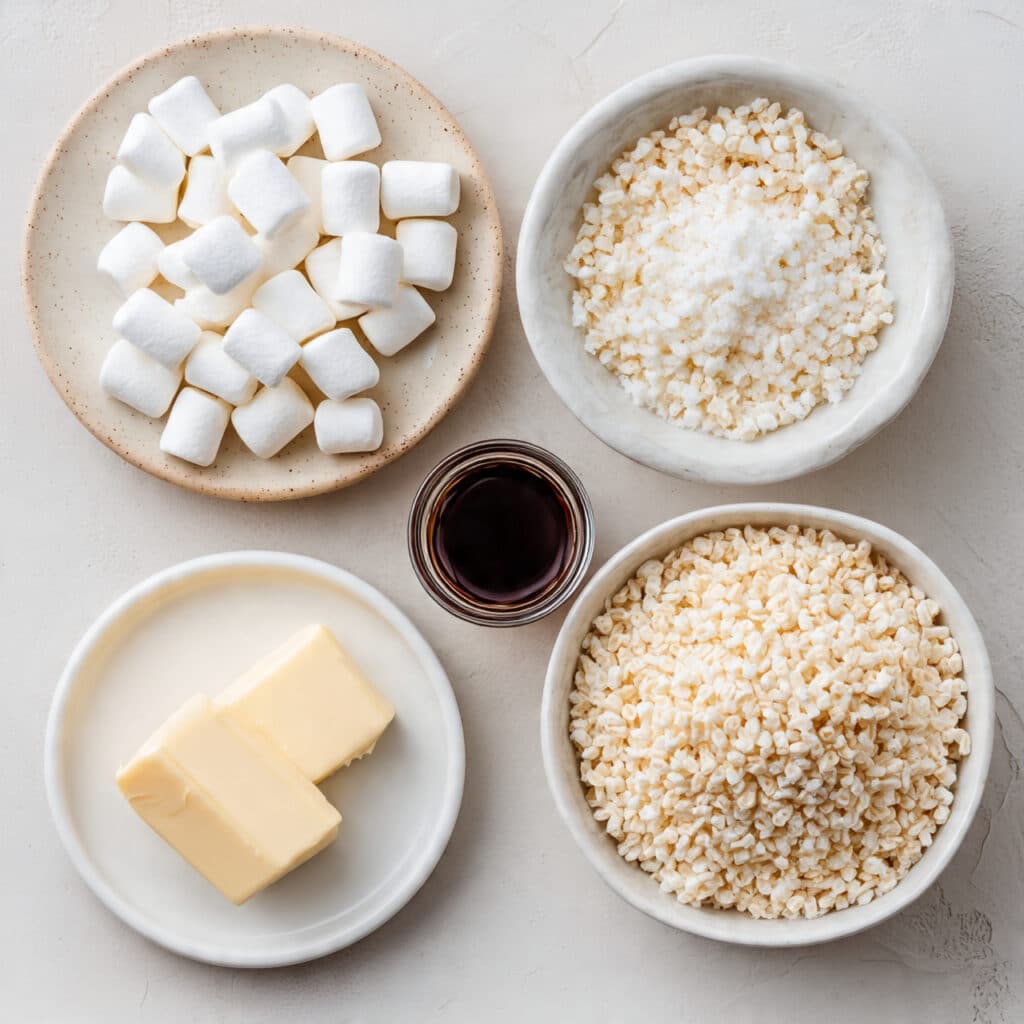
Ingredients You’ll Need for This Delightful Treat
You only need a few ingredients, but each plays a key role in texture and flavor.
- Unsalted Butter: 6 tablespoons — Gives richness and helps melt the marshmallows smoothly.
- Mini Marshmallows: 10 ounces — The heart of the gooey texture and sweetness.
- Rice Krispies Cereal: 6 cups — Provides that classic crunch and lightness.
- Vanilla Extract: 1 teaspoon — Adds depth and warmth to the flavor.
- Salt: a pinch — Balances out the sweetness perfectly.
Simple Swaps and Variations That Work
Need to change things up? No problem. Here are easy fixes and flavor twists:
Butter: Coconut oil for a dairy-free twist.
Marshmallows: Vegan marshmallows if needed.
Cereal: Any puffed rice or crispy cereal brand.
Vanilla Extract: Almond extract for a subtle nutty note.
Ingredient Spotlight: The Real MVPs
Mini Marshmallows: They melt faster and more evenly than large ones, creating that signature sticky base.
Rice Krispies Cereal: Their airy crunch is irreplaceable for that classic light-and-crispy bite.
Let’s Get Cooking Together
Alright, apron on and spatula ready? Here’s how to whip up the dreamiest batch of rice krispie treats.
-
Preheat Your Equipment:
Line a 9×13 inch baking dish with parchment paper and lightly grease it. Set aside. -
Combine Ingredients:
In a large pot over low heat, melt the butter. Once melted, add the marshmallows and stir continuously until smooth and fully melted. Stir in the vanilla extract and a pinch of salt. -
Prepare Your Cooking Vessel:
Make sure your pan is lined and ready to go, as the mixture sets fast. -
Assemble the Dish:
Remove pot from heat and quickly fold in the rice krispies. Stir gently until the cereal is evenly coated. -
Cook to Perfection:
Pour the mixture into your prepared dish. Use a greased spatula or wax paper to press down lightly and spread evenly. -
Finishing Touches:
Let the mixture cool at room temperature for at least 30 minutes. -
Serve and Enjoy:
Once set, cut into squares and dig in!
Gooey, Crunchy, Sweet: A Textural Dream
The beauty of this treat lies in its balance. That gooey marshmallow gives each bite a soft stretch while the cereal delivers a satisfying crunch. Together, they create a harmony of texture that makes every mouthful feel indulgent yet light. The vanilla and buttery backdrop just makes it all sing.
Kitchen Wisdom to Keep in Your Pocket
Before you jump into making your next batch, here are a few handy tips that always help:
- Press gently, not firmly, for soft bites.
- Work quickly once the cereal is added, as it sets fast.
- Let them cool fully before cutting to avoid crumbles.
Common Mistakes to Avoid
No judgment here, just a few things to watch out for:
- Using high heat: This can scorch the marshmallows and make the treats hard.
- Old marshmallows: They don’t melt well and affect texture.
- Overpacking the pan: Compressing too much makes them dense instead of chewy.
- Skipping parchment paper: Makes removal much harder.
Sweet Stats You Should Know
Servings: 12
Calories per serving: 190
Note: These are approximate values.
Quick Prep, Even Quicker Clean-Up
Prep Time: 5 minutes
Cook Time: 5 minutes
Total Time: 10 minutes
Store ‘Em Like a Pro
You can absolutely make these ahead. Just cover tightly with plastic wrap or store in an airtight container. They’ll stay fresh for up to 4 days at room temperature. Want to freeze them? Wrap each square individually and freeze for up to a month. Let them thaw at room temp before eating.
More Than Just a Snack Bar
These babies shine at bake sales, kids’ parties, or as sweet thank-you gifts. Dress them up with melted chocolate, drizzle caramel, or a pinch of sea salt for gourmet flair.
Leftover Magic: How to Reinvent the Treat
If you’ve got extras, don’t let them sit. Try:
- Chopping them up and folding into ice cream.
- Crumbling them over yogurt for a crunchy topping.
- Layering into parfaits with whipped cream and berries.
Bonus Tips for That Extra Edge
- Add food coloring to the marshmallow mix for themed treats.
- Stir in sprinkles or crushed candy bars before setting.
- Use cookie cutters to make fun shapes for holidays.
Turn Them Into a Showpiece
Want to impress? Stack them in a tower, drizzle with chocolate, and sprinkle with powdered sugar. Tie with ribbon if gifting. Presentation turns simple into stunning.
Tasty Twists to Try
- Peanut Butter Swirl: Stir in 1/4 cup peanut butter before adding cereal.
- Chocolate Lovers’ Dream: Mix in mini chocolate chips right before pressing into the pan.
- Birthday Cake Vibe: Add rainbow sprinkles and a dash of almond extract.
- Salted Caramel Upgrade: Drizzle with caramel and finish with flaky sea salt.
- S’mores Style: Add mini chocolate chunks and crushed graham crackers.
FAQ’s
Q1: Can I make these without butter?
A1: Yes, you can use coconut oil or margarine instead.
Q2: How do I keep them soft?
A2: Don’t overpress the mixture, and store them in an airtight container.
Q3: Can I double the recipe?
A3: Absolutely, just use a larger pan or make two batches.
Q4: Are they gluten-free?
A4: Yes, if you use certified gluten-free rice cereal.
Q5: Can I use flavored marshmallows?
A5: You can, but it will change the taste—try vanilla or strawberry for a twist.
Q6: Can kids help with this recipe?
A6: Definitely! It’s a fun, simple treat that’s great for little hands (with adult supervision for the melting part).
Q7: Can I add mix-ins like nuts or candy?
A7: Totally. Just stir them in with the cereal.
Q8: How long do they need to set?
A8: At least 30 minutes at room temperature.
Q9: Can I make them vegan?
A9: Use plant-based butter and vegan marshmallows.
Q10: Why are my treats too hard?
A10: You may have cooked the marshmallows over high heat or pressed them too firmly into the pan.
Conclusion
These rice krispie treats aren’t just a snack, they’re a bite-sized trip down memory lane. Whether you stick to the classic or add your own twist, they’re easy, delicious, and always a hit. Trust me, you’re going to love this—every chewy, crispy, marshmallowy bite.
Print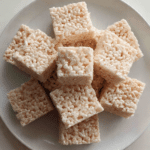
Rice Krispie Treats Recipe
- Prep Time: 5 minutes
- Cook Time: 5 minutes
- Total Time: 10 minutes
- Yield: 12 servings 1x
- Category: Dessert
- Method: No-Bake
- Cuisine: American
- Diet: Vegetarian
Description
These rice krispie treats are soft, chewy, and perfectly gooey with just the right crunch. An easy, no-bake classic that takes less than 10 minutes to make.
Ingredients
- 6 tablespoons unsalted butter
- 10 ounces mini marshmallows
- 6 cups Rice Krispies cereal
- 1 teaspoon vanilla extract
- Pinch of salt
Instructions
- Line a 9×13 inch baking dish with parchment paper and lightly grease it.
- In a large pot over low heat, melt the butter.
- Add the mini marshmallows and stir constantly until fully melted and smooth.
- Stir in vanilla extract and a pinch of salt.
- Remove from heat and quickly fold in the Rice Krispies cereal until well coated.
- Pour the mixture into the prepared pan and gently press it evenly using a greased spatula or wax paper.
- Let cool at room temperature for at least 30 minutes.
- Once set, cut into squares and serve.
Notes
- Use fresh marshmallows for the best texture and meltability.
- Do not press the mixture too hard into the pan to keep the bars soft and chewy.
- Add-ins like chocolate chips or sprinkles can be folded in before pressing into the pan.
- Store in an airtight container at room temperature for up to 4 days.
Nutrition
- Serving Size: 1 bar
- Calories: 190
- Sugar: 14g
- Sodium: 90mg
- Fat: 5g
- Saturated Fat: 3g
- Unsaturated Fat: 1g
- Trans Fat: 0g
- Carbohydrates: 36g
- Fiber: 0g
- Protein: 1g
- Cholesterol: 10mg
Keywords: rice krispie treats, no bake dessert, marshmallow bars, easy snacks, quick treats