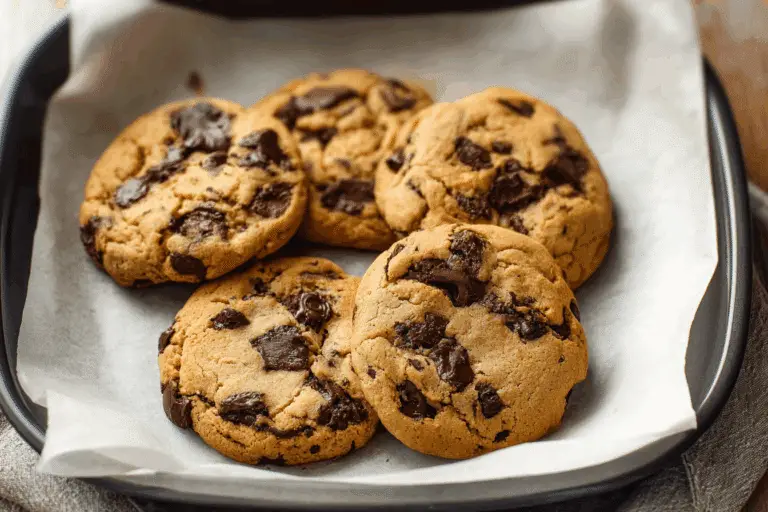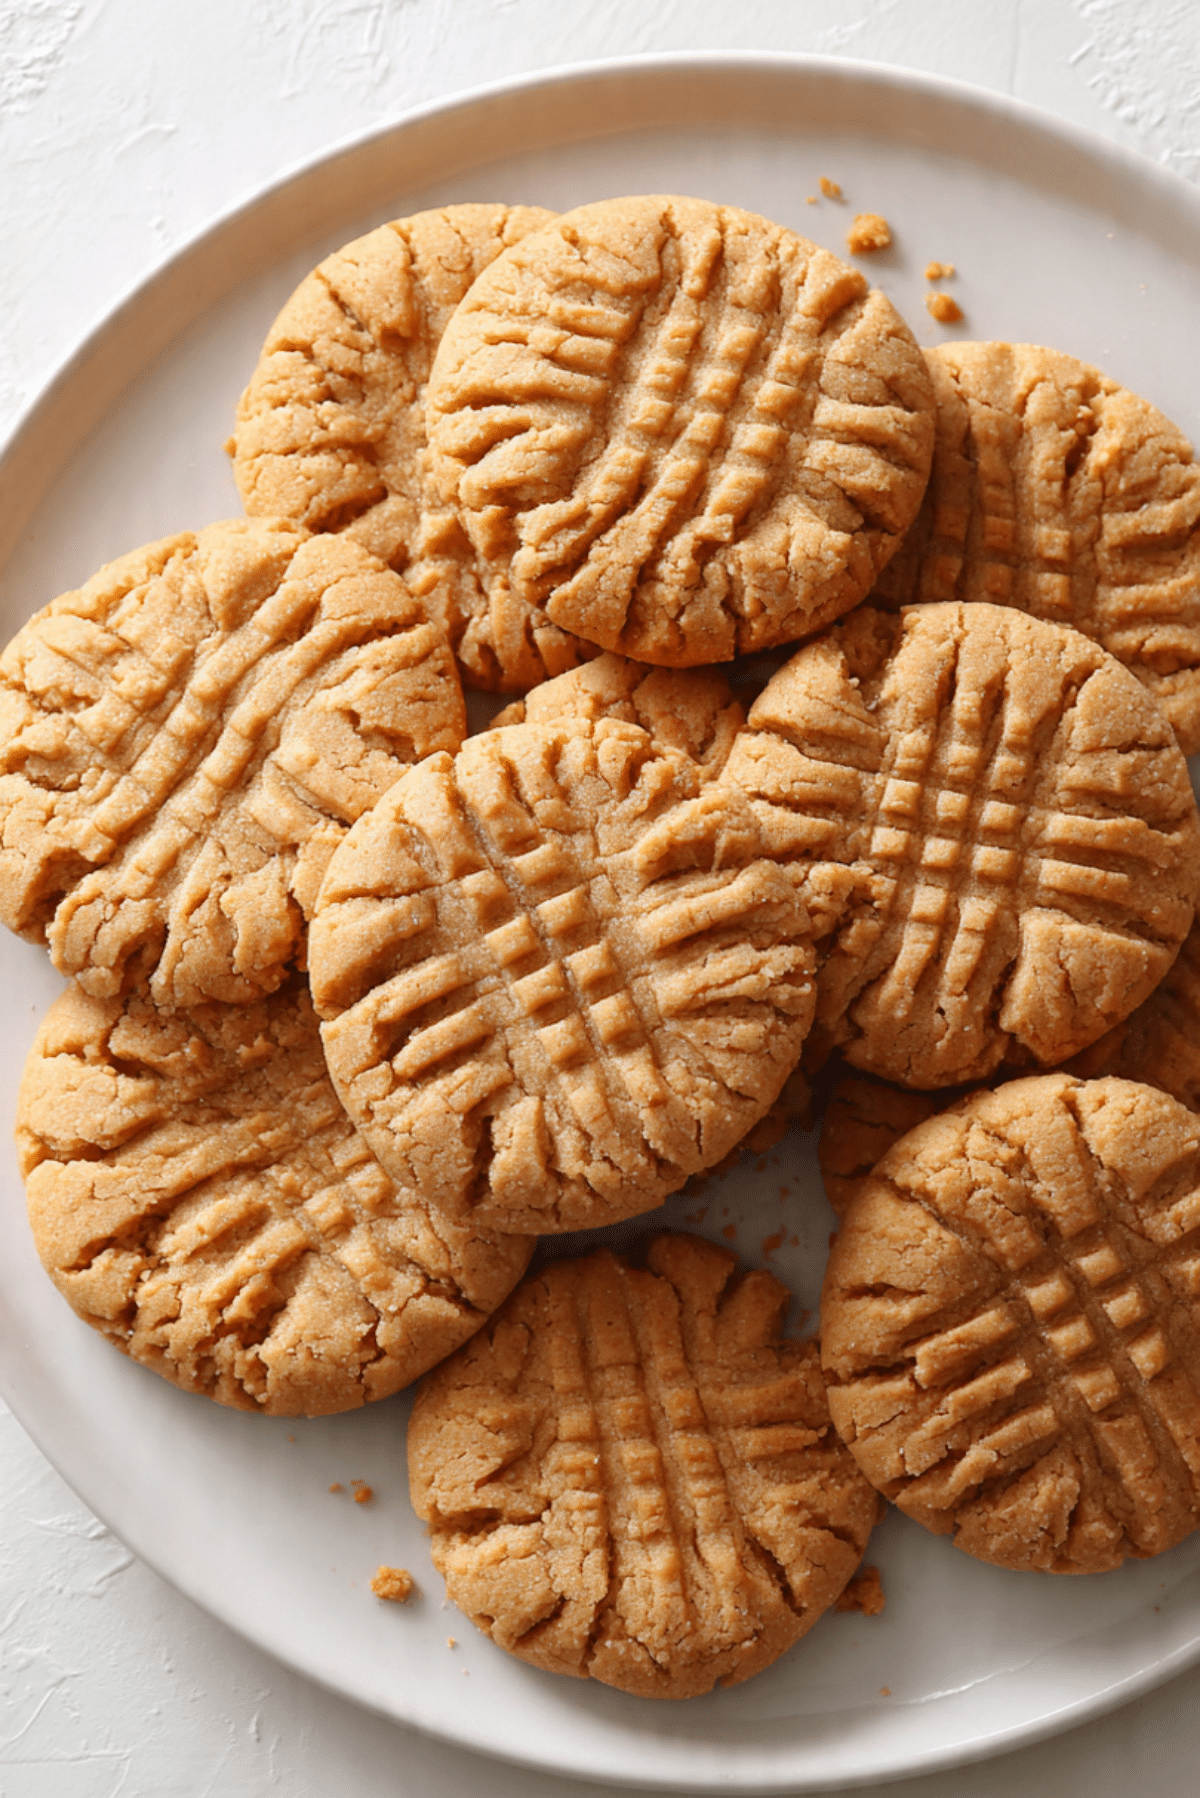
Peanut Butter Cookies
There is something instantly comforting about the smell of peanut butter cookies baking in the oven. It fills the kitchen with warmth, nostalgia, and that unmistakable nutty sweetness that makes you slow down and smile. These cookies are simple, honest, and deeply satisfying, the kind you bake once and then find yourself making again and again. Trust me, you’re going to love this.
Behind the Recipe
This recipe comes from those quiet afternoons when you want something homemade without turning the kitchen upside down. Peanut butter cookies have always been a go to in my kitchen, especially when time is short but the craving is strong. They remind me of standing on a stool as a kid, watching the crisscross marks being pressed into the dough, and sneaking one while it was still warm.
Recipe Origin or Trivia
Peanut butter cookies became popular in American kitchens in the early 1900s when peanut butter started appearing as a household staple. The classic fork crisscross pattern was originally suggested to help the dense dough cook evenly. Over time, it became the signature look we all recognize today, and honestly, it would feel strange without it.
Why You’ll Love Peanut Butter Cookies
These cookies have a way of winning people over fast, and now let’s dive into exactly why they deserve a permanent spot in your baking rotation.
Versatile: These cookies fit every occasion, from after school snacks to holiday trays, and they pair beautifully with milk, coffee, or tea.
Budget-Friendly: Made with pantry basics, this recipe keeps things simple and affordable without sacrificing flavor.
Quick and Easy: You can go from craving to cookie in under half an hour, which makes this one a total game changer.
Customizable: Add a pinch of cinnamon, a sprinkle of sugar on top, or keep them classic, they adapt easily.
Crowd-Pleasing: Soft centers, crisp edges, and rich peanut flavor make these a hit with kids and adults alike.
Make-Ahead Friendly: The dough can be mixed ahead and baked when you need it, fresh cookies on demand.
Great for Leftovers: These cookies stay delicious for days and even freeze beautifully.
Chef’s Pro Tips for Perfect Results
Before we get into the hands on part, here are a few insider tips that make all the difference.
- Use creamy peanut butter for the best texture and even mixing.
- Do not overbake, the cookies will firm up as they cool.
- Let the dough rest for a few minutes before shaping to improve structure.
- Press the fork gently, too hard and the cookies may crack.
Kitchen Tools You’ll Need
You do not need anything fancy here, which is part of the charm.
Mixing Bowl: Large enough to combine everything smoothly.
Wooden Spoon or Spatula: Perfect for mixing thick peanut butter dough.
Baking Sheet: A flat, sturdy surface for even baking.
Fork: For creating the classic crisscross pattern.
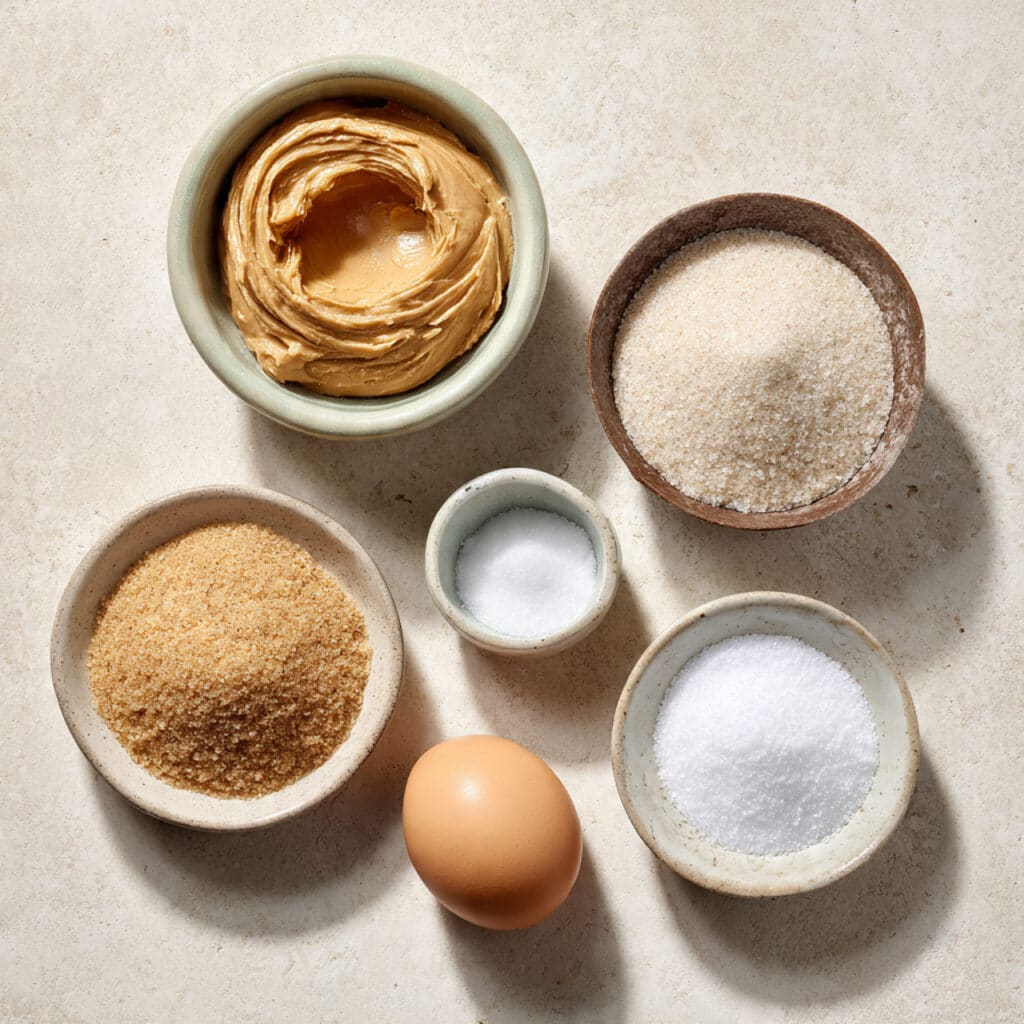
Ingredients in Peanut Butter Cookies
Every ingredient in this recipe works together to create that familiar flavor and texture we all crave.
Creamy Peanut Butter: 1 cup, this is the star, bringing richness, fat, and deep nutty flavor.
Granulated Sugar: 1 cup, adds sweetness and helps create crisp edges.
Egg: 1 large, binds the dough and gives structure.
Vanilla Extract: 1 teaspoon, rounds out the flavor and enhances sweetness.
Baking Soda: 1 teaspoon, provides lift and keeps the cookies tender.
Fine Salt: 1 quarter teaspoon, balances the sweetness and sharpens the peanut flavor.
Ingredient Substitutions
If you need to make adjustments, here are some easy swaps.
Creamy Peanut Butter: Crunchy peanut butter works but will change the texture.
Granulated Sugar: Coconut sugar can be used for a deeper, caramel like note.
Egg: A flax egg can work for a plant based option.
Ingredient Spotlight
Let’s pause for a moment and appreciate what makes this recipe shine.
Peanut Butter: This ingredient delivers protein, richness, and that unmistakable flavor that defines the cookie.
Granulated Sugar: More than sweetness, it helps create those golden edges we all love.
Instructions for Making Peanut Butter Cookies
Now let’s dive into the fun part, and here are the steps you’re going to follow from start to finish.
- Preheat Your Equipment: Preheat your oven to 350°F and line a baking sheet with parchment paper.
- Combine Ingredients: In a mixing bowl, stir together the peanut butter, granulated sugar, egg, vanilla extract, baking soda, and salt until smooth and fully combined.
- Prepare Your Cooking Vessel: Scoop tablespoon sized portions of dough and roll them into balls, placing them evenly spaced on the prepared baking sheet.
- Assemble the Dish: Use a fork to gently press a crisscross pattern on each dough ball.
- Cook to Perfection: Bake for 10 to 12 minutes until the edges are set and lightly golden.
- Finishing Touches: Remove from the oven and allow the cookies to cool on the baking sheet for 5 minutes.
- Serve and Enjoy: Transfer to a rack, let cool completely, and enjoy every bite.
Texture & Flavor Secrets
These cookies strike the perfect balance between soft and crisp. The centers stay tender while the edges develop a light crunch. As they bake, the peanut butter deepens in flavor, blending with sugar to create a rich, roasted aroma that fills the kitchen.
Cooking Tips & Tricks
A few extra pointers can make your batch even better.
- Chill the dough briefly if it feels too soft.
- Bake one test cookie to check timing.
- Use a light colored baking sheet for even browning.
What to Avoid
Even simple recipes have a few pitfalls to watch out for.
- Overbaking, which leads to dry cookies.
- Pressing too hard with the fork.
- Using natural peanut butter that separates too much.
Nutrition Facts
Servings: 18 cookies
Calories per serving: 130
Note: These are approximate values.
Preparation Time
Prep Time: 10 minutes
Cook Time: 12 minutes
Total Time: 22 minutes
Make-Ahead and Storage Tips
You can prepare the dough up to two days ahead and store it covered in the fridge. Baked cookies keep well in an airtight container at room temperature for up to five days. They also freeze well for up to two months and thaw quickly.
How to Serve Peanut Butter Cookies
Serve them slightly warm with a glass of milk, stack them on a dessert platter, or crumble one over a bowl of vanilla ice cream for an easy treat.
Creative Leftover Transformations
Crumble leftover cookies into yogurt, use them as a base for a quick dessert crust, or sandwich them with peanut butter for an extra indulgent snack.
Additional Tips
For extra flavor, sprinkle a tiny pinch of sugar on top before baking. Always let the cookies cool slightly before moving them, they are delicate when hot.
Make It a Showstopper
Arrange the cookies in neat stacks, highlight the fork marks, and let their golden color shine. Simple presentation works best here.
Variations to Try
- Add a pinch of cinnamon to the dough.
- Roll the dough balls in sugar before baking.
- Make smaller cookies for bite sized treats.
- Slightly underbake for extra soft centers.
FAQ’s
1. Can I use crunchy peanut butter?
Yes, it works well but adds texture and crunch.
2. Do I need flour for this recipe?
No, this recipe is naturally flourless.
3. Why do my cookies crack?
Cracking can happen if the dough is too dry or pressed too hard.
4. Can I freeze the dough?
Yes, freeze portioned dough balls for easy baking later.
5. How do I know when they are done?
The edges should be set and lightly golden.
6. Can I reduce the sugar?
You can slightly reduce it, but texture may change.
7. Are these cookies soft or crunchy?
They are soft in the center with lightly crisp edges.
8. Can kids help make this recipe?
Absolutely, it is simple and fun for little hands.
9. Do they spread a lot?
They spread moderately and hold their shape.
10. Can I double the recipe?
Yes, it doubles very easily.
Conclusion
Peanut butter cookies are one of those recipes that never go out of style. They are simple, comforting, and incredibly rewarding to make. Let me tell you, it’s worth every bite, and once you try them, they will quickly become a favorite in your kitchen too.
Print
Peanut Butter Cookies
- Prep Time: 10 minutes
- Cook Time: 12 minutes
- Total Time: 22 minutes
- Yield: 18 cookies 1x
- Category: Dessert
- Method: Baking
- Cuisine: American
- Diet: Vegetarian
Description
Soft and chewy peanut butter cookies with crisp edges and rich nutty flavor, made with simple pantry ingredients and ready in minutes.
Ingredients
- 1 cup creamy peanut butter
- 1 cup granulated sugar
- 1 large egg
- 1 teaspoon vanilla extract
- 1 teaspoon baking soda
- 1/4 teaspoon fine salt
Instructions
- Preheat the oven to 350°F and line a baking sheet with parchment paper.
- In a mixing bowl, combine the peanut butter, granulated sugar, egg, vanilla extract, baking soda, and salt until smooth.
- Scoop tablespoon-sized portions of dough and roll into balls.
- Place the dough balls on the prepared baking sheet, leaving space between each.
- Use a fork to gently press a crisscross pattern on each cookie.
- Bake for 10 to 12 minutes until the edges are set and lightly golden.
- Allow the cookies to cool on the baking sheet for 5 minutes, then transfer to a rack to cool completely.
Notes
- Do not overbake, the cookies will firm up as they cool.
- Use creamy peanut butter for the best texture.
- The dough can be chilled briefly if it feels too soft.
Nutrition
- Serving Size: 1 cookie
- Calories: 130
- Sugar: 9g
- Sodium: 85mg
- Fat: 7g
- Saturated Fat: 1.5g
- Unsaturated Fat: 5g
- Trans Fat: 0g
- Carbohydrates: 12g
- Fiber: 1g
- Protein: 4g
- Cholesterol: 10mg
Keywords: peanut butter cookies, easy peanut butter cookies, flourless cookies, homemade cookies, quick dessert