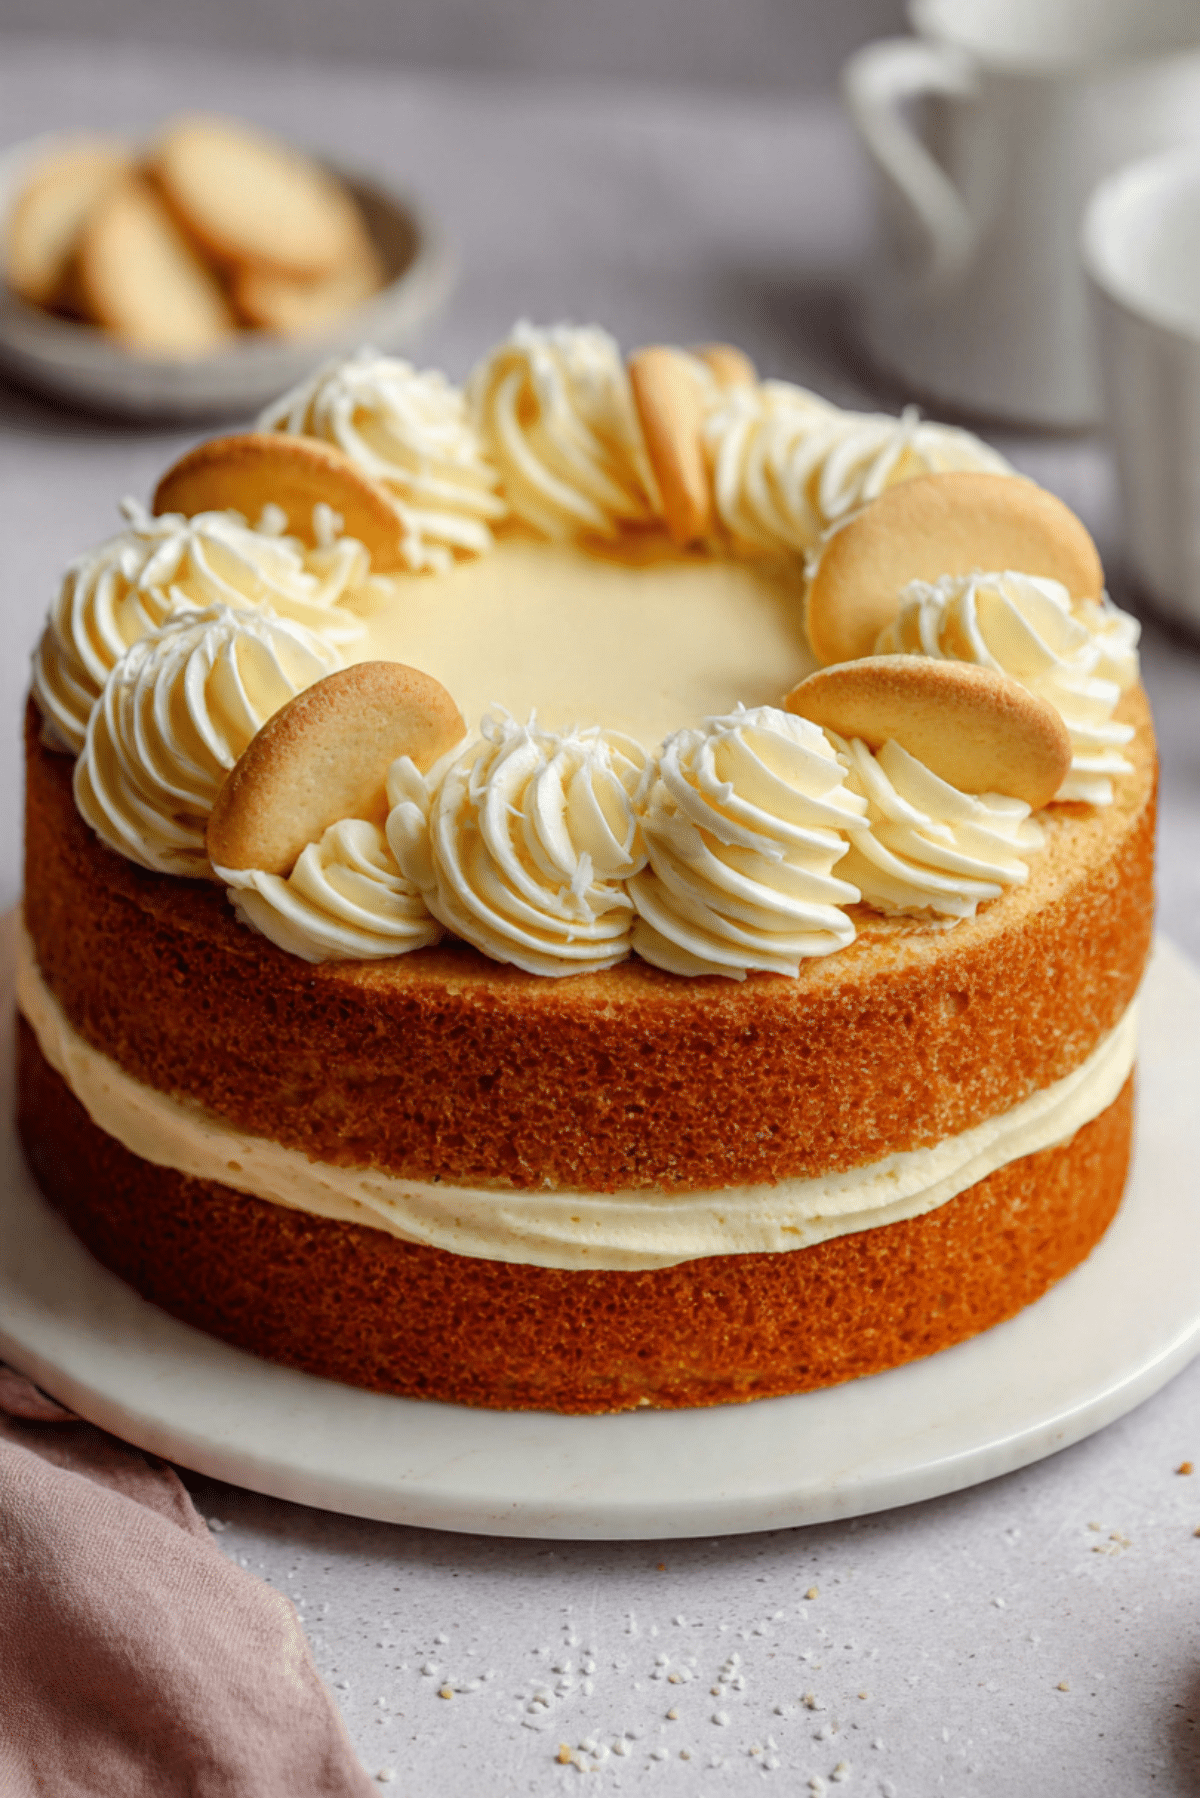
Custard Cream Cake
There is something instantly comforting about a cake like this. The soft vanilla custard sponge, the creamy middle, and that sweet biscuit finish make every slice feel a little nostalgic and a little fancy at the same time. Trust me, you’re going to love this, because it brings together the cozy flavor of custard and the joy of a classic layer cake in one beautiful dessert.
Why This Cake Feels Like a Little Bakery Treat at Home
Some cakes are all about drama, but this one wins people over in a softer way. It looks elegant on the table, yet the flavors are familiar and comforting, which makes it the kind of bake that disappears one happy slice at a time. Let me tell you, it’s worth every bite, especially when that creamy filling meets the tender sponge.
The beauty here is balance. Nothing feels too heavy, too sweet, or too rich. Instead, every layer works together, giving you a dessert that feels special enough for celebrations but easygoing enough for a weekend baking session.
The Sweet Story Behind This British-Inspired Favorite
And now, as we move from first impressions to the story behind it, this cake has roots in a very beloved flavor combination. It is inspired by the classic British custard cream biscuit, a teatime favorite known for its delicate vanilla custard flavor and creamy filling. Modern bakers often turn that biscuit inspiration into layer cakes by pairing custard-flavored sponge with pastry cream or custard buttercream. :contentReference[oaicite:0]{index=0}
That is what makes this bake feel both old-fashioned and fresh. It carries that comforting biscuit-shop feeling, but turns it into something you can proudly place in the center of the table.
Reasons This Bake Earns a Spot in Your Favorites List
Before we get into the practical side, it helps to know why this cake is such a keeper in the first place.
Versatile: It works beautifully for birthdays, afternoon coffee, family gatherings, or a slow Sunday when you want to bake something that feels extra rewarding.
Budget-Friendly: Most of the ingredients are basic baking staples, like flour, eggs, milk, butter, and sugar, so you get a bakery-style result without chasing specialty items.
Quick and Easy: While it looks impressive, the process is very straightforward when broken into simple stages. Each part is manageable, and nothing here is overly complicated.
Customizable: You can keep it simple with smooth buttercream, add biscuit crumbs for a little crunch, or decorate it more generously for a celebration centerpiece.
Crowd-Pleasing: Vanilla and custard are gentle, familiar flavors that tend to win over both kids and adults.
Make-Ahead Friendly: The filling can be made in advance, and the cake layers hold up well, which makes assembly feel much easier.
Great for Leftovers: A chilled slice the next day is still dreamy, and some people would argue it is even better once the flavors have settled together.
Smart Baker Secrets for the Best Slice
Now that you know why it deserves the hype, here are the little details that make the final result feel polished.
- Bring ingredients to room temperature: Butter, eggs, and milk blend more smoothly, which helps create an even batter and a softer crumb.
- Do not rush the custard: Cook it gently and whisk constantly so it thickens to a silky texture instead of turning lumpy.
- Cool every component fully: Warm custard or warm cake layers can make the buttercream slide around, and nobody wants that stress.
- Level the cake layers if needed: A flat surface makes stacking easier and gives you those neat bakery-style layers.
- Chill briefly before slicing: Even 20 to 30 minutes in the fridge helps everything set for cleaner slices.
The Kitchen Helpers That Make This Bake Smoother
At this point, the process starts feeling very doable, especially once you gather the right tools.
Two 8-inch round cake pans: These give you evenly sized layers and help the cake bake with a nice balanced height.
Mixing bowls: You will want separate bowls for the batter, dry ingredients, and frosting so the workflow stays tidy.
Electric mixer: This makes creaming the butter and sugar much easier and helps create a lighter sponge.
Saucepan: Essential for cooking the custard filling until thick and glossy.
Whisk: Your best friend for a smooth custard with no lumps.
Offset spatula: Helpful for spreading the filling and frosting neatly.
Cooling rack: Lets the layers cool properly so trapped steam does not make them soggy.
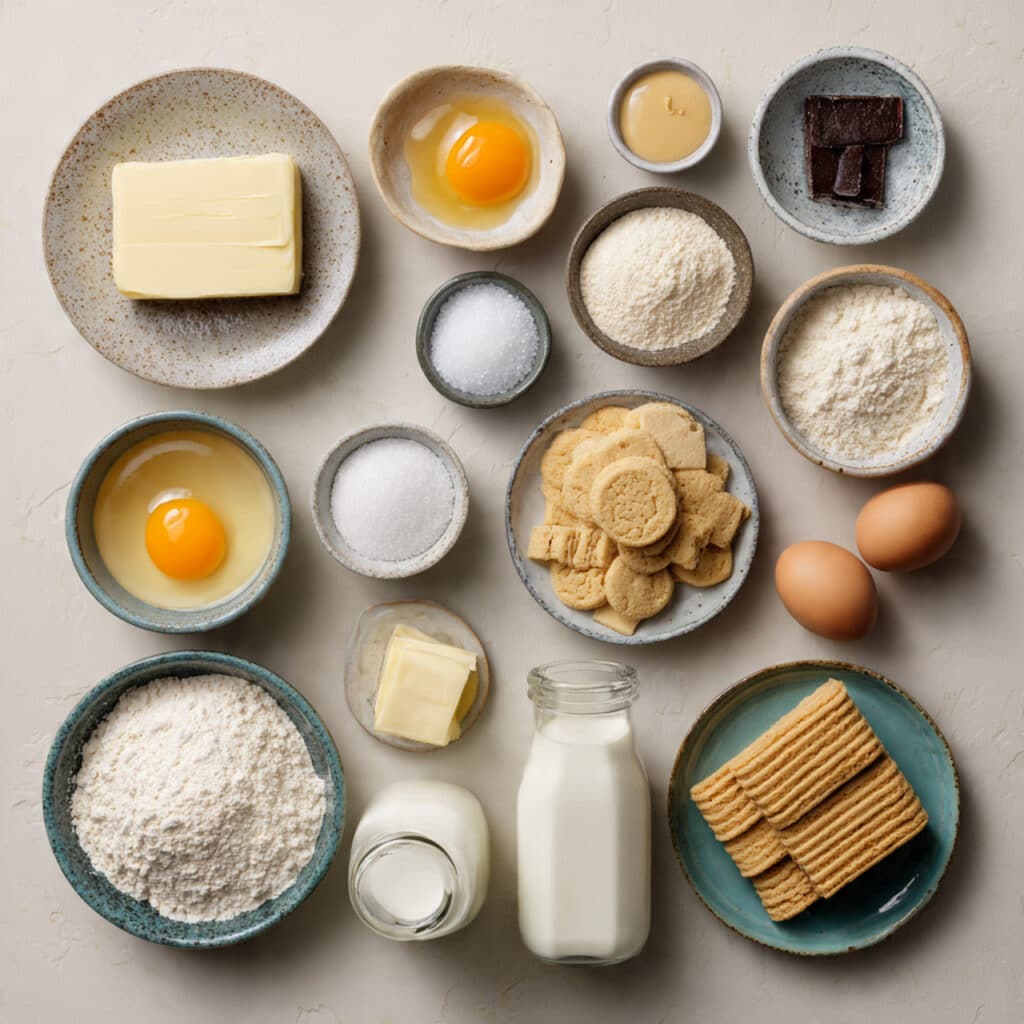
The Ingredients That Build All That Creamy, Vanilla Comfort
And now let’s dive into the heart of the cake, because every good bake starts with ingredients that know exactly what job they are there to do.
- Unsalted butter: 225 g, softened, this gives the sponge richness and a tender crumb.
- Caster sugar: 225 g, for sweetness and a light texture when creamed with the butter.
- Large eggs: 4, they add structure, richness, and help the batter stay smooth.
- Vanilla extract: 2 teaspoons, for that warm bakery-style flavor that ties everything together.
- Self-rising flour: 225 g, this keeps the sponge soft and gives it a reliable lift.
- Custard powder: 30 g, this brings the signature flavor and that lovely pale golden color.
- Whole milk: 3 tablespoons, just enough to loosen the batter so it bakes up fluffy.
- Whole milk: 500 ml, for the custard filling, it creates the creamy base.
- Granulated sugar: 100 g, to sweeten the filling without overpowering it.
- Egg yolks: 4, they give the custard a rich, silky texture.
- Cornstarch: 40 g, this thickens the filling so it slices neatly.
- Unsalted butter: 30 g, stirred into the hot custard for extra gloss and softness.
- Vanilla extract: 1 teaspoon, to round out the filling with mellow sweetness.
- Unsalted butter: 200 g, softened, for the buttercream, this makes the frosting smooth and spreadable.
- Powdered sugar: 350 g, sifted, for sweetness and structure in the frosting.
- Custard powder: 2 tablespoons, to echo the flavor in the sponge and filling.
- Whole milk: 2 to 3 tablespoons, to loosen the buttercream to a silky consistency.
- Custard cream biscuits: 8, some crushed and some left whole, for decoration and a hint of crunch.
Easy Swaps When You Want to Make It Your Own
Once you have the base ingredients sorted, you have plenty of room to adapt without losing the soul of the bake.
Self-rising flour: Use 225 g all-purpose flour plus 2 1/2 teaspoons baking powder.
Caster sugar: Granulated sugar works well if that is what you have on hand.
Cornstarch: Vanilla pudding powder can help thicken the filling, though the texture may be slightly different.
Whole milk: Use 2 percent milk for a slightly lighter result.
Vanilla extract: Vanilla bean paste adds an even deeper flavor and those pretty specks.
Custard cream biscuits: Plain vanilla sandwich biscuits can step in if needed.
The Ingredients That Quietly Steal the Show
A few ingredients really carry the personality of this bake, so they deserve a moment.
Custard powder: This is the ingredient that gives the cake its unmistakable old-school charm. It adds a gentle custard flavor and a warm golden tint that instantly makes the sponge feel inviting.
Egg yolks: In the filling, they create that rich, spoon-coating texture that feels luxurious without being too heavy. This one’s a total game-changer when you want a filling that tastes homemade and truly creamy.
Let’s Bake It Step by Step
Now comes the fun part, where everything starts to smell amazing and the kitchen takes on that cozy cake-shop feeling. Here are the steps you’re going to follow.
- Preheat Your Equipment: Heat the oven to 175°C and line two 8-inch round cake pans with parchment paper. Lightly grease the sides so the layers release easily after baking.
- Combine Ingredients: Beat 225 g softened butter with 225 g caster sugar until pale and fluffy. Add the 4 eggs one at a time, mixing well after each addition. Stir in 2 teaspoons vanilla extract. Fold in 225 g self-rising flour and 30 g custard powder, then mix in 3 tablespoons whole milk until the batter is smooth and soft.
- Prepare Your Cooking Vessel: Divide the batter evenly between the prepared pans and smooth the tops gently so the layers bake evenly.
- Assemble the Dish: Bake for 25 to 30 minutes, or until the cakes are risen, lightly golden, and a skewer inserted in the center comes out clean. Cool in the pans for 10 minutes, then transfer to a rack and let them cool completely.
- Cook to Perfection: For the filling, whisk 100 g granulated sugar, 4 egg yolks, 40 g cornstarch, and 500 ml whole milk in a saucepan. Cook over medium heat, whisking constantly, until thick and bubbling. Remove from the heat, whisk in 30 g butter and 1 teaspoon vanilla extract, then cover the surface directly and cool completely.
- Finishing Touches: Beat 200 g softened butter until creamy. Add 350 g sifted powdered sugar and 2 tablespoons custard powder, then beat again. Add 2 to 3 tablespoons whole milk until the buttercream is light and spreadable. Place one cake layer on a serving plate, spread over the cooled custard filling, top with the second layer, then frost the top and sides with the buttercream. Finish with crushed and whole custard cream biscuits.
- Serve and Enjoy: Chill the cake briefly so the layers settle, then slice and serve. The result should be soft, creamy, and full of mellow vanilla custard flavor.
What Makes Every Bite So Good
By the time the cake is assembled, the texture story really starts to shine. The sponge is light and tender, the filling is smooth and creamy, and the buttercream adds a soft sweet finish that ties everything together. Then the biscuits on top bring a little contrast, which keeps each bite interesting.
Flavor-wise, it is all about warm vanilla notes, mellow custard depth, and buttery richness. Nothing shouts. Everything blends. That is exactly why it tastes so comforting.
Handy Tips for a Smooth Baking Day
A cake like this is already rewarding, but a few small moves make it even easier.
- Chill the custard before using it, so it spreads neatly and stays put between the layers.
- Sift the powdered sugar and custard powder for the frosting, so the buttercream stays silky.
- Use a kitchen scale if possible, because measured ingredients give the sponge a much more reliable texture.
- Save a few biscuit crumbs for the final finish, because they add charm without much effort.
Common Slip-Ups and How to Avoid Them
Even cozy bakes can have a couple of tricky moments, so it helps to know what to watch for.
- Overbaking the sponge can dry it out, so start checking at the 25-minute mark.
- Rushing the custard can leave you with lumps, so whisk steadily and keep the heat moderate.
- Filling the cake while the custard is warm can make the layers slide, so let it cool completely first.
- Adding too much milk to the buttercream too quickly can make it loose, so add it a little at a time.
A Quick Look at the Nutrition Facts
Before you pour that second cup of tea, here is the general breakdown for one slice.
Servings: 12
Calories per serving: 520
Note: These are approximate values.
Time You’ll Want to Set Aside
This bake is very manageable once you see the timing laid out clearly.
Prep Time: 45 minutes
Cook Time: 30 minutes
Total Time: 1 hour 15 minutes
Make-Ahead and Storage Tips That Actually Help
One of the nicest things about this cake is how well it fits into real life. You can bake the layers a day ahead, wrap them well, and keep them at room temperature. The custard can also be made ahead and chilled until firm, which makes assembly far more relaxed.
Once assembled, store the cake in the refrigerator because of the custard filling. Cover it well and enjoy within 3 days for the best texture. For longer storage, you can freeze the unfrosted cake layers separately, then thaw and assemble later. When serving from the fridge, let slices sit for a few minutes so the texture softens slightly.
Simple and Lovely Ways to Serve It
When it is finally time to bring it to the table, you do not need much to make it feel special. A clean slice on a cake stand already looks beautiful, especially with those biscuit pieces on top.
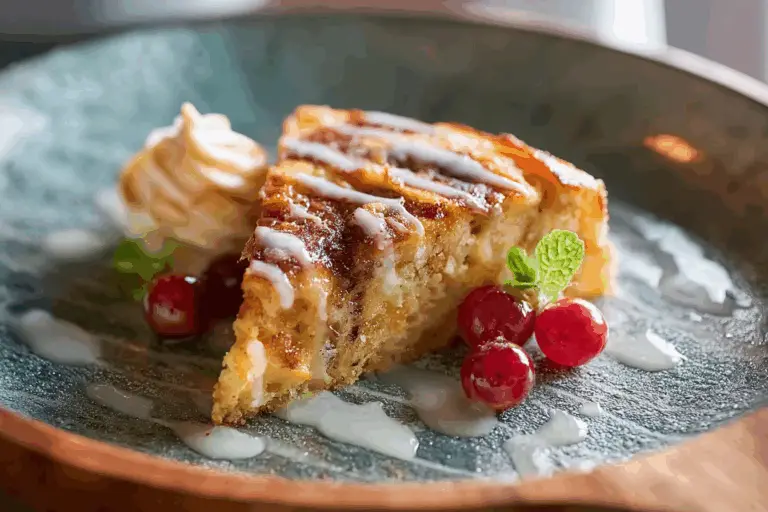
It also pairs wonderfully with hot tea, coffee, or a glass of cold milk. For a slightly fancier dessert plate, add a spoonful of softly whipped cream or a few fresh berries on the side.
Leftovers That Deserve a Second Round
And if you happen to have leftovers, do not think of them as yesterday’s cake. Think of them as your next dessert opportunity.
Cube a slice and layer it into a trifle glass with extra whipped cream. Crumble it over vanilla yogurt for a sweet afternoon treat. You can even serve small chilled squares with coffee for a little dessert-board moment that feels surprisingly elegant.
Extra Little Details That Make a Difference
By now, you can already imagine how lovely the finished cake will be, but a few final touches help push it from good to unforgettable.
A tiny pinch of salt in the buttercream can sharpen the vanilla flavor beautifully. Keeping the cake layers wrapped as they cool helps preserve moisture. And if your kitchen runs warm, chilling the assembled cake for a short time before decorating makes the whole job much easier.
Make It Look Celebration-Worthy
This cake has a naturally soft, golden beauty, so presentation does not need to be fussy. Smooth the frosting gently rather than trying to make it too perfect, because that relaxed homemade look is part of the charm.
Top it with a few whole biscuits, a scattering of fine biscuit crumbs, and neat swirls of buttercream. Once sliced, those creamy layers do most of the talking for you.
Fun Variations Worth Trying
Once you make the classic version, it is hard not to start imagining other ways to play with it.
Jam layer: Add a thin swipe of raspberry jam under the custard filling for a fruity contrast.
Lemon twist: Stir a little lemon zest into the sponge or frosting for a brighter finish.
Cupcake version: Turn the batter into cupcakes and pipe the custard into the center for an easier party option.
Traybake style: Bake it in a rectangular tin and spread the filling and frosting over the top for casual slicing.
Extra biscuit crunch: Fold finely crushed custard cream biscuits into the frosting for a slightly speckled finish.
FAQ’s
1. Can I make the custard filling a day ahead?
Yes, and it actually makes assembly easier. Keep it covered in the refrigerator so a skin does not form.
2. Can I use all-purpose flour instead of self-rising flour?
Yes. Add 2 1/2 teaspoons of baking powder to 225 g all-purpose flour.
3. Why did my custard turn lumpy?
That usually happens when the heat is too high or the mixture is not whisked consistently. Gentle heat and constant whisking are the fix.
4. Can I use store-bought custard?
You can, but homemade filling gives the cake a richer texture and a fresher flavor.
5. Does the cake need to stay in the fridge?
Yes, because the filling contains eggs and milk. Keep it chilled and covered.
6. Can I freeze the finished cake?
It is better to freeze the sponge layers separately. The custard texture is best when made fresh.
7. How do I get neat slices?
Chill the cake first, then use a sharp knife and wipe it clean between cuts.
8. Can I make this in one pan instead of two?
You can, but the baking time will change, and splitting one tall cake can be a bit trickier.
9. What kind of biscuits work best for decoration?
Classic custard cream biscuits are ideal, but plain vanilla sandwich biscuits also work nicely.
10. Is this cake very sweet?
It is sweet, but the custard flavor keeps it mellow and balanced rather than overly sugary.
Conclusion
This cake has that rare kind of charm that feels both simple and special. It is creamy, tender, nostalgic, and just polished enough to make people think you spent all day in the kitchen. And now that you’ve seen how it all comes together, you can bake it with confidence and enjoy every soft, custardy bite.
Print
Custard Cream Cake
- Prep Time: 45 minutes
- Cook Time: 30 minutes
- Total Time: 1 hour 15 minutes
- Yield: 12 slices 1x
- Category: Dessert
- Method: Baking
- Cuisine: British-inspired
- Diet: Vegetarian
Description
A soft vanilla and custard layer cake filled with silky homemade custard, frosted with custard buttercream, and finished with custard cream biscuits for a nostalgic British-inspired dessert.
Ingredients
- 225 g unsalted butter, softened
- 225 g caster sugar
- 4 large eggs
- 2 teaspoons vanilla extract
- 225 g self-rising flour
- 30 g custard powder
- 3 tablespoons whole milk
- 500 ml whole milk
- 100 g granulated sugar
- 4 egg yolks
- 40 g cornstarch
- 30 g unsalted butter
- 1 teaspoon vanilla extract
- 200 g unsalted butter, softened
- 350 g powdered sugar, sifted
- 2 tablespoons custard powder
- 2 to 3 tablespoons whole milk
- 8 custard cream biscuits, some crushed and some left whole
Instructions
- Preheat the oven to 175°C. Line two 8-inch round cake pans with parchment paper and lightly grease the sides.
- Beat 225 g softened butter with 225 g caster sugar until pale and fluffy. Add the 4 eggs one at a time, mixing well after each addition. Stir in 2 teaspoons vanilla extract.
- Fold in 225 g self-rising flour and 30 g custard powder, then mix in 3 tablespoons whole milk until the batter is smooth.
- Divide the batter evenly between the pans and smooth the tops. Bake for 25 to 30 minutes, or until a skewer inserted in the center comes out clean. Cool for 10 minutes in the pans, then transfer to a rack to cool completely.
- For the filling, whisk together 100 g granulated sugar, 4 egg yolks, 40 g cornstarch, and 500 ml whole milk in a saucepan. Cook over medium heat, whisking constantly, until thick and bubbling. Remove from the heat, whisk in 30 g butter and 1 teaspoon vanilla extract, cover the surface directly, and cool completely.
- For the buttercream, beat 200 g softened butter until creamy. Add 350 g sifted powdered sugar and 2 tablespoons custard powder, then beat until smooth. Add 2 to 3 tablespoons whole milk until light and spreadable.
- Place one cake layer on a serving plate and spread the cooled custard filling over it. Top with the second layer, then frost the top and sides with the buttercream.
- Decorate with the crushed and whole custard cream biscuits. Chill briefly for cleaner slices, then serve.
Notes
- Make the custard filling ahead and chill it for easier assembly.
- Do not frost the cake until both the custard and cake layers are fully cool.
- Sift the powdered sugar for the smoothest buttercream texture.
- Store the finished cake in the refrigerator and serve within 3 days.
Nutrition
- Serving Size: 1 slice
- Calories: 520
- Sugar: 36 g
- Sodium: 210 mg
- Fat: 29 g
- Saturated Fat: 17 g
- Unsaturated Fat: 10 g
- Trans Fat: 0.5 g
- Carbohydrates: 59 g
- Fiber: 1 g
- Protein: 6 g
- Cholesterol: 145 mg
Keywords: custard cream cake, vanilla custard layer cake, British biscuit cake, custard filling cake, buttercream cake