Chocolate Pudding
There’s something undeniably nostalgic about chocolate pudding. That deep cocoa aroma, the smooth and creamy spoonfuls, and the way it gently melts on your tongue. It’s like a warm hug in dessert form. Whether you’re serving it chilled after dinner or sneaking a spoon straight from the fridge, this homemade version takes you right back to simpler days, only better. Richer, silkier, and packed with real chocolate flavor, it’s pure comfort.
Behind the Recipe
The idea for this chocolate pudding came during a rainy afternoon when all I craved was something indulgent without the hassle. I remembered how my grandmother used to make it from scratch—no instant mixes, just pantry staples and a little love. Inspired by those memories, I recreated the recipe with a touch more depth and creaminess. It’s now my go-to treat when I want to feel like a kid again, but with the taste buds of an adult.
Recipe Origin or Trivia
Chocolate pudding has roots stretching back to early 19th-century America where it was often baked like a custard. Over time, it evolved into the stovetop version we know and love today. Its silky texture and simple ingredients made it a household staple, especially in the mid-1900s when boxed versions hit the shelves. Still, nothing beats the homemade variety for that rich, real cocoa flavor and melt-in-your-mouth finish.
Why You’ll Love Chocolate Pudding
Here’s why this dessert will be your new favorite.
Versatile: Serve it warm, cold, layered with whipped cream, or as a pie filling. It works every way.
Budget-Friendly: Made from basic pantry staples, it’s big on flavor without breaking the bank.
Quick and Easy: Minimal prep and under 15 minutes on the stove. It’s truly fuss-free.
Customizable: Add spices, top with berries, or layer with crushed cookies for a twist.
Crowd-Pleasing: Kids love it, adults devour it. It disappears fast at any gathering.
Make-Ahead Friendly: Chill it in advance and pull it out when dessert time rolls around.
Great for Leftovers: Store in the fridge and enjoy spoonfuls throughout the week (if it lasts that long!).
Chef’s Pro Tips for Perfect Results
To help your pudding turn out ultra-smooth and decadent every time, keep these tips in mind:
- Whisk constantly while cooking to prevent lumps and avoid burning the bottom.
- Use whole milk for the richest, creamiest texture. Lower-fat milk works but is less indulgent.
- Strain the pudding after cooking for an extra silky finish, especially if lumps sneak in.
- Chill with plastic wrap touching the surface to prevent a skin from forming.
- Add the butter at the end for that final glossy, velvety texture.
Kitchen Tools You’ll Need
You won’t need anything fancy. Just a few basic tools:
Medium saucepan: For cooking the pudding over the stove.
Whisk: To stir everything smooth and avoid clumps.
Measuring cups and spoons: Accuracy matters here.
Rubber spatula: Helps scrape every bit from the pan.
Fine mesh strainer (optional): For that perfect, lump-free texture.
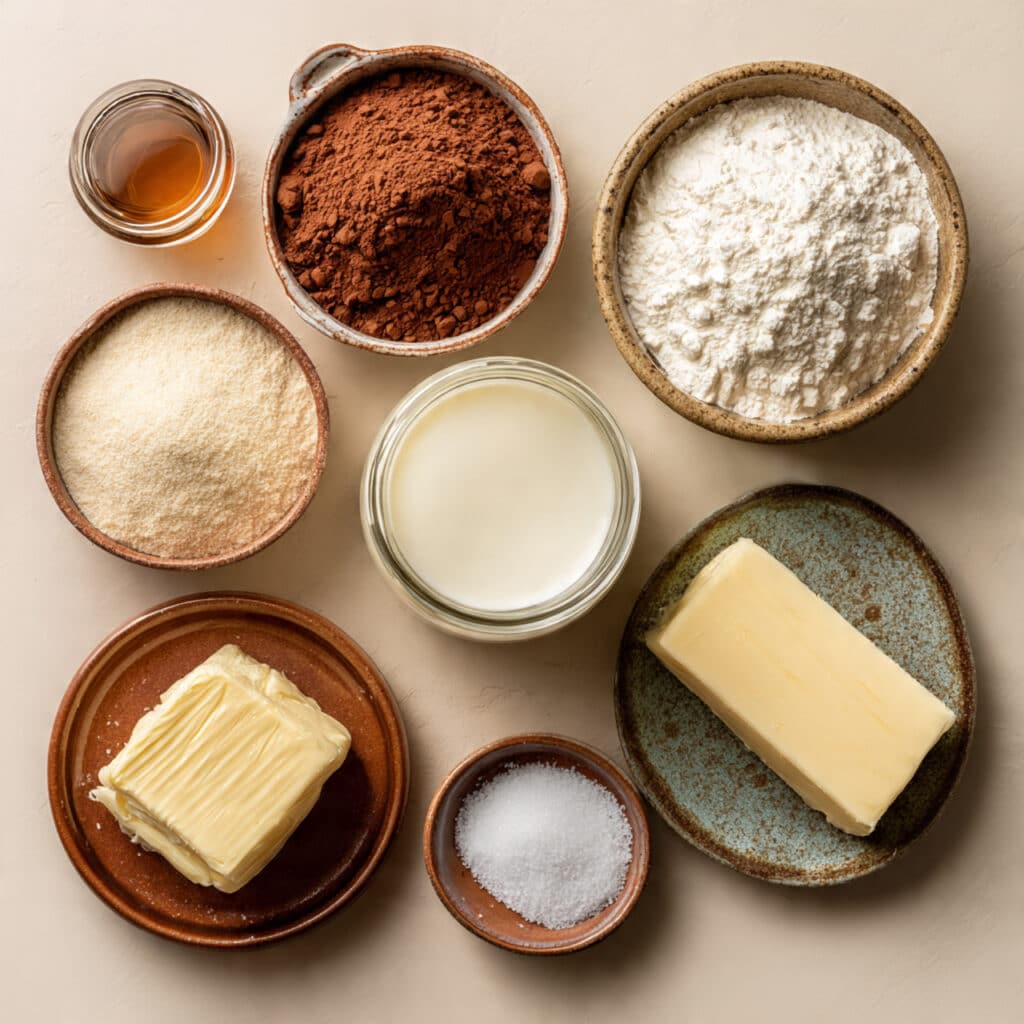
Ingredients in Chocolate Pudding
Each ingredient plays a small but essential role in building the rich flavor and luscious texture.
- Cocoa Powder: 1/3 cup, provides that deep chocolatey base with a slightly bitter edge.
- Cornstarch: 3 tablespoons, thickens the pudding into a perfect spoonable texture.
- Granulated Sugar: 2/3 cup, sweetens and balances the cocoa’s bitterness.
- Salt: 1/4 teaspoon, enhances flavor and rounds everything out.
- Whole Milk: 2 and 3/4 cups, creates the creamy body of the pudding.
- Vanilla Extract: 1 and 1/2 teaspoons, adds warmth and depth.
- Unsalted Butter: 2 tablespoons, stirred in at the end for a glossy, velvety finish.
Ingredient Substitutions
Here’s how you can tweak it depending on what’s in your kitchen:
Whole Milk: Almond or oat milk for dairy-free.
Cornstarch: Arrowroot or tapioca starch as a thickening alternative.
Granulated Sugar: Coconut sugar or maple syrup for a deeper, natural sweetness.
Unsalted Butter: Use dairy-free margarine for a vegan version.
Ingredient Spotlight
Cocoa Powder: This is where the magic starts. Choose a good-quality unsweetened cocoa for the best flavor. Dutch-processed will give a smoother, milder chocolate taste, while natural cocoa will be more intense.
Cornstarch: It might look simple, but it’s the key to that creamy, pudding-like consistency. Without it, you’d have chocolate milk instead of pudding.
Instructions for Making Chocolate Pudding
Let’s walk through the process together. Trust me, once you’ve made it from scratch, you’ll never go back to the box.
1. Preheat Your Equipment:
No preheating needed here, but make sure your saucepan and whisk are ready to go.
2. Combine Ingredients:
In a medium saucepan, whisk together cocoa powder, cornstarch, sugar, and salt. Slowly pour in the milk while whisking constantly until smooth and fully combined.
3. Prepare Your Cooking Vessel:
Place the saucepan over medium heat and keep that whisk moving to avoid lumps.
4. Assemble the Dish:
As the mixture warms up, it’ll begin to thicken. Continue stirring until it comes to a gentle boil.
5. Cook to Perfection:
Let it boil for 1 to 2 minutes while whisking constantly, then remove from heat. Stir in the vanilla extract and butter until fully melted and smooth.
6. Finishing Touches:
Pour the pudding through a fine mesh strainer into a clean bowl if you want extra silkiness. Then, press plastic wrap directly on the surface to prevent a skin from forming.
7. Serve and Enjoy:
Let it cool slightly for warm pudding, or chill in the fridge for a couple of hours for classic, cold pudding. Serve as is or top with whipped cream or berries.
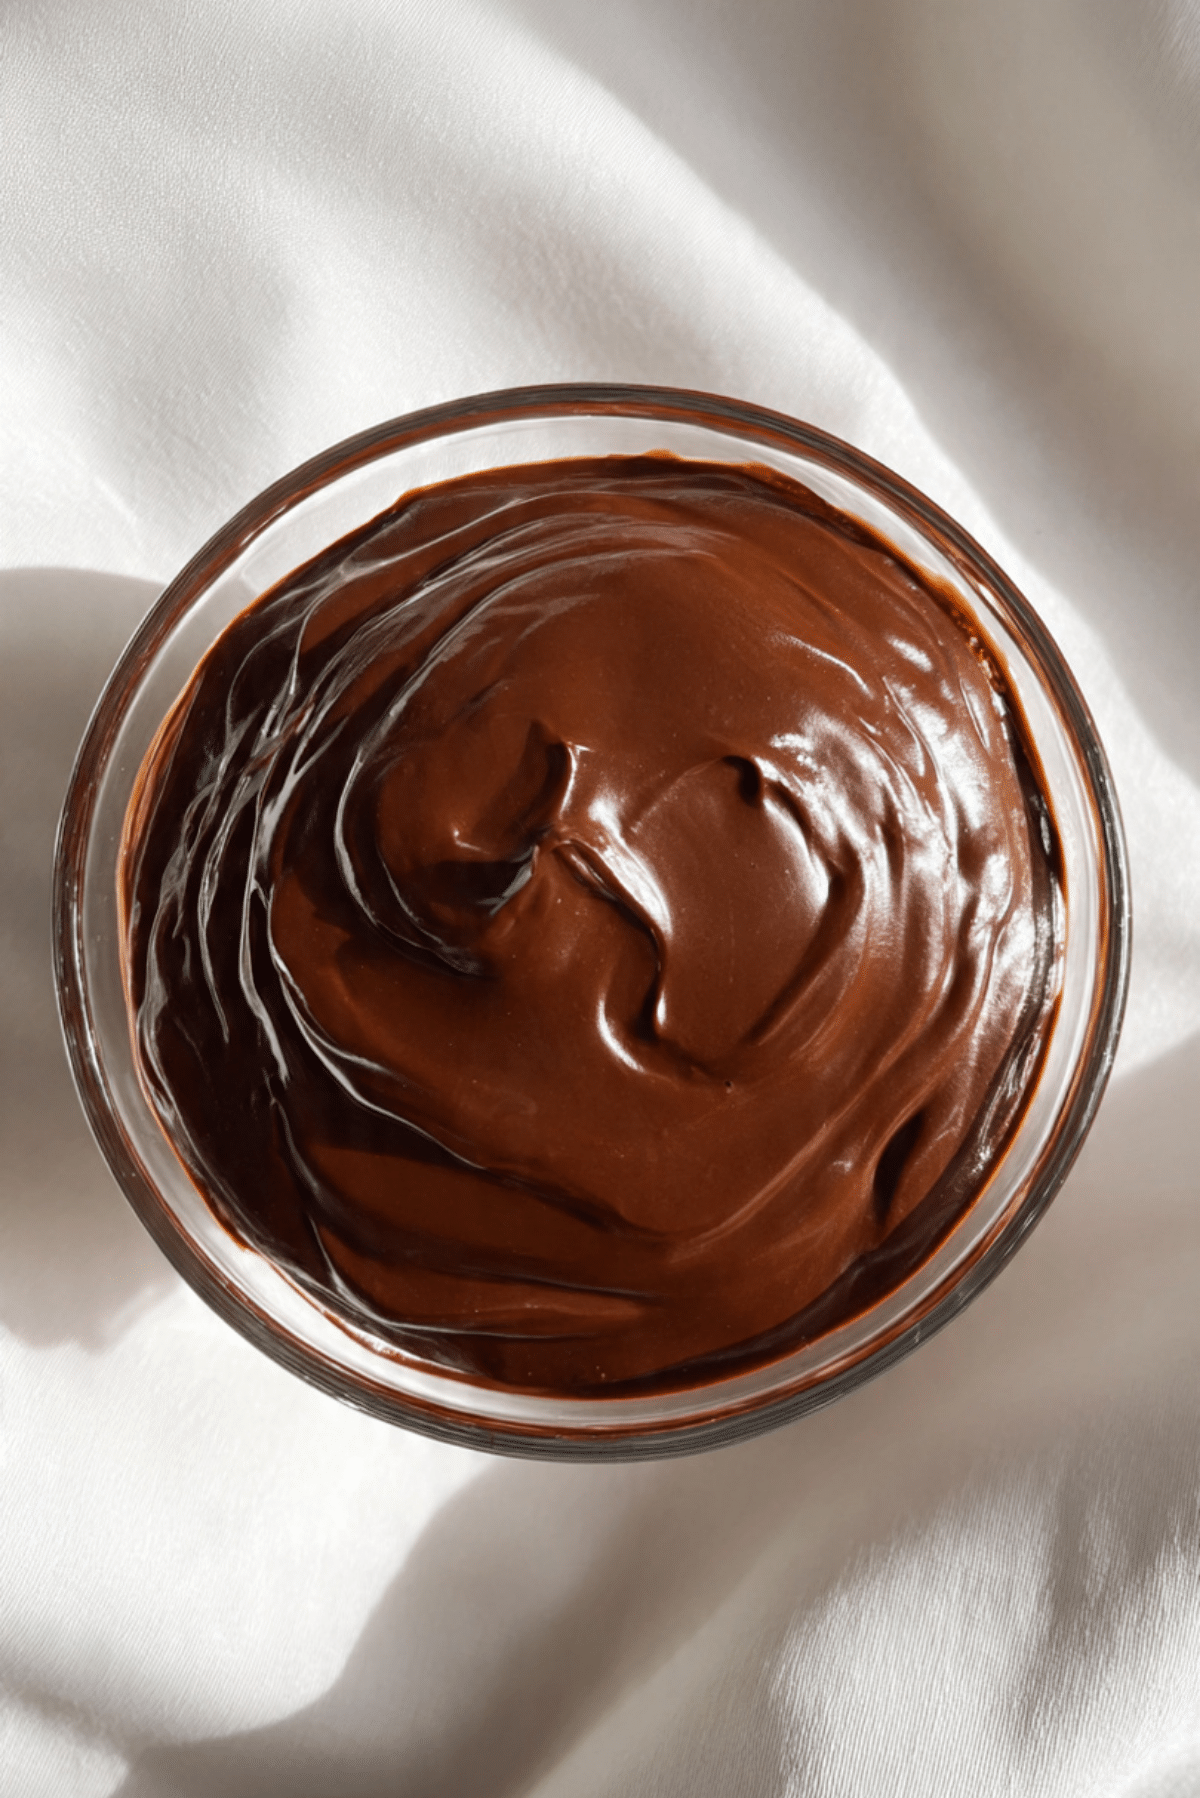
Texture & Flavor Secrets
The magic of this pudding lies in its contrast of textures. It’s silky and creamy but holds its shape just enough on the spoon. The deep chocolate flavor unfolds gently with every bite, and the touch of vanilla adds a soft, aromatic finish. The butter stirred in at the end gives it that final, irresistible richness.
Cooking Tips & Tricks
A few tips to help you master it every single time:
- Use a heavy-bottomed pan to avoid scorching.
- Whisk in the milk gradually for the smoothest blend.
- Don’t walk away from the stove. This pudding needs your full attention.
- Let it chill for at least 2 hours if you want that classic pudding texture.
What to Avoid
Even the easiest recipes can have a few pitfalls. Here’s how to dodge them:
- Don’t skip the cornstarch. Without it, the pudding won’t thicken.
- Avoid overcooking. Boil just for 1 to 2 minutes or it may get too stiff.
- Don’t forget the salt. It brings out the chocolate flavor beautifully.
Nutrition Facts
Servings: 4
Calories per serving: 265
Note: These are approximate values.
Preparation Time
Prep Time: 5 minutes
Cook Time: 10 minutes
Total Time: 15 minutes
Make-Ahead and Storage Tips
Chocolate pudding is a dream when made ahead. Simply cover and chill it in the fridge for up to 4 days. Pressing plastic wrap directly onto the surface prevents that pesky pudding skin. It’s not freezer-friendly though, as the texture may separate.
How to Serve Chocolate Pudding
Get creative! Serve it in small ramekins with a dollop of whipped cream, layer it into mini dessert cups with crushed cookies or fresh berries, or even use it as a filling for pies and parfaits.
Creative Leftover Transformations
If you have any pudding left (unlikely!), here are a few fun ideas:
- Chocolate Pudding Parfaits: Layer with granola, whipped cream, or chopped fruit.
- Frozen Pudding Pops: Pour into molds and freeze for creamy frozen treats.
- Chocolate Tart Filling: Use as the base for a no-bake tart with a graham cracker crust.
Additional Tips
- Let the pudding rest for a few minutes before chilling so it sets smoothly.
- Sprinkle a bit of sea salt on top before serving for a gourmet touch.
- For deeper flavor, stir in a little espresso powder with the cocoa.
Make It a Showstopper
Presentation makes all the difference. Serve it in clear glass cups to show off that glossy, rich texture. Top with shaved chocolate, crushed nuts, or a dollop of cream and a mint leaf for that Instagram-worthy finish.
Variations to Try
- Mexican Chocolate Pudding: Add a pinch of cinnamon and a dash of chili powder.
- Peanut Butter Swirl: Stir in a spoonful of creamy peanut butter at the end.
- Mocha Version: Mix in a teaspoon of instant coffee or espresso powder.
- Vegan Chocolate Pudding: Use plant-based milk and margarine.
- Dark Chocolate Boost: Add chopped dark chocolate along with the butter for extra richness.
FAQ’s
1. Can I use low-fat milk?
Yes, but the pudding will be slightly less creamy.
2. Can I make this dairy-free?
Absolutely. Use plant-based milk and vegan butter or margarine.
3. How long does it keep in the fridge?
Up to 4 days when properly covered.
4. Can I freeze chocolate pudding?
It’s not recommended. The texture may separate when thawed.
5. Can I double the recipe?
Yes, just make sure to whisk thoroughly to avoid lumps.
6. Is it gluten-free?
Yes, this recipe is naturally gluten-free.
7. Can I use Dutch-process cocoa?
Yes, it will give a smoother and less acidic flavor.
8. What if I don’t have cornstarch?
Try arrowroot or tapioca starch as a substitute.
9. Can I add chocolate chips?
Sure! Stir them in at the end for melty bites.
10. How do I prevent a skin from forming?
Place plastic wrap directly on the surface while chilling.
Conclusion
Homemade chocolate pudding is one of those simple pleasures that never gets old. Creamy, rich, and made with real ingredients, it hits all the right notes. Whether you’re reliving childhood memories or making new ones, this recipe is a timeless treat that always satisfies. So grab your whisk and let the magic begin—because trust me, this one’s worth every bite.
Print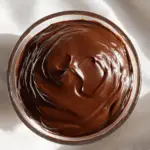
Chocolate Pudding
- Prep Time: 5 minutes
- Cook Time: 10 minutes
- Total Time: 15 minutes
- Yield: 4 servings 1x
- Category: Dessert
- Method: Stovetop
- Cuisine: American
- Diet: Vegetarian
Description
This silky, homemade chocolate pudding is rich, creamy, and packed with deep cocoa flavor. Perfect for a nostalgic dessert or a make-ahead treat everyone will love.
Ingredients
- 1/3 cup cocoa powder
- 3 tablespoons cornstarch
- 2/3 cup granulated sugar
- 1/4 teaspoon salt
- 2 and 3/4 cups whole milk
- 1 and 1/2 teaspoons vanilla extract
- 2 tablespoons unsalted butter
Instructions
- In a medium saucepan, whisk together cocoa powder, cornstarch, sugar, and salt.
- Slowly add the milk while whisking constantly until smooth.
- Place the saucepan over medium heat and continue whisking as the mixture thickens.
- Bring to a gentle boil and cook for 1 to 2 minutes, continuing to stir.
- Remove from heat and stir in vanilla extract and butter until smooth.
- Strain through a mesh sieve if desired and pour into a bowl.
- Press plastic wrap directly onto the surface and chill for 2 hours or serve warm.
Notes
- Use whole milk for a richer texture.
- For extra silkiness, strain the pudding before chilling.
- Chill with plastic wrap touching the surface to avoid skin forming.
- Add a pinch of cinnamon or espresso powder for flavor twists.
Nutrition
- Serving Size: 1 serving
- Calories: 265
- Sugar: 29g
- Sodium: 140mg
- Fat: 10g
- Saturated Fat: 6g
- Unsaturated Fat: 3g
- Trans Fat: 0g
- Carbohydrates: 39g
- Fiber: 2g
- Protein: 5g
- Cholesterol: 20mg
Keywords: chocolate pudding, homemade pudding, easy dessert, creamy chocolate dessert, stovetop pudding