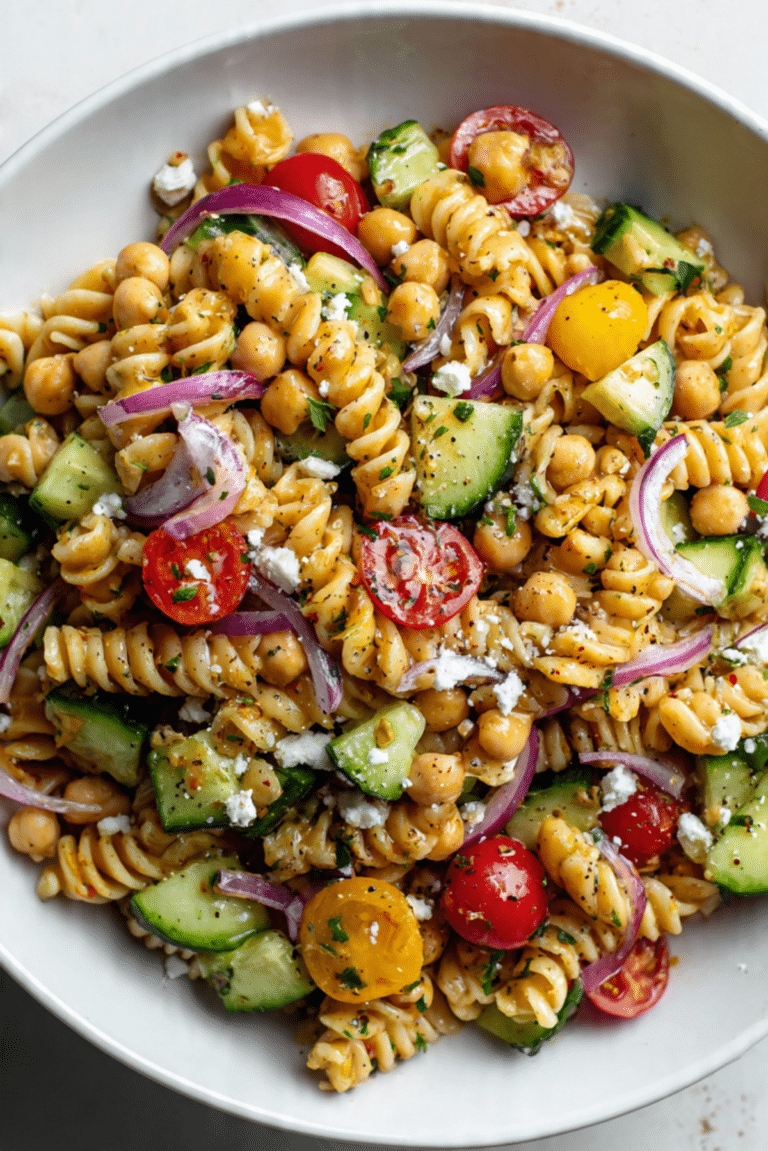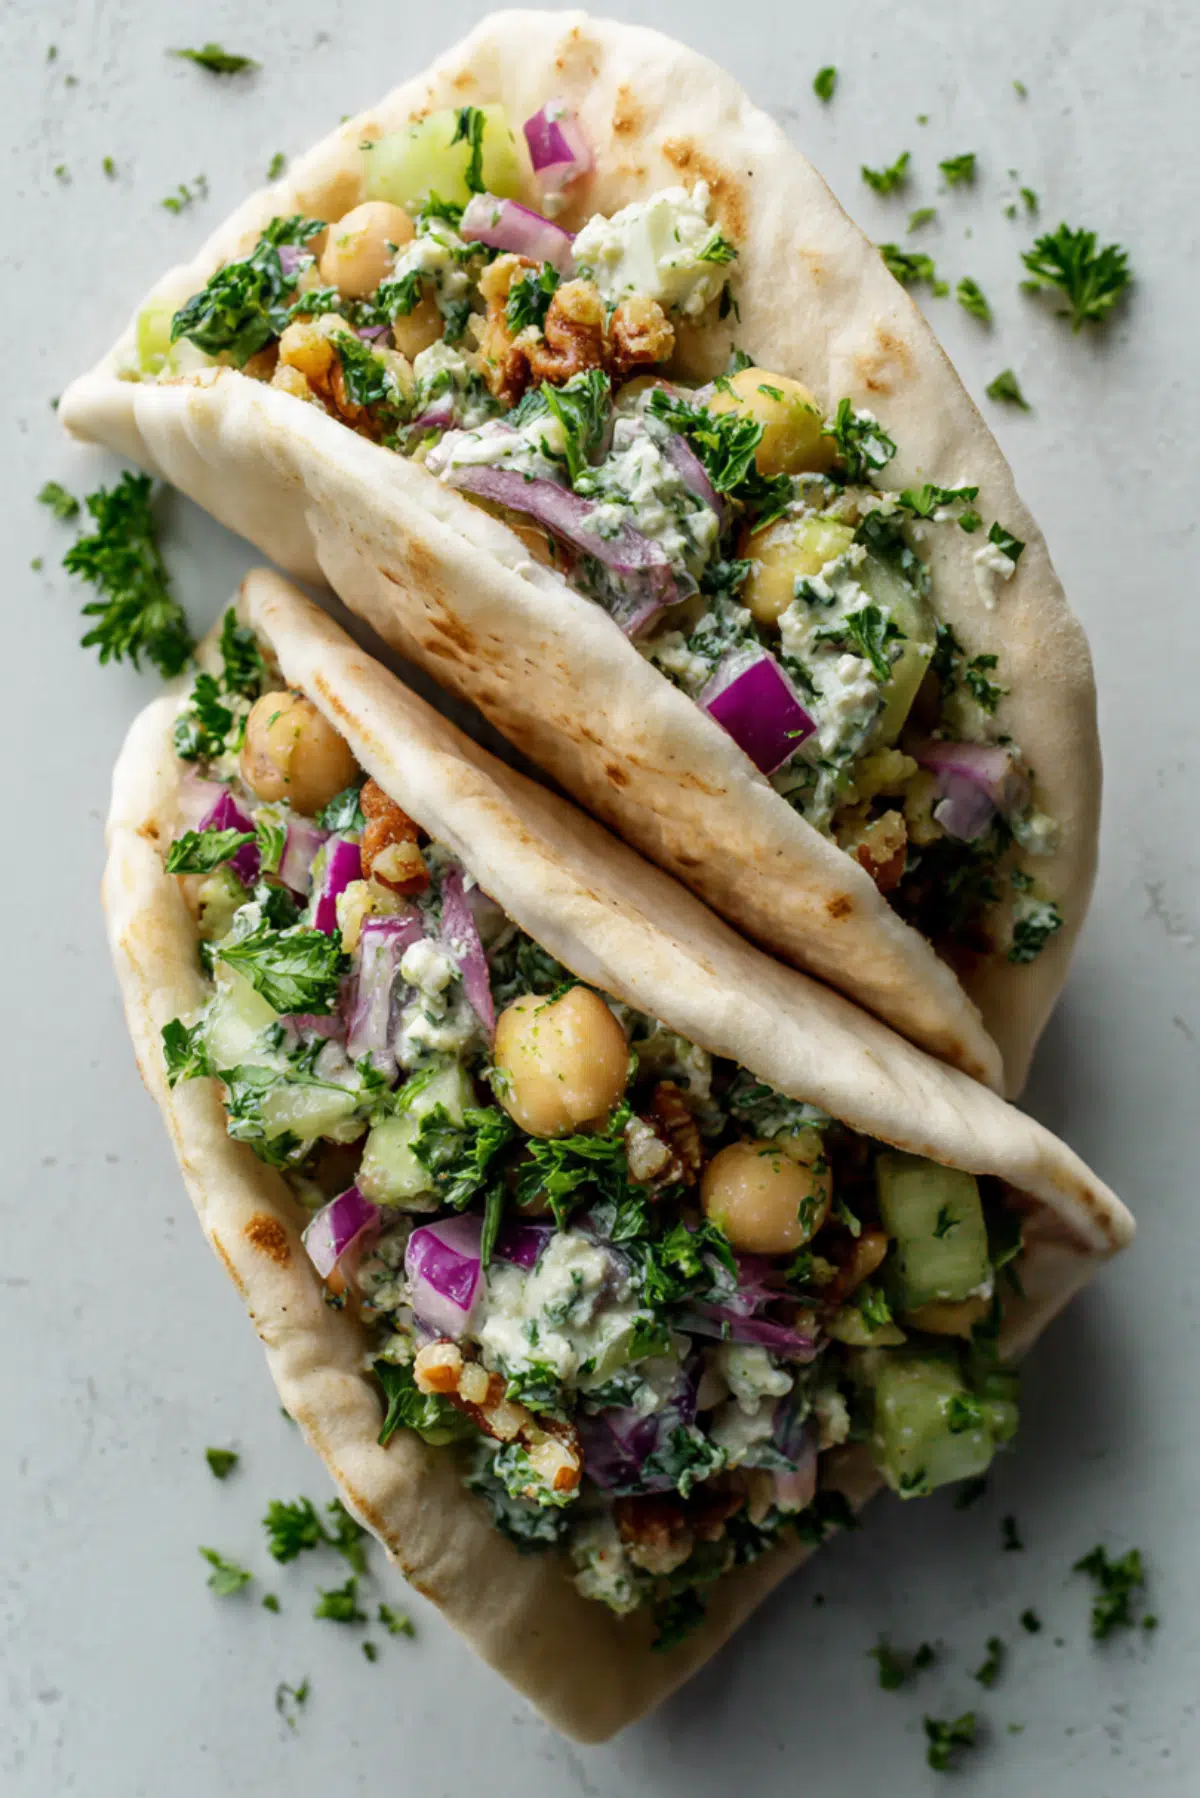
Chickpea Walnut Salad Stuffed Pitas
There is something incredibly comforting about holding a warm pita filled with a creamy, crunchy, flavor-packed filling. The first bite gives you that soft bread, followed by the nutty crunch of walnuts and the bright freshness of herbs. Trust me, you’re going to love this. It is simple, satisfying, and feels like a little homemade treat that comes together faster than you expect.
A Fresh and Hearty Bite That Feels Like a Hug
When you crave something filling but still fresh, this dish hits that perfect middle ground. The creamy chickpeas blend beautifully with the crunch of walnuts and celery, while a hint of lemon lifts everything up. It feels wholesome but never boring, and honestly, it is one of those meals you keep coming back to.
A Little Story Behind This Simple Favorite
This kind of filling draws inspiration from classic deli-style salads, but with a plant-based twist that has roots in Mediterranean flavors. Chickpeas have been a staple in Middle Eastern and Mediterranean kitchens for centuries, often paired with olive oil, herbs, and citrus. Turning them into a creamy salad tucked into pita bread feels like a modern take on something deeply traditional.
Why This Recipe Always Works
Before we jump into making it, let me tell you why this one is such a keeper.
Versatile: You can serve it for lunch, dinner, or even a quick snack. It fits into any part of your day.
Budget-Friendly: Chickpeas and pantry staples keep this affordable without sacrificing flavor.
Quick and Easy: You can have everything ready in under 20 minutes.
Customizable: Add your favorite veggies or spices to make it your own.
Crowd-Pleasing: Even people who are unsure about plant-based meals end up loving it.
Make-Ahead Friendly: The filling actually tastes better after sitting for a bit.
Great for Leftovers: It keeps well and can be used in wraps, bowls, or even on toast.
Insider Tips for the Best Results
A few small tricks can make a big difference here.
- Lightly mash the chickpeas instead of fully pureeing them, this keeps a nice texture.
- Toast the walnuts for a couple of minutes to bring out their flavor.
- Let the mixture chill for at least 10 minutes before serving for better taste.
- Use fresh lemon juice instead of bottled for a brighter flavor.
Kitchen Tools You Will Need
Before we dive in, gather these simple tools.
Mixing Bowl: For combining all the ingredients easily.
Fork or Potato Masher: To mash the chickpeas to the perfect texture.
Knife: For chopping vegetables finely.
Cutting Board: Keeps everything organized and clean.
Spoon or Spatula: For mixing everything together smoothly.
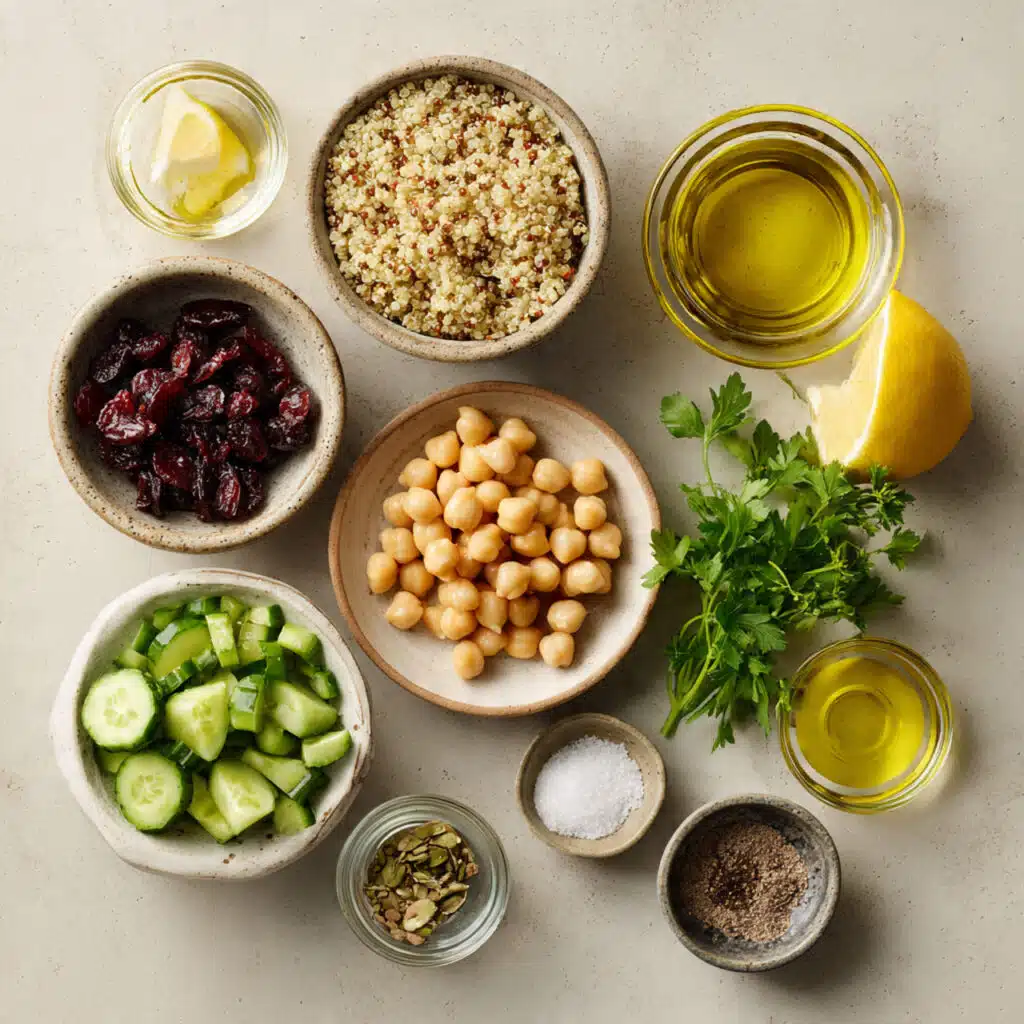
Ingredients That Make It Shine
Every ingredient plays its part, and together they create something really special.
- Chickpeas: 2 cups cooked or canned, drained and rinsed, they form the creamy base.
- Walnuts: 1/2 cup chopped, they add crunch and a rich nutty flavor.
- Celery: 1/2 cup diced, brings freshness and a crisp bite.
- Red Onion: 1/4 cup finely chopped, adds a sharp, slightly sweet flavor.
- Fresh Parsley: 1/4 cup chopped, gives brightness and color.
- Mayonnaise: 1/3 cup, creates the creamy texture that binds everything.
- Lemon Juice: 2 tablespoons, adds a fresh, tangy kick.
- Olive Oil: 1 tablespoon, enhances richness and smoothness.
- Salt: 1/2 teaspoon, balances all the flavors.
- Black Pepper: 1/4 teaspoon, adds a gentle heat.
- Pita Bread: 4 pieces, soft and perfect for stuffing.
Easy Swaps You Can Try
If you are missing something, here are a few simple swaps.
Chickpeas: White beans can be used instead.
Walnuts: Pecans or almonds work well too.
Mayonnaise: Greek yogurt or a plant-based alternative can replace it.
Parsley: Cilantro gives a slightly different but fresh flavor.
Spotlight on Key Ingredients
Let’s take a closer look at what makes this dish special.
Chickpeas: They are creamy, hearty, and absorb flavors beautifully.
Walnuts: Their crunch and slight bitterness balance the creaminess perfectly.
Let’s Bring It All Together
Now comes the fun part, making it step by step.
- Preheat Your Equipment: No cooking needed, but if toasting walnuts, lightly warm a pan over medium heat.
- Combine Ingredients: In a mixing bowl, mash the chickpeas with a fork until slightly chunky.
- Prepare Your Cooking Vessel: If using toasted walnuts, remove them from heat and let cool.
- Assemble the Dish: Add walnuts, celery, red onion, parsley, mayonnaise, lemon juice, olive oil, salt, and pepper to the chickpeas. Mix until well combined.
- Cook to Perfection: Let the mixture rest for about 10 minutes so the flavors blend.
- Finishing Touches: Taste and adjust seasoning if needed.
- Serve and Enjoy: Stuff the mixture into pita bread and enjoy immediately.
A Perfect Balance of Texture and Flavor
This is where everything comes together beautifully. You get creamy chickpeas, crunchy walnuts, crisp celery, and soft pita all in one bite. The lemon juice cuts through the richness, while the herbs add a fresh, vibrant note. It is a mix that keeps every bite interesting.
Helpful Tips for Success
Here are a few extra tips to make things even smoother.
- Use freshly chopped vegetables for the best crunch.
- Do not over mash the chickpeas, texture is key.
- Chill the mixture for deeper flavor.
What to Avoid While Making It
A few common mistakes can be easily avoided.
- Overmixing can make the texture too soft, keep it slightly chunky.
- Adding too much mayonnaise can overpower the flavors, stick to the measurements.
- Skipping seasoning can make it taste flat, always taste before serving.
Nutrition Snapshot You Should Know
Servings: 4
Calories per serving: 320
Note: These are approximate values.
Time Breakdown for This Recipe
Prep Time: 15 minutes
Cook Time: 5 minutes
Total Time: 20 minutes
Make-Ahead and Storage Tips
If you are planning ahead, you are in luck. The filling can be made a day in advance and stored in the fridge in an airtight container. It actually tastes better the next day. If you have leftovers, keep them refrigerated and use within 3 days. Avoid freezing as the texture may change.
Serving Ideas to Make It Even Better
Serve these stuffed pitas with a side of fresh salad, roasted vegetables, or even a light soup. You can also open the pita and turn it into a loaded sandwich with extra greens.
Creative Ways to Use Leftovers
Leftovers are where things get fun.
Spread it on toast for a quick breakfast.
Use it as a filling for wraps or lettuce cups.
Add it to a grain bowl for extra protein.
Extra Tips for the Best Experience
A squeeze of extra lemon right before serving makes a big difference. You can also drizzle a bit of olive oil on top for added richness.
Make It Look as Good as It Tastes
Serve the pitas slightly open so the filling is visible. Sprinkle a bit of parsley on top for color. A simple presentation makes it feel even more inviting.
Variations You Can Explore
Try adding grated carrots for sweetness.
Mix in diced pickles for a tangy twist.
Add a pinch of paprika or cumin for warmth.
Use whole wheat pita for a nuttier flavor.
FAQ’s
Q1: Can I make this ahead of time?
Yes, and it actually tastes better after resting.
Q2: Can I skip the mayonnaise?
Yes, you can use yogurt or a plant-based option.
Q3: How long does it last in the fridge?
Up to 3 days in an airtight container.
Q4: Can I use dried chickpeas?
Yes, just cook them first until tender.
Q5: Is this suitable for meal prep?
Absolutely, it is perfect for that.
Q6: Can I add more vegetables?
Yes, cucumber or carrots work great.
Q7: What bread can I use instead of pita?
Wraps or sandwich bread work fine.
Q8: Can I make it spicy?
Add chili flakes or a bit of hot sauce.
Q9: Is it filling enough for dinner?
Yes, especially with a side dish.
Q10: Can kids enjoy this?
Definitely, it is mild and creamy.
A Simple Dish Worth Making Again and Again
This one is a total game-changer when you want something quick, wholesome, and satisfying. Let me tell you, it’s worth every bite. Once you try it, it might just become one of your go-to meals, the kind you make without even thinking twice.
Print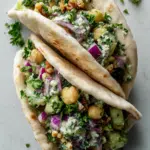
Chickpea Walnut Salad Stuffed Pitas
- Prep Time: 15 minutes
- Cook Time: 5 minutes
- Total Time: 20 minutes
- Yield: 4 servings 1x
- Category: Lunch
- Method: No-cook
- Cuisine: Mediterranean-inspired
- Diet: Vegetarian
Description
A creamy and crunchy chickpea walnut salad tucked into soft pita bread, packed with fresh herbs and a bright lemony flavor.
Ingredients
- 2 cups chickpeas, cooked or canned, drained and rinsed
- 1/2 cup walnuts, chopped
- 1/2 cup celery, diced
- 1/4 cup red onion, finely chopped
- 1/4 cup fresh parsley, chopped
- 1/3 cup mayonnaise
- 2 tablespoons lemon juice
- 1 tablespoon olive oil
- 1/2 teaspoon salt
- 1/4 teaspoon black pepper
- 4 pita bread
Instructions
- Lightly mash the chickpeas in a mixing bowl using a fork until slightly chunky.
- If desired, toast the walnuts in a pan over medium heat for a few minutes, then let them cool.
- Add chopped walnuts, diced celery, red onion, and parsley to the chickpeas.
- Mix in mayonnaise, lemon juice, olive oil, salt, and black pepper until well combined.
- Let the mixture rest for about 10 minutes to allow the flavors to blend.
- Taste and adjust seasoning if needed.
- Stuff the mixture into pita bread and serve immediately.
Notes
- Do not over mash the chickpeas, keeping some texture makes the salad more satisfying.
- Chill the mixture briefly before serving for better flavor.
- You can replace mayonnaise with yogurt or a plant-based alternative.
Nutrition
- Serving Size: 1 stuffed pita
- Calories: 320
- Sugar: 3g
- Sodium: 420mg
- Fat: 18g
- Saturated Fat: 3g
- Unsaturated Fat: 13g
- Trans Fat: 0g
- Carbohydrates: 32g
- Fiber: 7g
- Protein: 10g
- Cholesterol: 10mg
Keywords: chickpea walnut salad stuffed pitas, chickpea pita sandwich, vegetarian pita filling, healthy chickpea salad, easy lunch ideas