Mosaic Cake
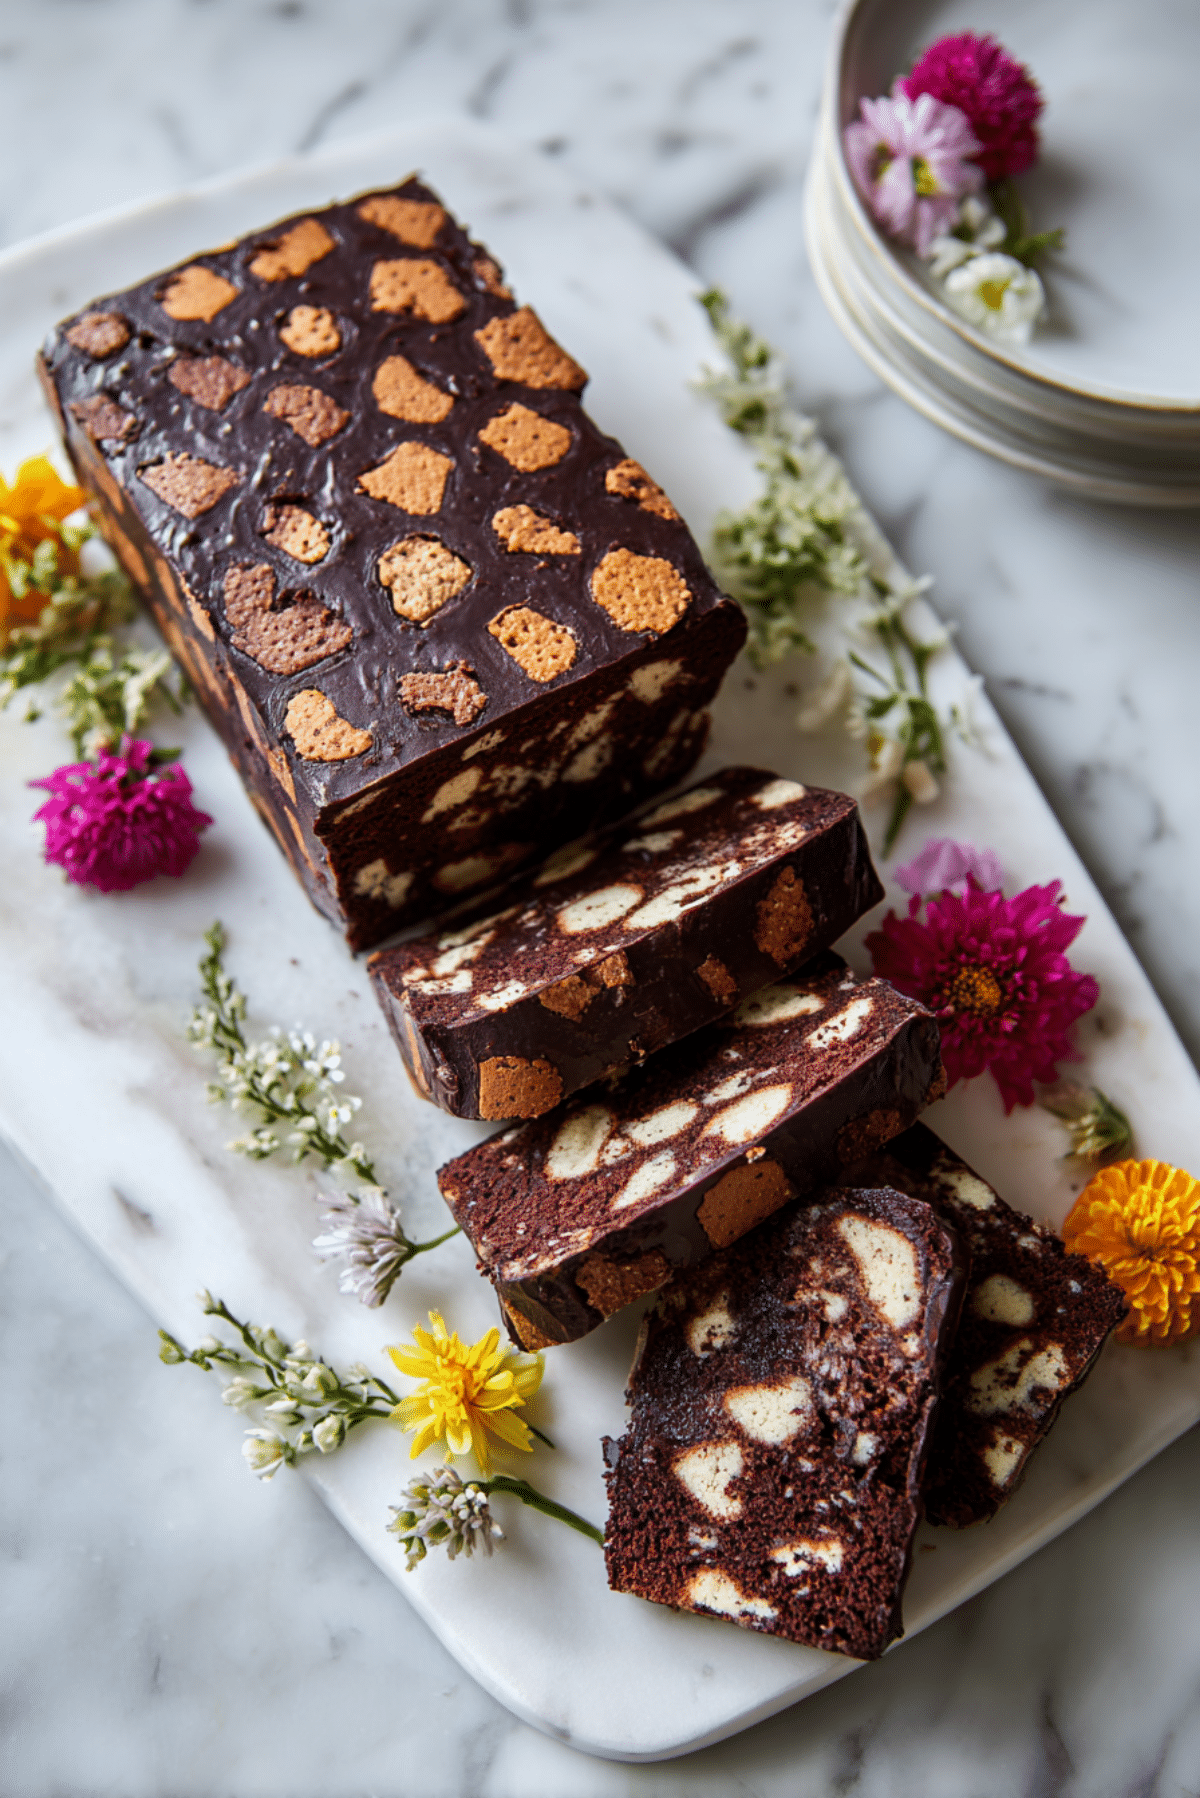
There’s something deeply comforting about a dessert that comes together with just a few pantry staples and a whole lot of love. Mosaic Cake is that kind of sweet magic. With its beautiful chocolate coating and colorful biscuit mosaic hidden inside, each slice looks like a stained glass window and tastes like a bite of home. Rich, nostalgic, and entirely no-bake, this cake is a staple of childhoods and cozy kitchens everywhere. Trust me, you’re going to love this.
Behind the Recipe
I still remember the first time I made Mosaic Cake. I was maybe ten, standing on tiptoes to reach the counter while my mom broke biscuits into chunks and I snuck a few pieces when she wasn’t looking. We stirred everything together in an old ceramic bowl, poured it into a loaf pan, and waited impatiently as it set in the fridge. When it was finally sliced, I was mesmerized by the beautiful patterns. That memory has stuck with me, and now, every time I make it, it feels like a warm hug from the past.
Recipe Origin or Trivia
This delightful dessert has roots in many Mediterranean and Eastern European kitchens. Known as “Chocolate Salami” in Italy and Portugal, or “Mozaik Pasta” in Turkey, it’s been adored across cultures for generations. The concept is simple: crushed dry biscuits held together by a chocolate mixture and chilled until firm. What makes it special is the variety of textures and the surprise visual appeal when sliced. Whether served during holidays or just as a sweet treat after dinner, it never fails to charm.
Why You’ll Love Mosaic Cake
Whether you’re making it for the first time or the fiftieth, here’s why Mosaic Cake deserves a place in your kitchen:
Versatile: You can add nuts, dried fruits, or even swap in different kinds of biscuits. It’s a blank canvas for creativity.
Budget-Friendly: All you need are basic pantry staples, so it won’t break the bank.
Quick and Easy: No oven, no fuss. Mix, chill, slice, and enjoy.
Customizable: From the sweetness to the texture, you can tailor it to suit your taste perfectly.
Crowd-Pleasing: That eye-catching mosaic pattern and rich flavor always get compliments.
Make-Ahead Friendly: You can prepare it a day in advance and let it rest in the fridge until you’re ready to serve.
Great for Leftovers: It keeps well for days and the flavors even improve over time.
Chef’s Pro Tips for Perfect Results
Even a no-bake cake deserves a little finesse. Here are a few tips to get yours just right:
- Use a mix of biscuit sizes for texture contrast, but avoid crumbling them too finely.
- Line your loaf pan with parchment paper for easy removal and a clean finish.
- Let the cake chill overnight for the best structure and flavor.
- Use good-quality cocoa powder to give the chocolate a deeper, richer taste.
- If using nuts or dried fruit, toast them lightly beforehand for enhanced flavor.
Kitchen Tools You’ll Need
You won’t need much, just a few simple tools to get started:
Mixing Bowl: To combine the chocolate mixture and biscuit pieces.
Loaf Pan: Ideal shape for that classic mosaic slice look.
Parchment Paper: Helps with lifting the cake out easily after chilling.
Spatula: For mixing and smoothing the top.
Knife: A sharp one for clean slices and a wow-worthy presentation.
Ingredients in Mosaic Cake
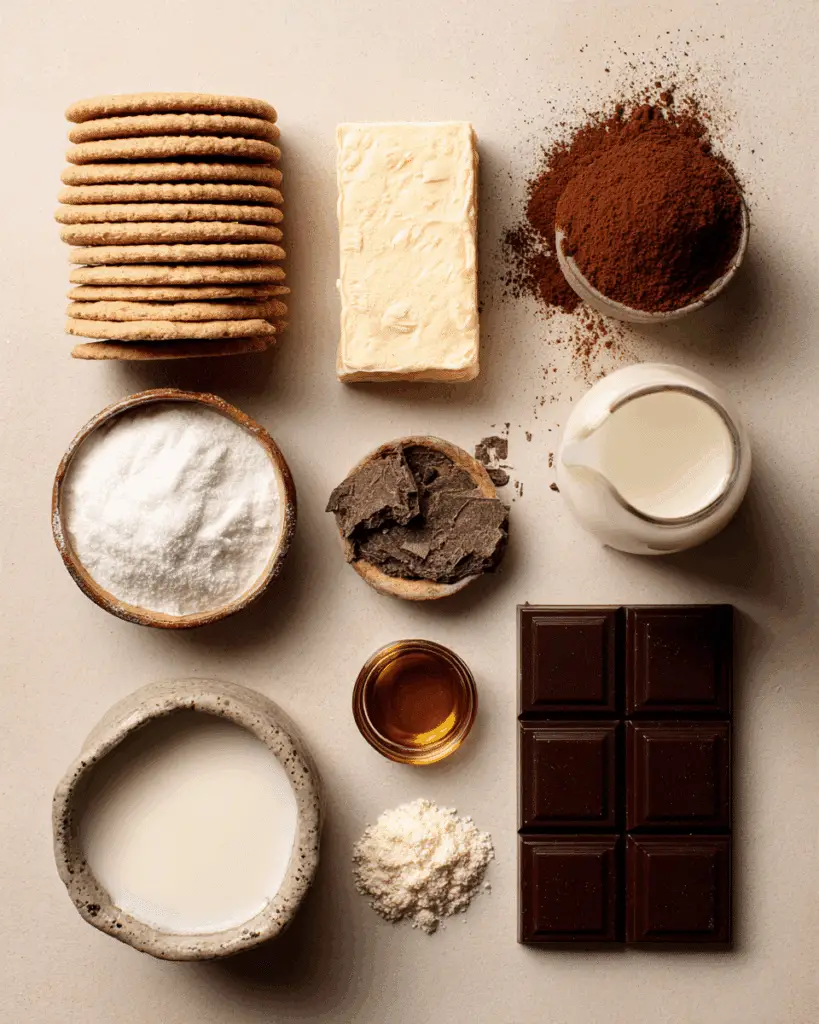
The beauty of this cake lies in how everyday ingredients come together into something unforgettable.
- Tea Biscuits or Digestive Cookies: 300 grams Crushed into uneven chunks, these form the foundation and texture of the mosaic.
- Unsalted Butter: 150 grams Melted and mixed in for richness and smooth binding.
- Cocoa Powder: 5 tablespoons Adds deep chocolate flavor and that signature dark color.
- Granulated Sugar: 100 grams Sweetens the mix and balances the cocoa’s bitterness.
- Milk: 100 milliliters Brings the mixture together into a pourable, cohesive texture.
- Vanilla Extract: 1 teaspoon Adds warmth and rounds out the flavors.
- Dark Chocolate (optional glaze): 100 grams Melted and poured over the cake for a glossy, elegant finish.
Ingredient Substitutions
You can easily swap things out to suit your pantry or dietary needs.
Butter: Use margarine or coconut oil for a dairy-free option.
Sugar: Swap in honey or maple syrup, adjusting the amount slightly to taste.
Milk: Any plant-based milk like almond or oat milk works great.
Vanilla Extract: Try almond extract or a dash of orange zest for a fun twist.
Biscuits: Graham crackers or any plain, dry cookie will work beautifully.
Ingredient Spotlight
Tea Biscuits: These humble pantry staples soak up the chocolate mixture without getting soggy, providing that signature crunch in every bite.
Cocoa Powder: The heart of the chocolate flavor, unsweetened cocoa gives the dessert its deep, slightly bitter backbone which balances the sweetness.
Instructions for Making Mosaic Cake
Now comes the fun part. Let’s turn those ingredients into something stunning.
- Preheat Your Equipment:
No oven needed! Just line a loaf pan with parchment paper and set it aside. - Combine Ingredients:
In a large bowl, combine melted butter, cocoa powder, sugar, milk, and vanilla. Stir until smooth and well blended. - Prepare Your Cooking Vessel:
Crush the biscuits into chunks and add them to the chocolate mixture. Fold everything together gently until all pieces are coated. - Assemble the Dish:
Spoon the mixture into your lined loaf pan. Press down gently with a spatula to create an even layer. - Cook to Perfection:
Since this is no-bake, the “cooking” happens in the fridge. Chill the cake for at least 4 hours, or overnight for best results. - Finishing Touches:
If desired, melt dark chocolate and pour it over the chilled cake. Return to the fridge for another 15 minutes to set the glaze. - Serve and Enjoy:
Slice with a sharp knife and marvel at those mosaic patterns. Serve cold for the perfect texture.
Texture & Flavor Secrets
Every bite of this cake offers contrast — the crunch of biscuit against the smoothness of the chocolate binder, the slight bitterness of cocoa balanced by sweet sugar, and that touch of vanilla bringing it all together. If you add nuts or dried fruit, you’ll get bursts of chewiness or nutty richness that make each bite unique and exciting.
Cooking Tips & Tricks
Little tips go a long way in perfecting this classic:
- Chill overnight for a firmer, cleaner slice.
- Use parchment paper for a flawless lift from the pan.
- Add a splash of espresso to deepen the chocolate flavor.
- Toast nuts before adding for extra crunch and aroma.
What to Avoid
To keep things smooth, here are a few common pitfalls to steer clear of:
- Over-crushing biscuits: Keep them in chunks for that classic mosaic effect.
- Too much liquid: It’ll make the cake soggy and hard to set.
- Skipping chill time: It needs time to firm up for slicing.
- Using flavored cookies: Stick to plain for best flavor balance.
Nutrition Facts
Servings: 10
Calories per serving: 290
Note: These are approximate values.
Preparation Time
Prep Time: 15 minutes
Cook Time: 0 minutes
Total Time: 4 hours 15 minutes (includes chilling)
Make-Ahead and Storage Tips
This cake was made for prepping ahead. You can easily make it the night before and store it covered in the fridge for up to 5 days. For longer storage, wrap slices individually and freeze for up to a month. Thaw in the fridge for a few hours before serving. It’s a great dessert to keep on hand for surprise guests or sudden cravings.
How to Serve Mosaic Cake
Slice it cleanly and serve cold. Add a dollop of whipped cream or a scoop of vanilla ice cream if you’re feeling indulgent. Fresh berries or a light dusting of powdered sugar can elevate the presentation without much extra work. It also pairs beautifully with coffee or a strong cup of tea.
Creative Leftover Transformations
If you’ve got extra slices, don’t let them go to waste. Here are some fun ideas:
- Crumble and use as a topping over ice cream or yogurt.
- Sandwich a thin slice between cookies for a dessert “slider.”
- Chop and mix into softened ice cream, then refreeze for a crunchy, chocolatey surprise.
Additional Tips
Want to take it up a notch? Here are a few more secrets:
- Add a teaspoon of instant coffee to the chocolate mix for depth.
- Sprinkle crushed pistachios or sea salt on top of the glaze for a fancy finish.
- If using dark chocolate glaze, stir in a bit of cream for a silkier texture.
Make It a Showstopper
Presentation counts, especially for such a visually striking dessert. Use a sharp knife for clean slices, wipe between cuts, and arrange the slices slightly overlapping on a beautiful serving platter. A drizzle of melted chocolate or dusting of cocoa powder adds that final touch of flair.
Variations to Try
- Nutty Mosaic Cake: Add chopped toasted hazelnuts or walnuts to the mix.
- Fruity Twist: Mix in chopped dried apricots or raisins for chewiness.
- Coconut Dream: Sprinkle shredded coconut into the base and on top.
- Spiced Delight: Add a pinch of cinnamon or cardamom for warmth.
- White Chocolate Version: Use melted white chocolate instead of dark for a lighter, sweeter take.
FAQ’s
Q1: Can I make this without sugar?
A1: Yes, you can use sugar alternatives like stevia or erythritol, but adjust to taste.
Q2: What biscuits work best?
A2: Plain tea biscuits, digestives, or graham crackers all hold up well.
Q3: Is this cake freezer-friendly?
A3: Absolutely. Slice and wrap tightly before freezing.
Q4: Can I use fresh fruit instead of dried?
A4: Fresh fruit may release moisture and affect texture, so dried is best.
Q5: Can I skip the glaze?
A5: Of course! It’s optional but adds a nice finish.
Q6: What’s the best way to slice it cleanly?
A6: Use a sharp knife and run it under warm water between cuts.
Q7: Can I make this vegan?
A7: Yes, use plant-based milk and butter substitutes.
Q8: How long should it chill?
A8: At least 4 hours, but overnight is even better.
Q9: Is this suitable for kids?
A9: Definitely! It’s kid-approved and fun to make together.
Q10: Can I make it in different shapes?
A10: Try a round cake mold or silicone muffin molds for individual portions.
Conclusion
Mosaic Cake is more than just dessert. It’s a nostalgic journey, a no-bake miracle, and a visual treat all rolled into one. With its simple steps and stunning results, it’s perfect for beginners and seasoned bakers alike. Whether you’re serving it at a gathering or sneaking a midnight slice, it’s bound to bring joy. So go ahead, whip up a loaf, and let those sweet memories unfold in every bite.
Print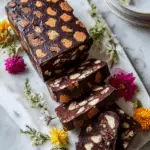
Mosaic Cake
- Prep Time: 15 minutes
- Cook Time: 0 minutes
- Total Time: 4 hours 15 minutes
- Yield: 10 servings 1x
- Category: Dessert
- Method: No-Bake
- Cuisine: Mediterranean
- Diet: Vegetarian
Description
This no-bake Mosaic Cake is a nostalgic chocolate dessert made with crushed tea biscuits and a rich cocoa mixture, chilled to perfection and sliced to reveal a stunning mosaic pattern inside.
Ingredients
- 300 grams tea biscuits or digestive cookies
- 150 grams unsalted butter, melted
- 5 tablespoons cocoa powder
- 100 grams granulated sugar
- 100 milliliters milk
- 1 teaspoon vanilla extract
- 100 grams dark chocolate (optional glaze)
Instructions
- Line a loaf pan with parchment paper and set aside.
- In a large mixing bowl, combine the melted butter, cocoa powder, sugar, milk, and vanilla extract. Stir until smooth and well blended.
- Break the biscuits into chunks and fold them into the chocolate mixture until fully coated.
- Spoon the mixture into the prepared loaf pan and press down gently to form an even layer.
- Chill in the refrigerator for at least 4 hours or overnight until firm.
- If using glaze, melt dark chocolate and pour over the chilled cake. Chill for another 15 minutes to set.
- Slice and serve cold for best texture and flavor.
Notes
- Use a mix of biscuit sizes for better texture.
- Letting the cake chill overnight gives cleaner slices and deeper flavor.
- For a vegan version, use plant-based milk and butter alternatives.
- Add toasted nuts or dried fruit for extra flavor and crunch.
Nutrition
- Serving Size: 1 slice
- Calories: 290
- Sugar: 18g
- Sodium: 90mg
- Fat: 16g
- Saturated Fat: 9g
- Unsaturated Fat: 6g
- Trans Fat: 0g
- Carbohydrates: 32g
- Fiber: 2g
- Protein: 3g
- Cholesterol: 25mg
Keywords: mosaic cake, no-bake dessert, chocolate biscuit cake, Turkish cake, easy dessert recipe