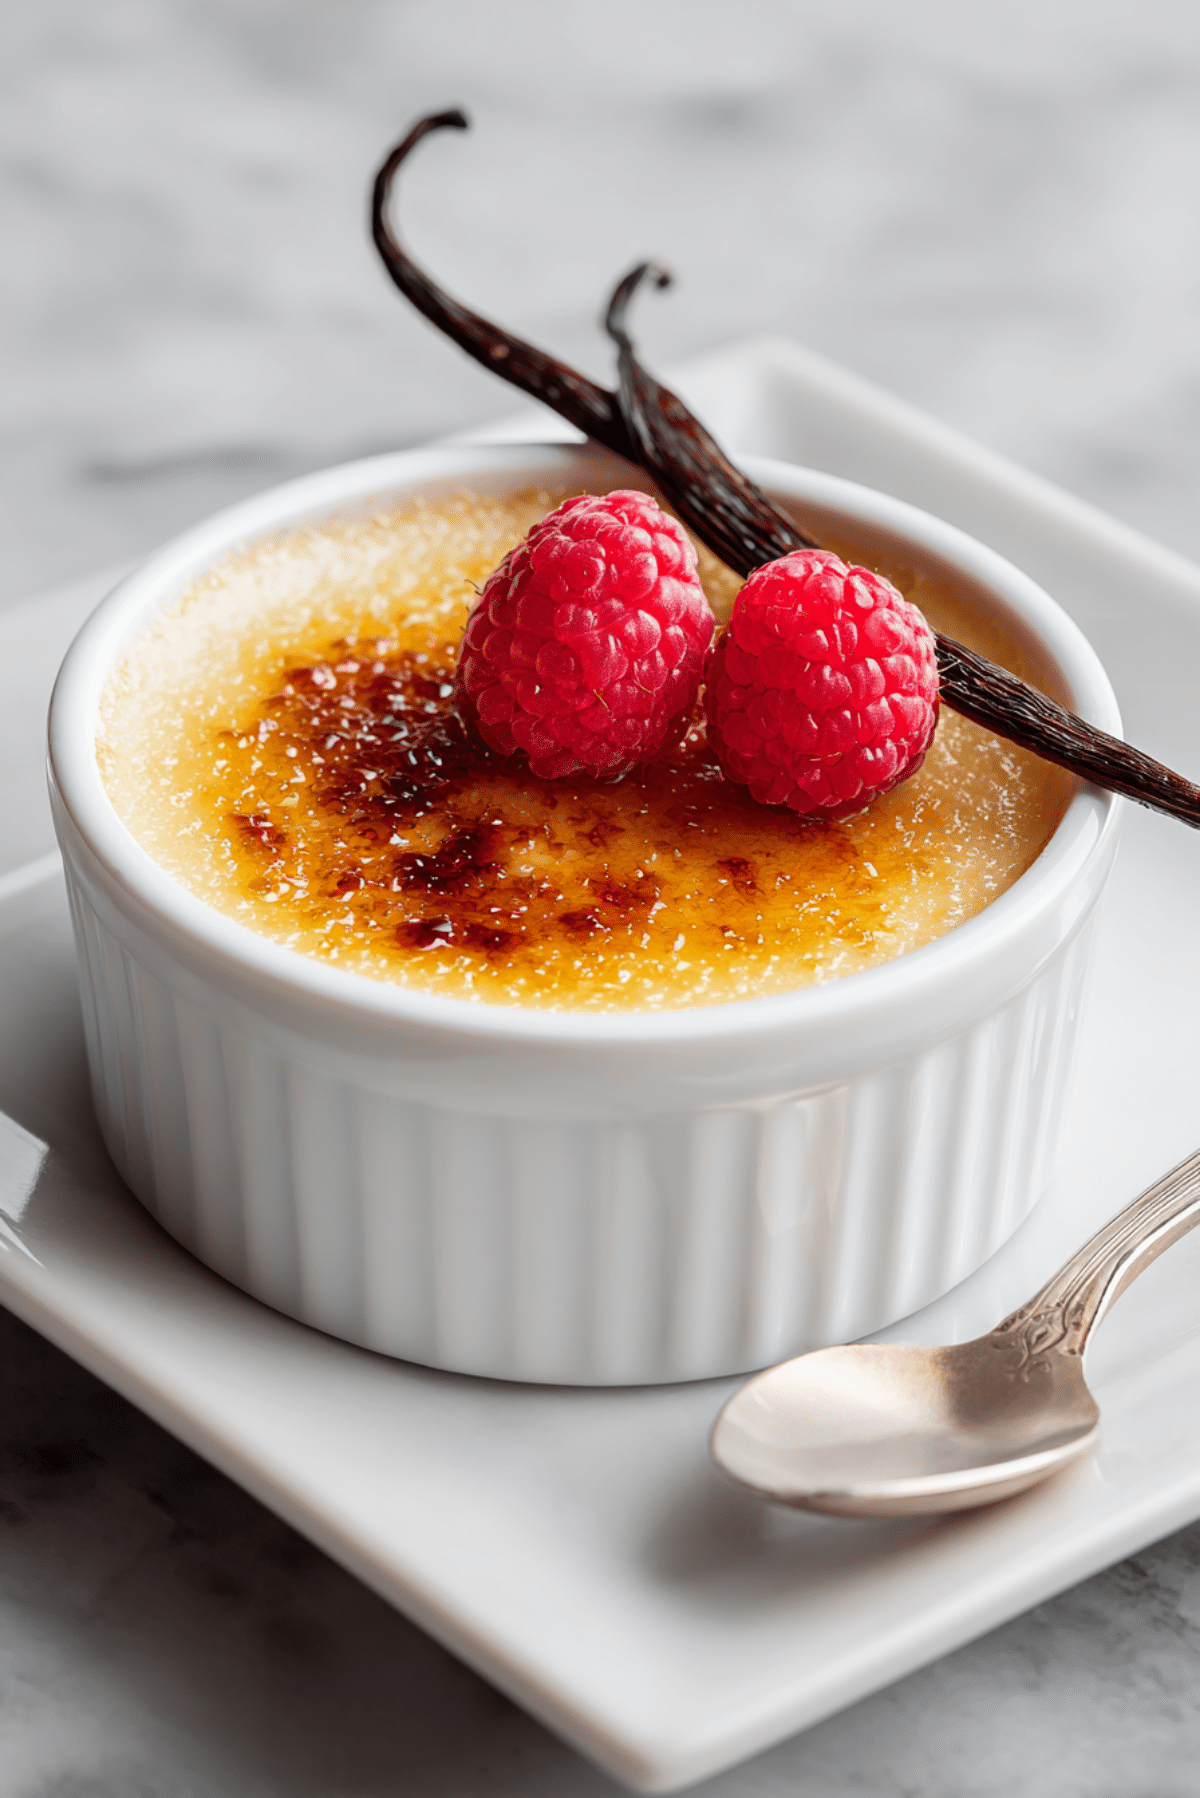
Crème brûlée
Few things feel as indulgent and soothing as cracking through the caramelized top of a crème brûlée. The sound alone sets the tone for the velvety custard underneath—rich, silky, and kissed with the warmth of vanilla. Whether you’re hosting a dinner party or simply treating yourself to something special, this dessert has a way of making ordinary moments feel extraordinary.
Behind the Recipe
The first time I made crème brûlée, it felt like magic. I remember nervously watching the sugar melt under the broiler, hoping it would reach that perfect golden amber without burning. And then, that first spoonful—cool custard meeting warm crunch—was all it took. Since then, it’s become a go-to dessert for celebrations or slow Sunday evenings, when the kitchen smells like vanilla and comfort.
Recipe Origin or Trivia
Crème brûlée, which translates to “burnt cream,” has roots that are often debated between the French, Spanish, and English. The French have claimed it with classic elegance, yet similar versions appeared in English cookbooks as early as the 1600s. What’s universal is its appeal—a creamy base, topped with a brittle layer of caramelized sugar, offering texture and taste that’s timeless.
Why You’ll Love Crème brûlée
There’s something for everyone in this dreamy dessert. Here’s why it earns a spot in your recipe box:
Versatile: Dress it up with fruit, spices, or flavored extracts to suit the season or your mood.
Budget-Friendly: Just a handful of simple ingredients turns into something restaurant-worthy.
Quick and Easy: Most of the time is hands-off, letting the oven and fridge do the work.
Customizable: Swap vanilla for citrus zest or espresso powder to mix things up.
Crowd-Pleasing: Universally loved, it’s a surefire hit with guests.
Make-Ahead Friendly: Chill it in advance and brûlée just before serving.
Great for Leftovers: Keeps well in the fridge for a few days—if it lasts that long.
Chef’s Pro Tips for Perfect Results
To help you nail that creamy texture and crackly top every time, here are a few tips I swear by:
- Use room temperature yolks: They blend more evenly with the cream for a silkier custard.
- Strain the custard: This removes any cooked egg bits and ensures a super smooth base.
- Torch it just before serving: For that fresh, warm caramelized crunch.
- Don’t overbake: The custard should still jiggle slightly in the center when done.
- Let it rest: Chilling allows the flavors to develop and texture to set.
Kitchen Tools You’ll Need
You don’t need a fancy setup, but having these on hand helps:
Ramekins: The classic choice for portioning and baking.
Whisk: For combining eggs and sugar without over-aerating.
Mixing bowls: A heatproof bowl for tempering the yolks.
Baking dish: Large enough to hold your ramekins in a hot water bath.
Kitchen torch: Essential for getting that perfect brûléed sugar top.
Fine mesh sieve: Strains the custard for that ultra-smooth finish.
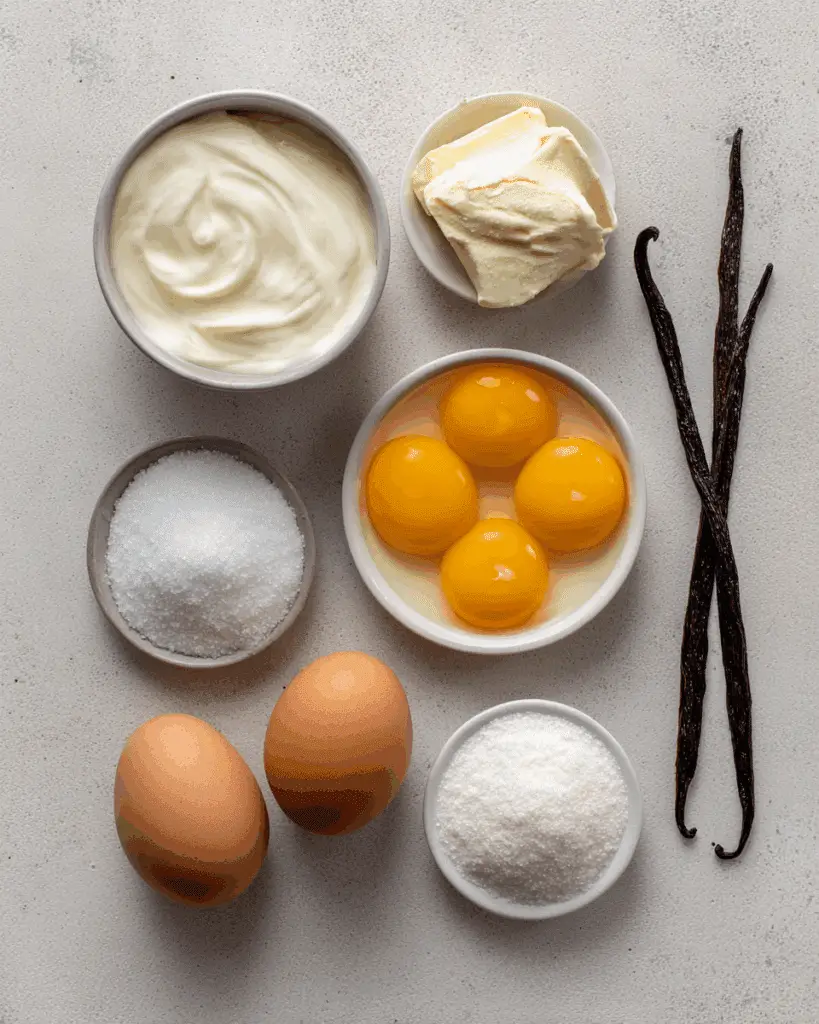
Ingredients in Crème brûlée
Making magic from minimal ingredients is what this recipe does best. Here’s what you’ll need:
- Heavy Cream: 2 cups (480 ml). The rich foundation that gives the custard its lush texture.
- Egg Yolks: 5 large. They thicken the custard and add golden richness.
- Granulated Sugar: 1/2 cup (100 grams). Sweetens the custard and provides the topping.
- Vanilla Bean or Extract: 1 whole bean (or 1 1/2 teaspoons extract). Infuses the custard with deep, warm flavor.
- Salt: Just a pinch. Balances the sweetness and enhances the vanilla.
Ingredient Substitutions
Even a classic like this allows for a few flexible swaps:
Heavy Cream: Use half-and-half for a lighter version.
Vanilla Bean: Substitute with vanilla paste or extract.
Granulated Sugar: Raw sugar works for a more robust caramel topping.
Ingredient Spotlight
Vanilla Bean: This pod packs powerful aroma and depth that elevates the entire dessert. Splitting it and scraping the seeds adds flecks of flavor throughout.
Egg Yolks: They’re the magic makers here. Their richness and ability to thicken when gently cooked is what gives crème brûlée its creamy body.
Instructions for Making Crème brûlée
Making crème brûlée is easier than it looks, and once you master the basics, you’ll want to make it again and again. Here’s the step-by-step:
- Preheat Your Equipment:
Set your oven to 325°F (160°C). Place your ramekins in a deep baking dish. - Combine Ingredients:
In a bowl, whisk together the egg yolks, 1/4 cup of sugar, and a pinch of salt until pale. In a saucepan, heat the cream and vanilla until just simmering. Slowly whisk the hot cream into the yolks to temper them. - Prepare Your Cooking Vessel:
Strain the mixture into a pitcher. Pour evenly into ramekins. Fill the baking dish with hot water halfway up the sides of the ramekins. - Assemble the Dish:
Carefully transfer the baking dish to the oven. Bake for 30–35 minutes until custards are just set with a slight jiggle. - Cook to Perfection:
Remove ramekins from the water bath and cool to room temperature. Chill in the fridge for at least 4 hours or overnight. - Finishing Touches:
Sprinkle a thin layer of remaining sugar over each custard. Use a kitchen torch to caramelize until golden and glassy. - Serve and Enjoy:
Let stand for 5 minutes so the sugar hardens, then dig in with a spoon and listen for that satisfying crack.
Texture & Flavor Secrets
Crème brûlée is all about the contrast. The custard should be incredibly smooth and cool, melting on your tongue with delicate vanilla notes. The sugar crust, in contrast, should be thin and shatteringly crisp, offering that iconic crack with every bite. When done right, each spoonful delivers rich, creamy luxury and just enough sweetness.
Cooking Tips & Tricks
Here’s how to make your crème brûlée shine:
- Use shallow ramekins for more surface area to brûlée.
- Chill completely before torching for the crispiest top.
- Don’t over-torch. Aim for golden, not burnt.
What to Avoid
Here are a few common hiccups to watch out for:
- Avoid boiling the cream: It can scramble your eggs during tempering.
- Don’t skip the water bath: It ensures gentle, even cooking.
- Don’t overbake: The custard continues to set as it cools.
Nutrition Facts
Servings: 4
Calories per serving: 320
Note: These are approximate values.
Preparation Time
Prep Time: 10 minutes
Cook Time: 35 minutes
Total Time: 4 hours 45 minutes (including chill time)
Make-Ahead and Storage Tips
This dessert is a dream for planners. You can make it up to two days ahead and store the ramekins, covered, in the fridge. Just caramelize the sugar right before serving for best results. Note: Do not freeze crème brûlée as it changes the texture.
How to Serve Crème brûlée
Serve with a few fresh berries, a sprig of mint, or even a dusting of powdered sugar. Pair it with espresso or dessert wine to elevate the experience. The elegance lies in its simplicity, so keep the garnish minimal and the focus on that glassy top.
Creative Leftover Transformations
If you somehow have leftovers, here’s what you can do:
- Spoon it into warm crepes and roll for a brunch treat.
- Layer into parfait glasses with fruit and granola.
- Use it as a filling for stuffed French toast.
Additional Tips
A few extra pointers to make this experience even smoother:
- Let your eggs sit out for 10 minutes before using.
- Keep your torch moving to avoid burning one spot.
- Invest in good ramekins. They last a lifetime and bake evenly.
Make It a Showstopper
Presentation is everything. Serve on a small plate with a lace doily underneath. Add a tiny silver spoon or a fresh flower nearby. A final sprinkle of vanilla sugar or edible gold leaf can turn this dessert into a showpiece.
Variations to Try
Looking to mix it up? Try these:
- Espresso Crème Brûlée: Add a tablespoon of instant espresso to the cream.
- Citrus Zest Version: Infuse with orange or lemon zest.
- Lavender-Infused: Steep dried lavender in the cream before using.
- Chocolate Crème Brûlée: Mix in melted dark chocolate with the cream.
- Chai Spice: Add cinnamon, cardamom, and a pinch of cloves for warmth.
FAQ’s
Q1: Can I use milk instead of cream?
A1: Full-fat milk can work, but it won’t be as rich or silky.
Q2: What if I don’t have a kitchen torch?
A2: You can caramelize the sugar under the broiler, just watch closely.
Q3: How long does it last in the fridge?
A3: Up to 3 days, but the topping is best freshly torched.
Q4: Can I make this dairy-free?
A4: You can try using full-fat coconut milk, but the texture may vary.
Q5: Is it gluten-free?
A5: Yes, naturally gluten-free as it contains no flour or wheat.
Q6: Can I double the recipe?
A6: Absolutely, just adjust baking time if your ramekins are larger.
Q7: Why is my custard runny?
A7: It may be underbaked or not cooled long enough.
Q8: Why did my sugar burn?
A8: Likely held the torch too close or too long. Keep it moving.
Q9: Can I use flavored sugar on top?
A9: Yes, vanilla or cinnamon sugar adds extra depth.
Q10: What’s the best type of vanilla to use?
A10: Vanilla bean offers the most flavor, but paste or extract work well too.
Conclusion
Crème brûlée might look fancy, but it’s really all about embracing the simple beauty of good ingredients and careful technique. The joy is in that first crack, that creamy spoonful, and the smiles it brings to those you share it with. Trust me, you’re going to love this.
Print
Crème brûlée
- Prep Time: 10 minutes
- Cook Time: 35 minutes
- Total Time: 4 hours 45 minutes (including chilling)
- Yield: 4 servings
- Category: Dessert
- Method: Baking
- Cuisine: French
- Diet: Vegetarian
Description
A silky-smooth French classic featuring creamy vanilla custard and a perfectly caramelized sugar crust, crème brûlée is an elegant dessert that’s surprisingly simple to make at home.
Ingredients
- Heavy Cream: 2 cups (480 ml) – The rich foundation that gives the custard its lush texture.
- Egg Yolks: 5 large – They thicken the custard and add golden richness.
- Granulated Sugar: 1/2 cup (100 grams) – Sweetens the custard and provides the topping.
- Vanilla Bean or Extract: 1 whole bean or 1 1/2 teaspoons extract – Infuses the custard with deep, warm flavor.
- Salt: A pinch – Balances the sweetness and enhances the vanilla.
Instructions
- Preheat Your Equipment: Set your oven to 325°F (160°C). Place your ramekins in a deep baking dish.
- Combine Ingredients: In a bowl, whisk together the egg yolks, 1/4 cup of sugar, and a pinch of salt until pale. In a saucepan, heat the cream and vanilla until just simmering. Slowly whisk the hot cream into the yolks to temper them.
- Prepare Your Cooking Vessel: Strain the mixture into a pitcher. Pour evenly into ramekins. Fill the baking dish with hot water halfway up the sides of the ramekins.
- Assemble the Dish: Carefully transfer the baking dish to the oven. Bake for 30–35 minutes until custards are just set with a slight jiggle.
- Cook to Perfection: Remove ramekins from the water bath and cool to room temperature. Chill in the fridge for at least 4 hours or overnight.
- Finishing Touches: Sprinkle a thin layer of remaining sugar over each custard. Use a kitchen torch to caramelize until golden and glassy.
- Serve and Enjoy: Let stand for 5 minutes so the sugar hardens, then dig in with a spoon and listen for that satisfying crack.
Notes
- Use shallow ramekins for a larger brûlée surface.
- Chill completely before torching for the crispiest top.
- Do not boil the cream to avoid scrambling eggs.
Nutrition
- Serving Size: 1 ramekin
- Calories: 320
- Sugar: 22g
- Sodium: 45mg
- Fat: 24g
- Saturated Fat: 14g
- Unsaturated Fat: 9g
- Trans Fat: 0g
- Carbohydrates: 24g
- Fiber: 0g
- Protein: 4g
- Cholesterol: 210mg
Keywords: creme brulee, french dessert, vanilla custard, easy creme brulee, homemade creme brulee