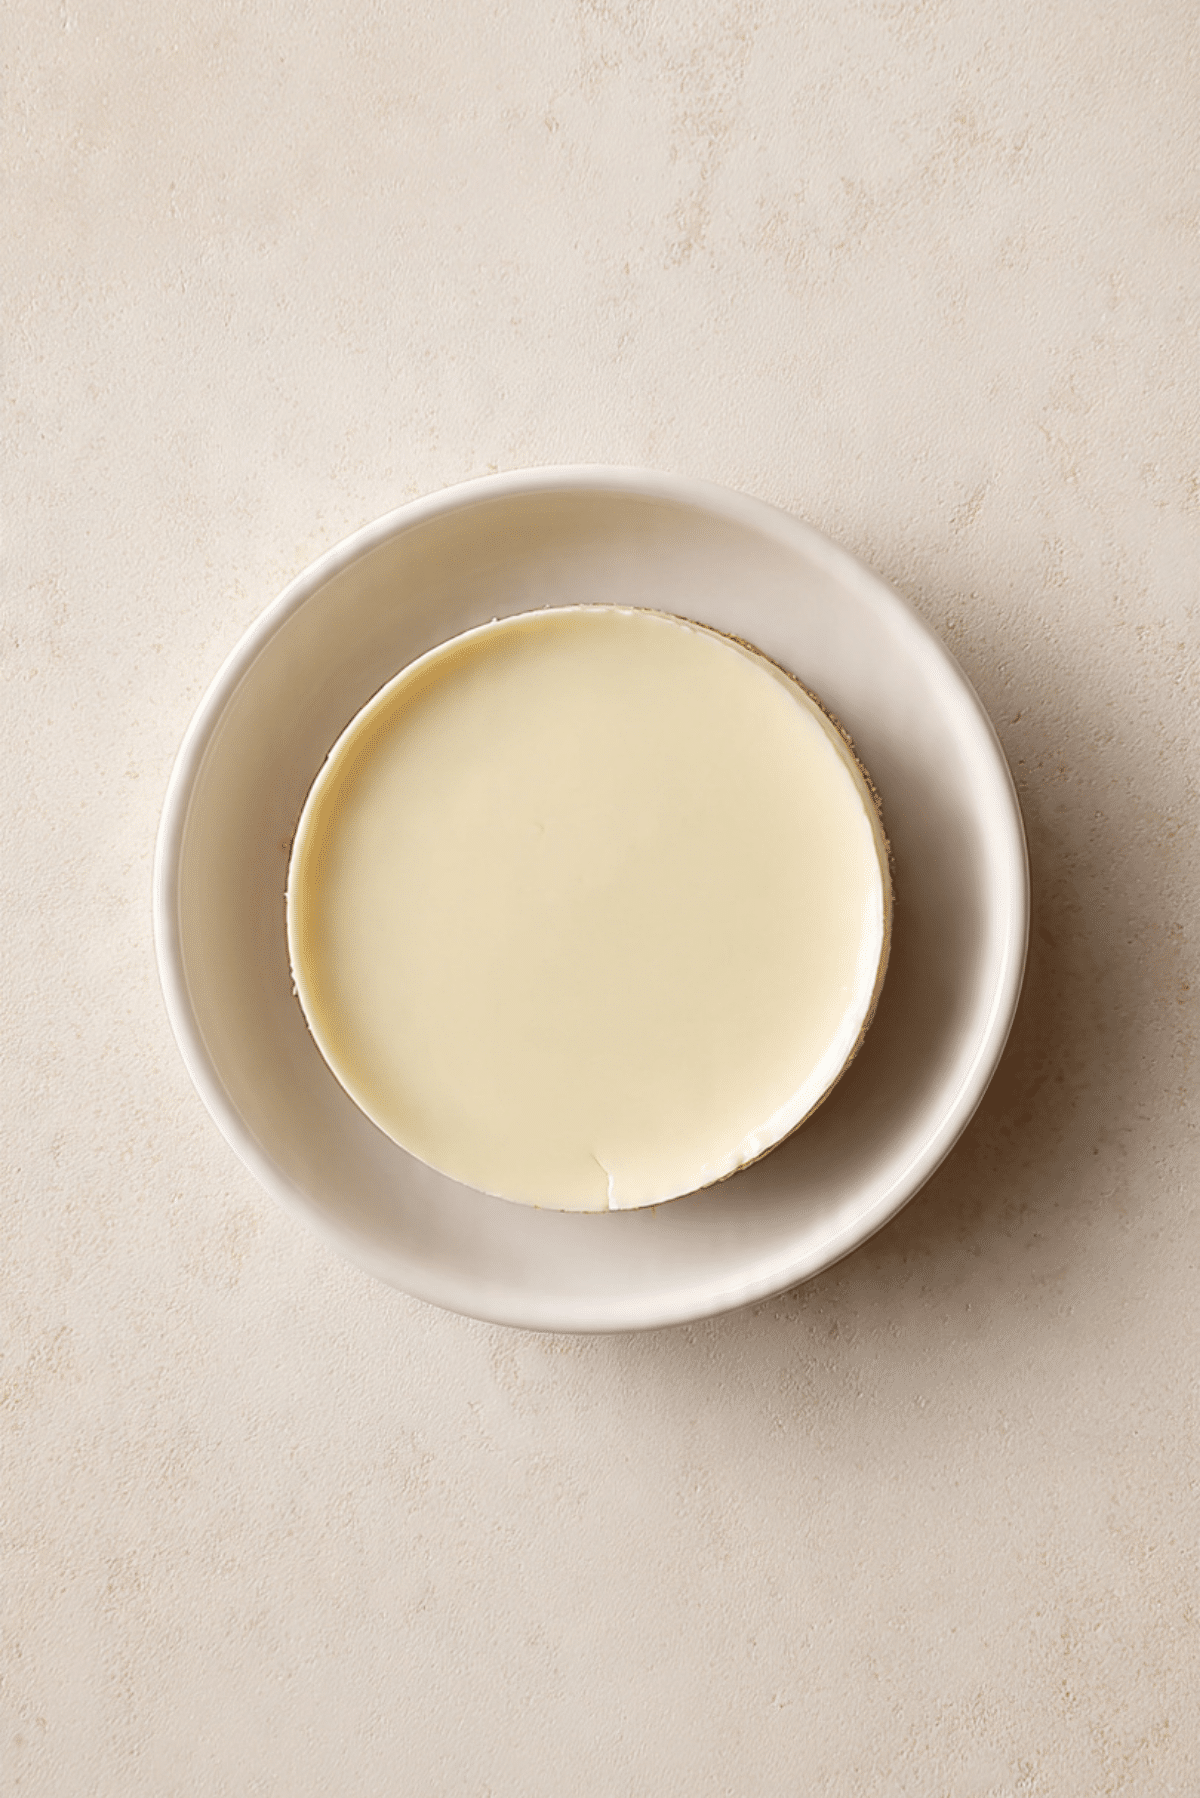
5-Minute Cheesecake
There is something almost magical about a dessert that comes together so quickly yet tastes like you spent hours crafting it. This creamy, dreamy cheesecake is one of those little kitchen secrets that feels almost too good to be true. Smooth, rich, and lightly sweet with a buttery base, it is the kind of treat that instantly lifts your mood. Trust me, you are going to love this.
A quick dessert that feels like a small luxury
And now as we ease into what makes this dessert so special, you will notice how it blends simplicity with indulgence. It has that soft, velvety texture that melts on your tongue, paired with a gentle crunch from the base. The best part, it does not need baking or complicated steps, just a few minutes and a little patience while it sets.
A little backstory behind this easy favorite
As we move deeper into the story, this style of cheesecake actually comes from the idea of no-bake desserts that became popular for their convenience. While traditional cheesecakes require careful baking, this version skips all that and focuses on quick preparation. It is inspired by classic European cheesecakes but simplified for everyday kitchens, making it accessible for anyone craving something sweet without the wait.
Why this recipe works every single time
Now let me walk you through why this one is such a reliable go-to.
Versatile: You can dress it up with fruit, chocolate, or keep it plain and elegant depending on your mood.
Budget-Friendly: The ingredients are simple and easy to find, which makes it perfect for quick cravings.
Quick and Easy: It truly comes together in minutes, no oven required.
Customizable: You can adjust sweetness, add flavors like citrus or cocoa, or change the base.
Crowd-Pleasing: Everyone loves a creamy dessert, and this one disappears fast.
Make-Ahead Friendly: It actually tastes even better after chilling.
Great for Leftovers: If there are any, they hold up beautifully in the fridge.
Smart tips from the kitchen that make all the difference
Before we dive into the tools and ingredients, here are a few insider tricks that will elevate your result.
- Use room temperature cream cheese for a smoother mixture.
- Whip the cream until soft peaks form, not too stiff.
- Mix gently to keep the texture light and airy.
- Chill properly, even if it is tempting to dig in early.
Tools that make everything easier
And now let us talk about the tools you will need to make this process smooth.
Mixing Bowl: For combining all the creamy elements evenly.
Hand Mixer or Whisk: Helps achieve that light and fluffy texture.
Spatula: Perfect for folding and smoothing the mixture.
Serving Dish or Mold: Gives the cheesecake its final shape.
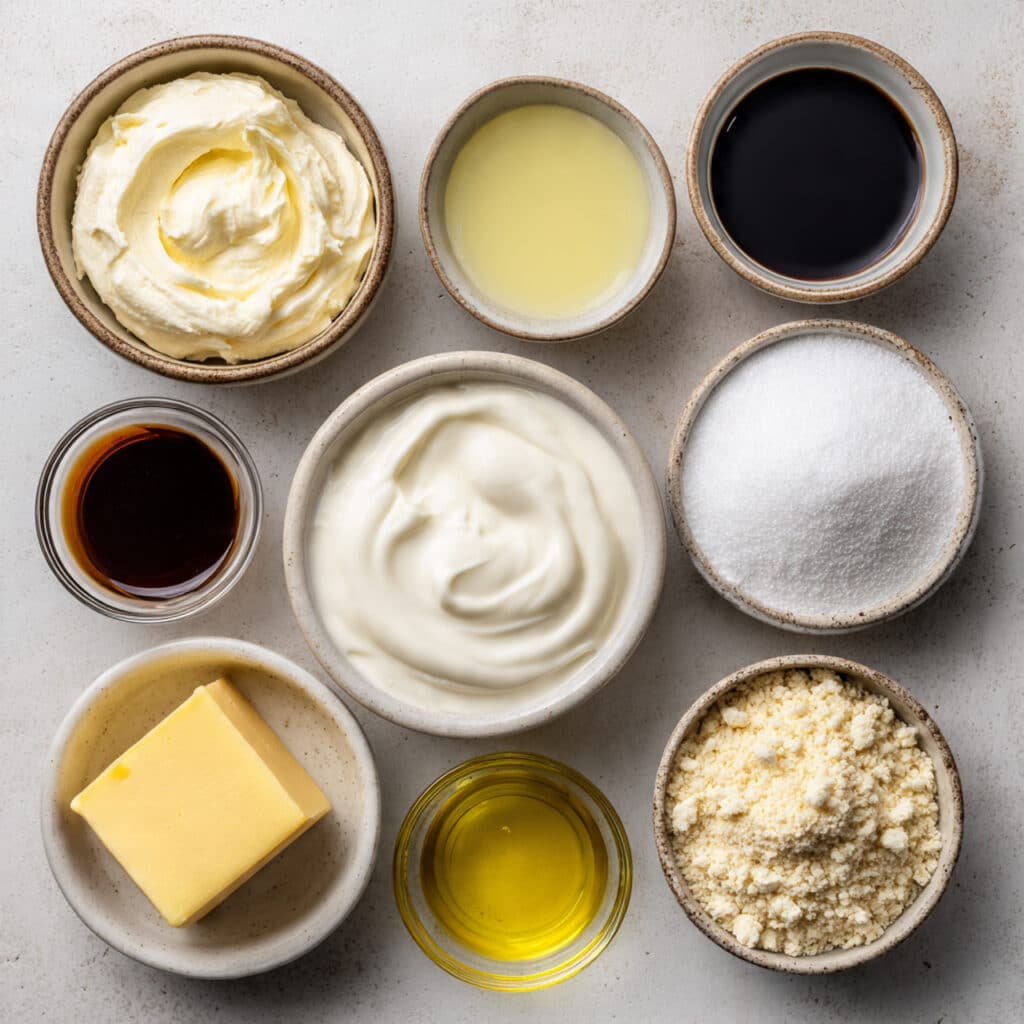
Ingredients that come together beautifully
Now we arrive at the heart of the recipe, where each ingredient plays its role in creating that perfect balance.
- Cream Cheese: 200 grams, the base of the cheesecake, providing richness and structure
- Heavy Cream: 200 milliliters, adds lightness and a smooth airy texture
- Granulated Sugar: 60 grams, brings sweetness and balances the tanginess
- Crushed Biscuits: 120 grams, forms the crunchy and buttery base
- Melted Butter: 60 grams, binds the biscuit base together
- Vanilla Extract: 1 teaspoon, enhances the overall flavor with warmth
- Lemon Juice: 1 tablespoon, adds a slight freshness that cuts through the richness
Easy swaps if you want to experiment
And if you feel like making it your own, here are some simple swaps.
Cream Cheese: Mascarpone for a milder taste
Heavy Cream: Whipping cream as an alternative
Granulated Sugar: Honey or powdered sugar
Biscuits: Graham crackers or digestive biscuits
Butter: Margarine if needed
Vanilla Extract: Almond extract for a different twist
Lemon Juice: Orange juice for a softer citrus note
A closer look at the stars of the dish
Let me highlight what really makes this dessert shine.
Cream Cheese: This is what gives that signature creamy texture and slight tang.
Crushed Biscuits: They bring the contrast, adding a satisfying crunch to every bite.
Let us bring it all together
Now comes the fun part, where everything starts to transform into something delicious.
- Preheat Your Equipment: No heating needed, but prepare your dish and tools so everything is ready.
- Combine Ingredients: Beat the cream cheese and sugar until smooth, then mix in vanilla and lemon juice.
- Prepare Your Cooking Vessel: Mix crushed biscuits with melted butter and press into the base of your dish.
- Assemble the Dish: Whip the cream separately, then gently fold it into the cream cheese mixture and spread over the base.
- Cook to Perfection: No cooking required, simply place it in the fridge to set.
- Finishing Touches: Smooth the top and optionally add a light topping if you like.
- Serve and Enjoy: Chill for at least 2 hours, then slice and enjoy every creamy bite.
The texture and flavor that make it unforgettable
As it chills, the mixture firms up into a silky, smooth layer that feels almost mousse-like. The base stays slightly crumbly yet firm enough to hold everything together. The balance between sweet, creamy, and slightly tangy flavors creates a dessert that feels light but still indulgent.
Helpful little tricks to get it just right
Here are a few extra tips to keep in mind.
- Chill longer for a firmer texture
- Use a lined dish for easy removal
- Taste before chilling and adjust sweetness if needed
What to avoid for the best results
Even simple recipes have a few things to watch out for.
- Do not overmix the whipped cream or it may turn dense
- Avoid using cold cream cheese straight from the fridge
- Do not skip chilling time, it is essential for structure
Nutrition details you might want to know
Servings: 6
Calories per serving: 320
Note: These are approximate values.
Time breakdown for planning
Prep Time: 5 minutes
Cook Time: 0 minutes
Total Time: 5 minutes
Make ahead and storage tips
This dessert fits perfectly into busy days. You can prepare it ahead and keep it in the fridge for up to 3 days. Cover it well to maintain freshness. Freezing is also possible, just thaw slowly in the fridge before serving.
Serving ideas that make it even better
Serve it chilled with fresh fruit, a drizzle of chocolate, or even a spoon of jam on top. It pairs beautifully with coffee or tea, making it a perfect afternoon treat.
Turning leftovers into something new
If you somehow have leftovers, you can crumble them into parfaits, layer them with fruit, or even freeze small portions for a quick frozen treat.
Extra tips for even better results
Always use good quality ingredients, especially the cream cheese, since it is the main flavor. A touch of citrus zest can also add a fresh twist if you like experimenting.
Make it look as good as it tastes
For presentation, smooth the top with a spatula and add a simple garnish like fruit slices or a light dusting of crumbs. Clean slices make it look extra inviting.
Fun variations to try next time
- Add cocoa powder for a chocolate version
- Swirl in fruit puree for a fruity twist
- Use a chocolate biscuit base for deeper flavor
- Add a caramel layer on top for richness
FAQ’s
1. Can I make this without sugar?
Yes, you can use natural sweeteners like honey or alternatives.
2. How long does it need to chill?
At least 2 hours for best results.
3. Can I freeze it?
Yes, just thaw it slowly before serving.
4. What if I do not have a mixer?
A whisk works fine, it just takes a bit more effort.
5. Can I use low-fat cream cheese?
Yes, but the texture may be slightly less rich.
6. Is it very sweet?
It is balanced, but you can adjust sugar to taste.
7. Can I add toppings before chilling?
It is better to add them after it sets.
8. What size dish should I use?
A small round dish works perfectly for this quantity.
9. Can I double the recipe?
Absolutely, just use a larger dish.
10. Does it taste like baked cheesecake?
It is lighter and creamier, but still very satisfying.
Conclusion
And there you have it, a dessert that feels special without any stress. It is quick, creamy, and endlessly adaptable. Let me tell you, it is worth every bite, and once you try it, it might just become your favorite go-to treat.
Print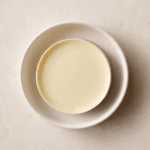
5-Minute Cheesecake
- Prep Time: 5 minutes
- Cook Time: 0 minutes
- Total Time: 5 minutes
- Yield: 6 servings 1x
- Category: Dessert
- Method: No-Bake
- Cuisine: European
- Diet: Vegetarian
Description
A creamy, no-bake cheesecake that comes together in just minutes with a smooth filling and a buttery biscuit base.
Ingredients
- 200 grams cream cheese
- 200 milliliters heavy cream
- 60 grams granulated sugar
- 120 grams crushed biscuits
- 60 grams melted butter
- 1 teaspoon vanilla extract
- 1 tablespoon lemon juice
Instructions
- Prepare your tools and serving dish.
- Beat the cream cheese and sugar until smooth, then mix in vanilla extract and lemon juice.
- In a separate bowl, whip the heavy cream until soft peaks form.
- Gently fold the whipped cream into the cream cheese mixture until combined.
- Mix crushed biscuits with melted butter and press into the base of your dish.
- Spread the cheesecake mixture evenly over the biscuit base.
- Smooth the top and refrigerate for at least 2 hours before serving.
Notes
- Use room temperature cream cheese for a smoother texture.
- Do not overmix the whipped cream to keep the filling light.
- Chill longer for a firmer consistency.
- You can add fruit or chocolate toppings after chilling.
Nutrition
- Serving Size: 1 slice
- Calories: 320
- Sugar: 18g
- Sodium: 180mg
- Fat: 24g
- Saturated Fat: 14g
- Unsaturated Fat: 8g
- Trans Fat: 0g
- Carbohydrates: 20g
- Fiber: 1g
- Protein: 4g
- Cholesterol: 70mg
Keywords: quick cheesecake, no bake cheesecake, easy dessert, creamy cheesecake, 5 minute dessert