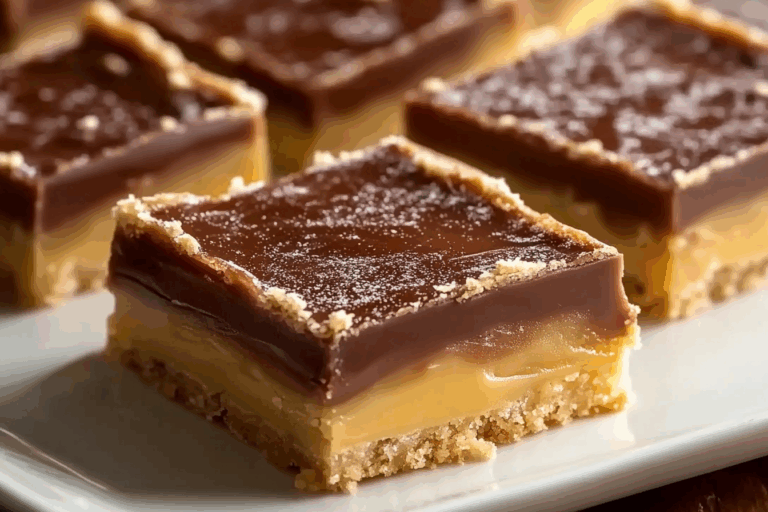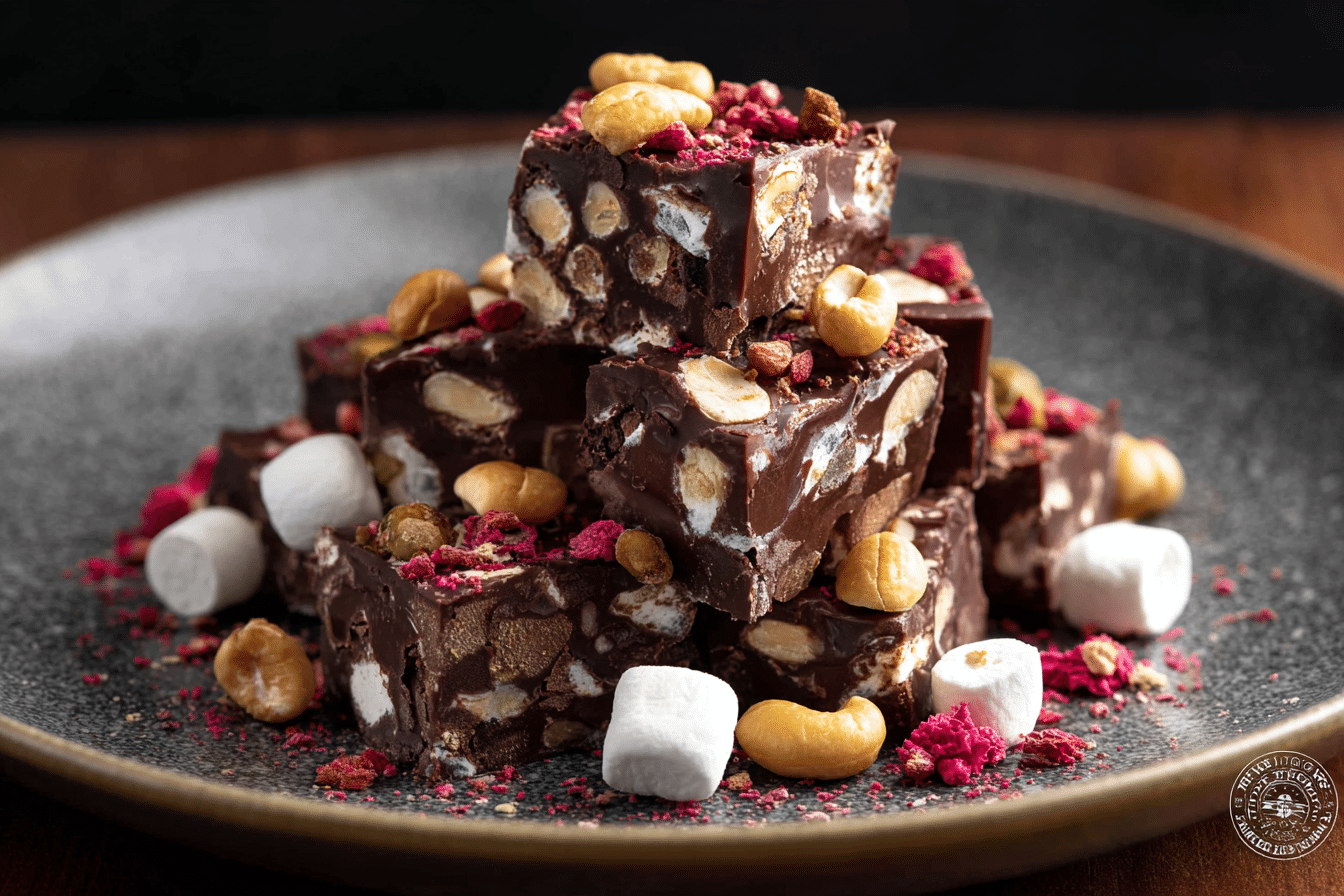
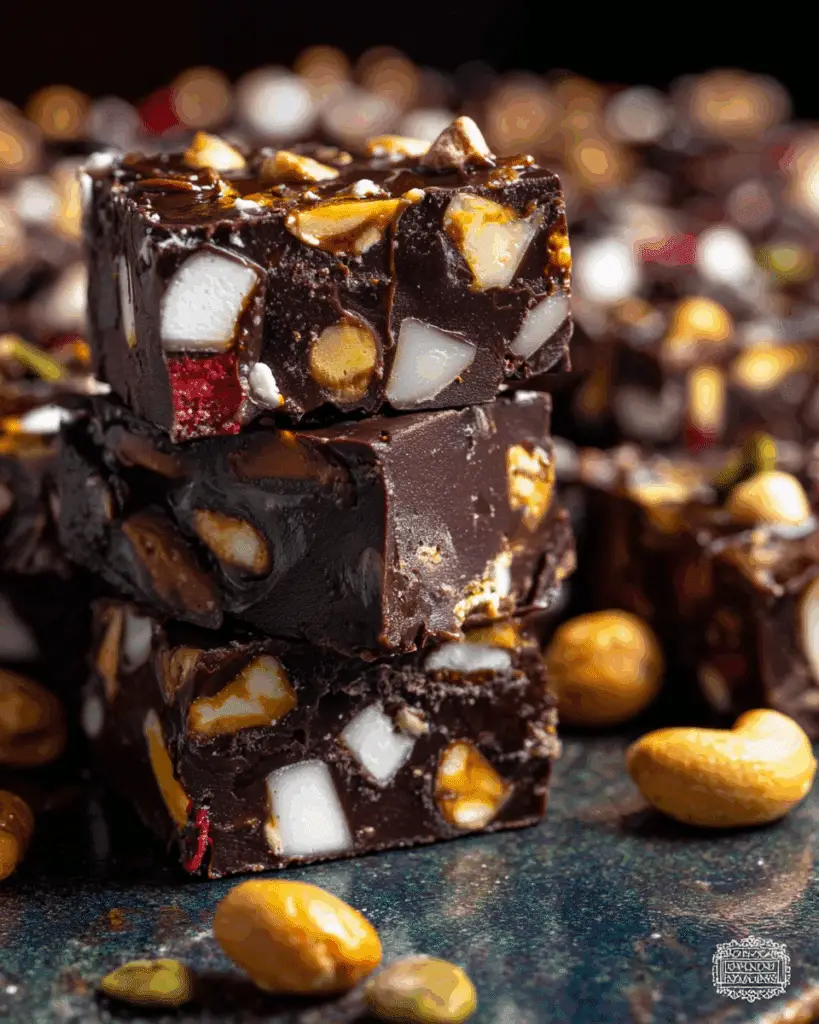
Rocky Road Fudge
If there’s one dessert that screams comfort, nostalgia, and pure joy, it’s Rocky Road Fudge. Imagine biting into a rich, melt-in-your-mouth square of chocolatey goodness that’s studded with crunchy peanuts and pillowy mini marshmallows. Each bite is a little party for your taste buds—sweet, salty, chewy, and crunchy all rolled into one irresistible treat.
This isn’t just fudge—it’s happiness cut into squares. And the best part? You only need a handful of ingredients, and there’s no fancy candy thermometer required. It’s the kind of dessert that looks impressive, tastes indulgent, but is secretly one of the easiest things you’ll ever make. Trust me, once you whip up a batch, you’ll wonder why you haven’t been making this every holiday season, bake sale, or Friday night chocolate emergency.
Recipe Origin
Rocky Road has roots dating back to the 1920s in the U.S., when chocolate makers began combining marshmallows and nuts with chocolate to create a treat that offered texture, sweetness, and crunch all in one. The name “rocky road” came from the bumpy texture created by the mix-ins—and honestly, it fits perfectly. Over the years, Rocky Road has become a classic flavor in ice cream, candy bars, and of course, this beloved fudge.
Kitchen Tools You’ll Need
- Medium saucepan (for melting the fudge base)
- Heatproof spatula or wooden spoon
- 8×8-inch baking dish (lined with parchment paper for easy removal)
- Mixing bowl
- Sharp knife (for cutting into squares once set)
Rocky Road Fudge
- Prep Time: 10 minutes
- Cook Time: 5 minutes
- Total Time: 15 minutes (plus chilling time)
- Yield: 25 pieces 1x
- Category: Dessert
- Method: No-Bake
- Cuisine: American
- Diet: Vegetarian
Description
This Rocky Road Fudge is a rich and decadent treat made with creamy chocolate, crunchy peanuts, and soft mini marshmallows. It’s an easy no-bake dessert that comes together quickly and is perfect for holidays, gifting, or whenever you’re craving something sweet and indulgent.
Ingredients
- 2 cups (380 g) semi-sweet chocolate chips
- 14 oz (400 g) sweetened condensed milk
- 4 tbsp (56 g) unsalted butter
- 1 tsp pure vanilla extract
- 1/4 tsp salt
- 2 cups (240 g) salted roasted peanuts
- 1 cup mini marshmallows
Instructions
- Line an 8×8-inch (20×20 cm) baking pan with parchment paper, leaving some overhang for easy removal.
- In a saucepan over low heat, combine chocolate chips, sweetened condensed milk, and butter. Stir continuously until melted and smooth.
- Remove from heat and stir in vanilla extract and salt.
- Fold in the peanuts and mini marshmallows until evenly distributed.
- Spread the mixture evenly into the prepared pan, smoothing the top with a spatula.
- Refrigerate for at least 2 hours, or until firm.
- Once set, lift the fudge out of the pan using the parchment overhang and cut into squares.
Notes
- For extra flavor, toast the peanuts before adding them.
- You can substitute almonds, walnuts, or pecans for the peanuts.
- Keep stored in an airtight container in the refrigerator for up to 1 week.
- This fudge also freezes well—wrap tightly and store for up to 2 months.
Nutrition
- Serving Size: 1 piece
- Calories: 190
- Sugar: 17g
- Sodium: 95mg
- Fat: 11g
- Saturated Fat: 5g
- Unsaturated Fat: 5g
- Trans Fat: 0g
- Carbohydrates: 21g
- Fiber: 2g
- Protein: 4g
- Cholesterol: 8mg
Keywords: rocky road fudge, no bake fudge, easy holiday fudge, chocolate marshmallow peanut fudge, homemade candy
Why You’ll Love Rocky Road Fudge
This recipe checks all the boxes for the perfect sweet treat:
No-Bake Simplicity: You don’t need a candy thermometer or special techniques. Just melt, stir, pour, and chill.
Crowd-Pleaser: Chocolate, peanuts, and marshmallows? It’s practically impossible not to love.
Perfect for Gifting: Wrapped up in parchment and tied with ribbon, these little squares make the cutest edible gifts.
Versatile: Swap in your favorite nuts or add-ins—this fudge is endlessly customizable.
Make-Ahead Friendly: It keeps well in the fridge, making it a great option for parties and holidays.
Chef’s Pro Tips for Perfect Results
- Use quality chocolate chips. Since chocolate is the main flavor, better chocolate makes a big difference.
- Line your pan with parchment. This makes removing and slicing the fudge a breeze.
- Fold in mix-ins gently. Overmixing can melt the marshmallows too much.
- Chill thoroughly. Give the fudge at least 2 hours in the fridge before cutting.
- Warm your knife. For clean slices, dip your knife in hot water and wipe between cuts.
Ingredients in Rocky Road Fudge
(Note: the full ingredients list, including measurements, is provided in the recipe card directly below.)
Semi-Sweet Chocolate Chips: The rich, chocolatey foundation of the fudge. Semi-sweet keeps it from being overly sugary.
Sweetened Condensed Milk: Thick, creamy, and sweet—this gives the fudge its smooth, melt-in-your-mouth texture.
Unsalted Butter: Adds richness and helps the chocolate stay glossy and smooth.
Vanilla Extract: A splash of warmth that rounds out the chocolate flavor.
Salt: Just a pinch balances the sweetness and enhances the chocolate.
Salted Roasted Peanuts: Crunchy, savory, and nutty—perfect against the soft fudge and sweet marshmallows.
Mini Marshmallows: Sweet, fluffy bites of chewy goodness that make every square fun and playful.
Instructions
Here’s how to whip up this classic treat:
Prepare the Pan: Line an 8×8-inch baking dish with parchment paper, leaving some overhang for easy removal later.
Melt the Base: In a medium saucepan over low heat, combine the chocolate chips, sweetened condensed milk, and butter. Stir constantly until smooth and melted. Remove from heat.
Flavor It: Stir in vanilla extract and salt until well combined.
Add the Mix-Ins: Gently fold in the peanuts and mini marshmallows, making sure they’re evenly distributed but not melted.
Pour and Set: Spread the mixture evenly into the prepared baking dish. Smooth the top with a spatula.
Chill: Refrigerate for at least 2 hours, or until firm.
Slice and Serve: Lift the fudge out of the pan using the parchment overhang. Cut into squares and enjoy!
Nutrition Facts
Servings: About 16 pieces
Calories per serving: Approx. 250 (depending on size and add-ins)
Prep Time: 10 minutes
Chill Time: 2 hours
Total Time: 2 hours 10 minutes
How to Serve Rocky Road Fudge
- On Dessert Trays: A colorful addition to holiday cookie platters.
- With Coffee or Tea: The richness pairs beautifully with a hot drink.
- Gift-Wrapped: Package in little bags or boxes for neighbors and friends.
- As a Sweet Snack: Perfect for a little afternoon pick-me-up.
Make-Ahead and Storage Tips
- Make Ahead: This fudge can be made several days in advance—it actually tastes better after chilling overnight.
- Storage: Store in an airtight container in the fridge for up to 2 weeks.
- Freezing: Wrap tightly in plastic and freeze for up to 2 months. Thaw in the fridge before serving.
Variations to Try
- Nut-Free: Swap peanuts for pretzels or extra marshmallows.
- Almond Joy Style: Add shredded coconut and almonds.
- Peanut Butter Swirl: Drizzle melted peanut butter into the fudge before setting.
- White Chocolate Twist: Use white chocolate chips instead of semi-sweet for a completely different flavor.
- Holiday Version: Add festive sprinkles or use red and green mini marshmallows for Christmas.
Additional Tips
- Don’t rush the chilling—this is what gives the fudge its firm texture.
- For extra shine, top with a sprinkle of flaky sea salt before chilling.
- Use fresh marshmallows; stale ones don’t melt in your mouth the same way.
FAQ Section
Q1: Can I use milk chocolate instead of semi-sweet?
A1: Yes, but the fudge will be much sweeter. You can balance it by reducing the marshmallows slightly.
Q2: Can I make this fudge without nuts?
A2: Absolutely! Just replace the peanuts with more marshmallows, pretzels, or dried fruit.
Q3: Do I need a candy thermometer?
A3: Not at all! That’s the beauty of this recipe—it’s foolproof without one.
Q4: Can I use large marshmallows?
A4: Yes, just chop them into smaller pieces so they distribute evenly.
Q5: How do I cut clean squares?
A5: Use a sharp knife dipped in hot water and wiped clean between slices.
Q6: Can I use a different type of nut?
A6: Definitely—almonds, pecans, or cashews all work beautifully.
Q7: Can I make this fudge dairy-free?
A7: Yes—use dairy-free chocolate chips, vegan butter, and coconut condensed milk.
Q8: How long does the fudge take to set?
A8: At least 2 hours in the fridge, but overnight gives the best texture.
Q9: Can I add extra mix-ins like dried fruit?
A9: Go for it! Cherries, cranberries, or raisins add a fun chewy bite.
Q10: Can I double the recipe?
A10: Yes—just use a 9×13 pan instead of 8×8.
Conclusion
Rocky Road Fudge is everything you want in a treat: rich, chocolatey, crunchy, chewy, and oh-so-easy to make. It’s the perfect balance of textures and flavors, and it comes together in minutes with no special tools or tricky steps. Whether you’re whipping up a batch for holiday gifting, sharing at a party, or simply treating yourself (because you deserve it), this fudge is guaranteed to hit the sweet spot.
So grab your saucepan, melt that chocolate, and get ready to cut happiness into squares. Trust me—this is one recipe you’ll come back to again and again.