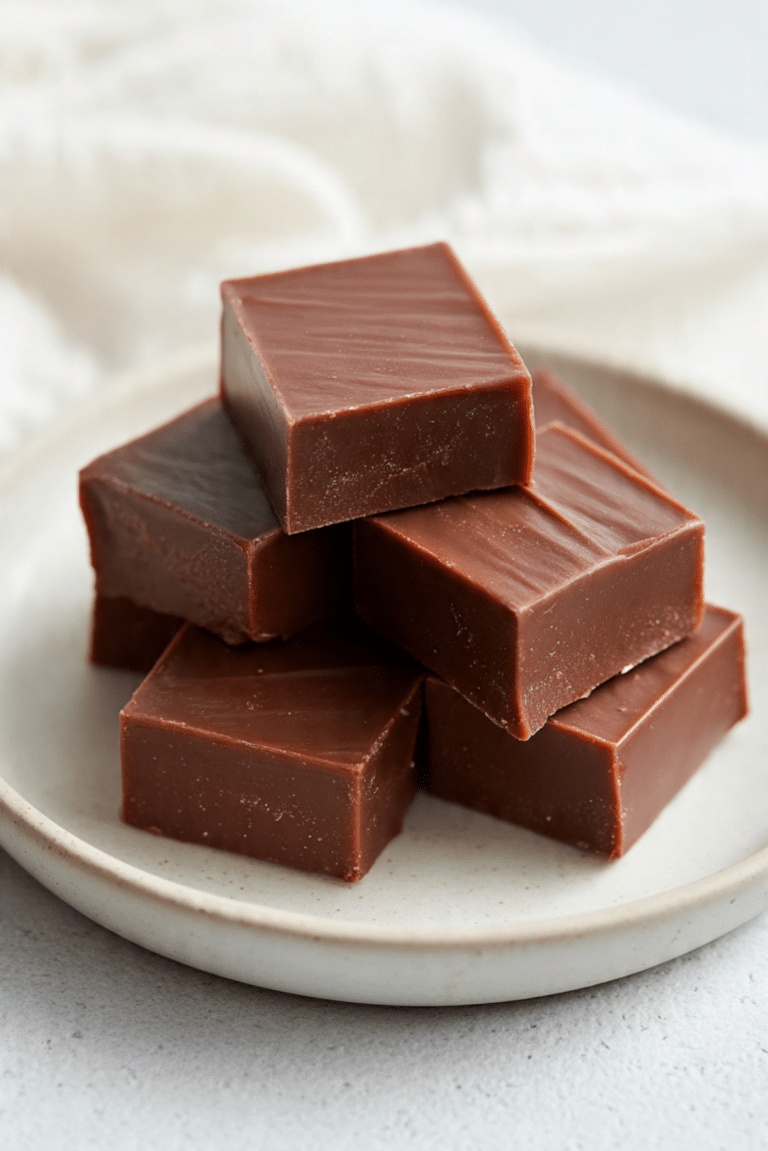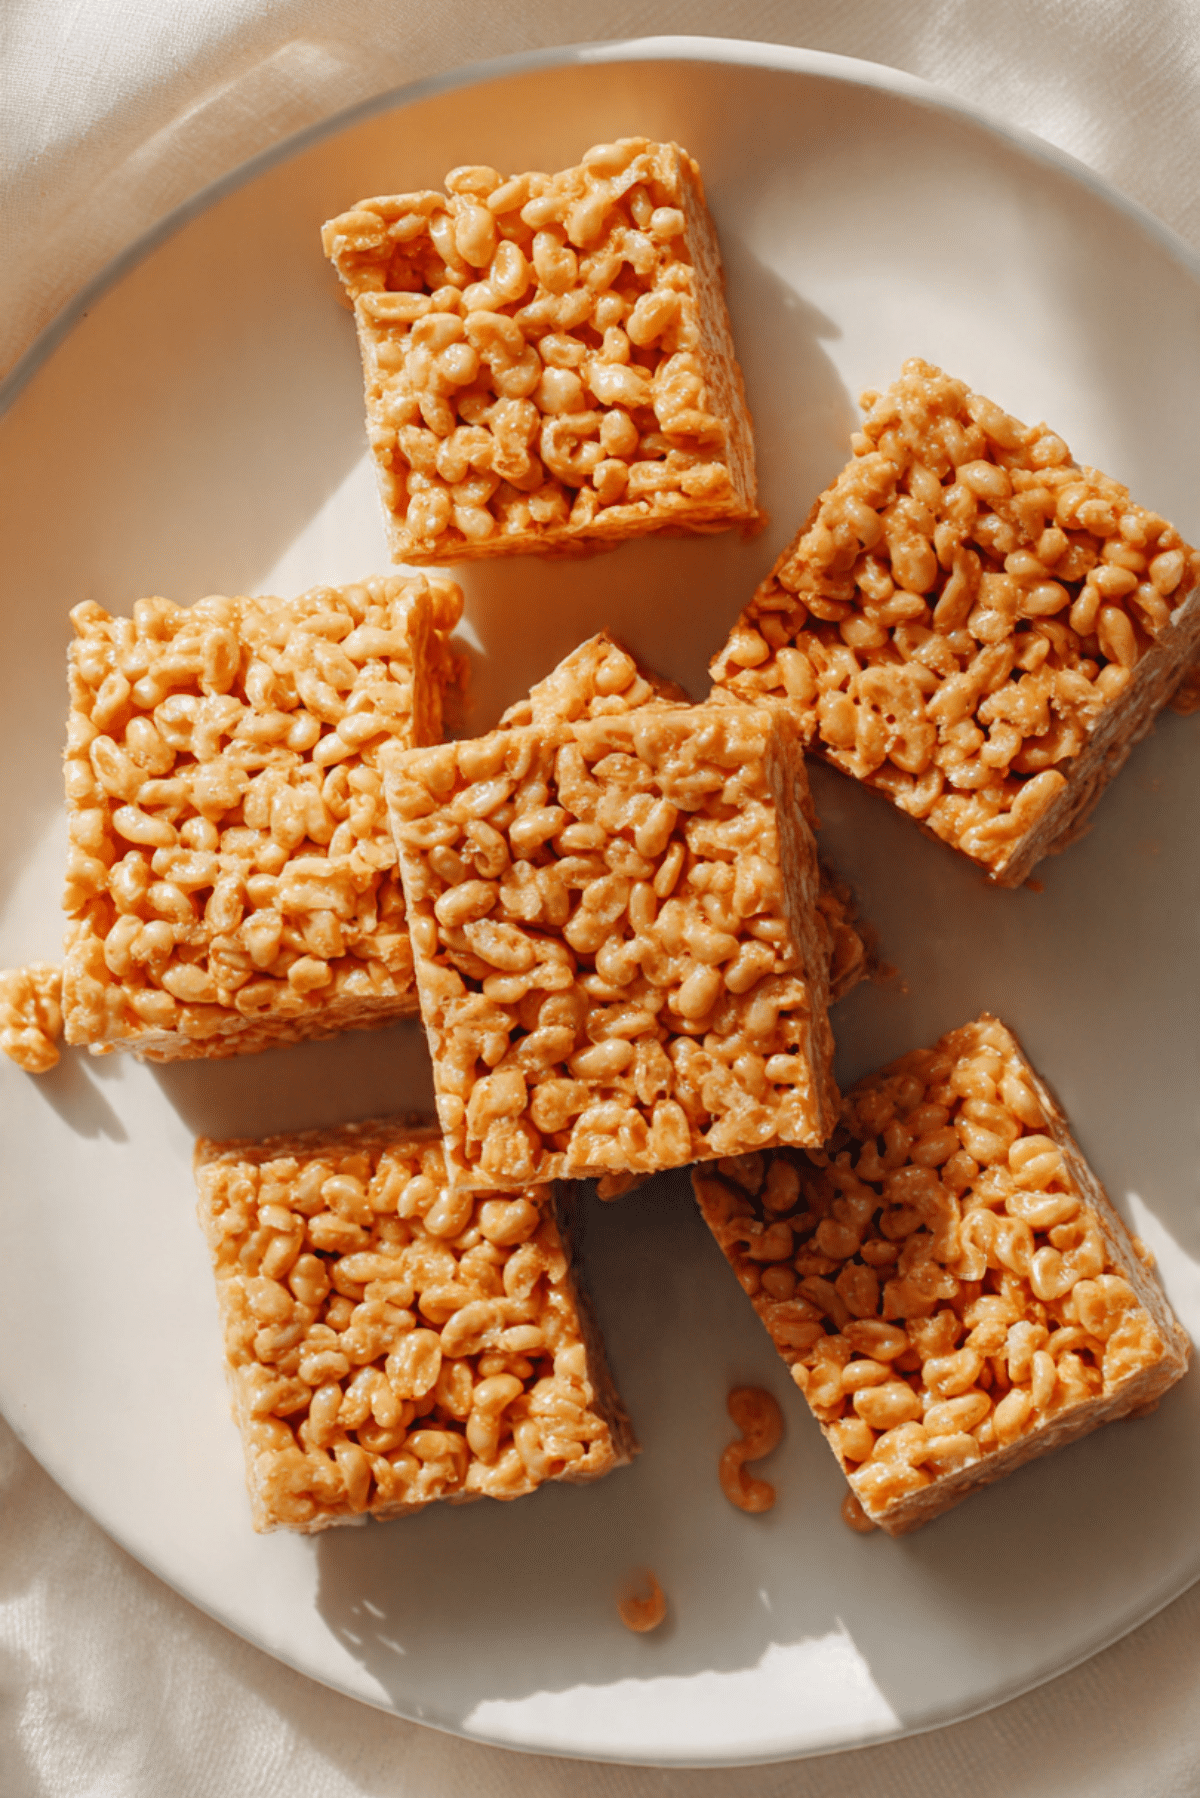
PB Rice Krispie Treats
There is something so comforting about a pan of sweet, chewy cereal bars cooling on the counter, especially when peanut butter joins the party. The smell is warm and toasty, the texture is perfectly soft with that light crisp snap in every bite, and the whole thing comes together with almost no fuss. Trust me, you’re going to love this, because it feels nostalgic and a little extra at the same time.
Why These Gooey Bars Always Win People Over
Some recipes have a way of disappearing almost as fast as you set them down, and this is one of them. They are soft, rich, and full of that classic marshmallow pull, but the peanut butter adds a deeper flavor that makes every square feel a little more special. This one’s a total game-changer when you want something easy, sweet, and guaranteed to make people reach for seconds.
A Sweet Little Story Behind This Classic Treat
These bars are part of that wonderful American no-bake dessert tradition, the kind of recipe that shows up at bake sales, potlucks, lunchboxes, and family gatherings. The original cereal treat became popular for being simple, affordable, and incredibly satisfying, and the peanut butter version followed naturally because it adds creaminess and a salty-sweet edge that so many people love.
Over time, home cooks started tweaking the original with chocolate, sprinkles, cookie butter, and all kinds of mix-ins, but peanut butter remains one of the most beloved upgrades. It keeps the familiar charm while giving the bars a fuller, rounder flavor. Let me tell you, it’s worth every bite.
What Makes This Recipe So Dependable Every Single Time
This recipe keeps things simple, but it still delivers big results. That is exactly why it earns a permanent spot in the dessert rotation.
Versatile: These bars fit just about any occasion, from an after-school snack to a casual party dessert. You can serve them plain, drizzle them with chocolate, or cut them into fun shapes for holidays.
Budget-Friendly: The ingredient list is short and made up of pantry-friendly basics. That means you can whip up a full pan without spending much at all.
Quick and Easy: The whole process moves fast, and there is no baking involved. A few minutes on the stove and a little time to set are really all you need.
Customizable: You can use creamy or crunchy peanut butter, add a pinch of sea salt, or stir in a little vanilla for extra warmth. It is an easy recipe to make your own.
Crowd-Pleasing: Kids love the chewy sweetness, and adults love the nostalgic flavor. It is one of those treats that works for almost everyone at the table.
Make-Ahead Friendly: You can prepare the pan earlier in the day and slice when ready to serve. That makes it especially handy when you are juggling other dishes.
Great for Leftovers: The bars stay tasty for a couple of days when stored well. They are just as good tucked into a lunchbox or enjoyed with coffee the next day.
Insider Tips That Make a Big Difference
A few smart moves can take these from good to absolutely irresistible.
- Use low heat: Marshmallows melt best when you take your time. High heat can make the mixture stiff, which leads to harder bars.
- Stir in the peanut butter once the marshmallows soften: This helps everything melt together smoothly without scorching.
- Do not press too firmly into the pan: A gentle press keeps the bars tender and light instead of dense and compact.
- Grease your spatula or hands lightly: The mixture is sticky, so this little trick makes spreading much easier.
- Let them set fully before slicing: Clean edges and better texture come from giving the pan enough time to rest.
The Kitchen Tools That Keep Things Easy
Before you start, it helps to have a few basics ready to go so the whole process feels smooth and relaxed.
Large saucepan or pot: This gives you enough room to melt and stir everything without making a sticky mess.
9×9-inch baking dish: This size creates thick, satisfying squares with a nice chewy center.
Silicone spatula or wooden spoon: Perfect for stirring the marshmallow mixture and folding in the cereal evenly.
Measuring cups and spoons: Since this recipe moves quickly, accurate measuring helps keep the texture just right.
Parchment paper or nonstick spray: Either one makes lifting and slicing the finished bars so much easier.
Everything You Need to Build That Perfect Chewy Bite
The beauty of this recipe is in how a handful of familiar ingredients come together into something so craveable. Each one brings its own little magic, and together they create that soft, rich, crisp texture everyone loves.
- Salted butter: 4 tablespoons. This adds richness and a touch of salt that balances the sweetness beautifully.
- Mini marshmallows: 10 ounces, about 5 cups. These melt into the sticky, fluffy base that holds everything together.
- Creamy peanut butter: 1/2 cup. This brings nutty depth, extra softness, and that unmistakable salty-sweet flavor.
- Vanilla extract: 1/2 teaspoon. A small amount, but it rounds out the sweetness and makes the flavor taste warmer.
- Rice Krispies cereal: 6 cups. This gives the bars their classic crisp texture and airy crunch.
Easy Swaps When You Want to Tweak Things
Sometimes you want to work with what you already have, and thankfully this recipe is flexible.
Salted butter: Unsalted butter, plus a tiny pinch of salt.
Mini marshmallows: Regular marshmallows, cut into smaller pieces for easier melting.
Creamy peanut butter: Crunchy peanut butter for extra texture.
Vanilla extract: A small splash of maple syrup, or simply leave it out if needed.
Rice Krispies cereal: Another crisp rice cereal brand with similar texture.
The Ingredients That Really Steal the Show
A couple of ingredients do most of the heavy lifting here, and they deserve a little spotlight.
Peanut butter: This is where the richness comes from. It melts into the marshmallow base and turns a simple cereal bar into something deeper, toastier, and more satisfying.
Mini marshmallows: These create the chewy stretch and glossy sweetness that make every square feel soft and classic. Without them, you would lose that signature texture everyone waits for.

Let’s Make These Soft, Sweet Squares Together
Now that everything is lined up and ready, let’s dive into the fun part. This is one of those recipes that moves fast, so having your pan and ingredients ready makes the whole process feel easy and satisfying.
- Preheat Your Equipment: There is no oven to heat, but go ahead and prepare a 9×9-inch baking dish by lining it with parchment paper or lightly coating it with nonstick spray.
- Combine Ingredients: In a large saucepan, melt the butter over low heat. Add the mini marshmallows and stir gently until they begin to melt. Stir in the peanut butter and keep mixing until the mixture is smooth and creamy. Remove from the heat, then stir in the vanilla extract.
- Prepare Your Cooking Vessel: Make sure your lined or greased pan is close by, because once the cereal goes in, you will want to work fairly quickly.
- Assemble the Dish: Add the Rice Krispies cereal to the warm peanut butter marshmallow mixture. Fold gently until every piece is coated and glossy.
- Cook to Perfection: Since this is a no-bake recipe, perfection here means mixing just enough and keeping the texture light. Transfer the mixture to the prepared dish and gently press it into an even layer without packing it down too hard.
- Finishing Touches: Let the pan sit at room temperature for 30 to 45 minutes until set. Once firm enough to handle, lift the slab out and cut into squares.
- Serve and Enjoy: Serve the bars as they are, or pair them with a cold glass of milk or a hot cup of coffee for a cozy little treat.
The Texture and Flavor Magic Happening in Every Bite
This is where the recipe really shines. The cereal stays crisp enough to give you that delicate crackle, while the marshmallow mixture keeps everything soft and chewy. The peanut butter melts right into the sweet base, so instead of tasting like an add-on, it becomes part of the whole experience.
You get sweet, salty, nutty, buttery notes all at once, and the vanilla smooths everything out in the background. The result is rich without being heavy, and nostalgic without feeling plain. It is the kind of bite that starts soft, turns chewy, and ends with a light little crunch.
Helpful Tricks for Even Better Results
A few small choices can make the process smoother and the final bars even more delicious.
- Work quickly once the cereal goes in: The mixture begins setting fast, so fold and transfer without too much delay.
- Use fresh marshmallows: Older marshmallows do not melt quite as smoothly and can affect the texture.
- Lightly butter your spatula: It helps spread the sticky mixture without tearing it apart.
- Let the bars cool naturally: Room temperature resting gives the best chewy finish.
Common Mistakes to Skip for the Best Texture
Even an easy recipe has a few little pitfalls, but they are simple to avoid once you know what to watch for.
- Using heat that is too high: This can make the marshmallow mixture tough. Keep the stove on low for soft bars.
- Pressing the mixture too hard into the pan: A firm hand can make the squares dense. Press gently for a lighter bite.
- Adding the cereal too late: If the melted mixture cools too much before the cereal is added, coating becomes harder. Have it measured and ready.
- Cutting too soon: Warm bars can fall apart. Let them set before slicing for cleaner edges.
A Quick Look at the Nutrition
These bars are definitely a treat, and that is part of the fun. They bring sweetness, crunch, and a bit of richness, so a little square goes a long way.
Servings: 8
Calories per serving: 321
Note: These are approximate values.
Time Breakdown Before You Get That First Bite
One of the best things about this recipe is how quickly it comes together. It gives you homemade dessert energy without demanding much from your day.
Prep Time: 10 minutes
Cook Time: 5 minutes
Total Time: 15 minutes, plus 30 to 45 minutes for setting
Make-Ahead and Storage Tips That Actually Help
If you are planning ahead, these bars fit beautifully into the schedule. You can make the full pan earlier in the day, let it set, and keep it covered until serving time. They hold up nicely on the counter for short-term storage, which is great when you want dessert ready without any last-minute work.
For storing, place the cut squares in an airtight container at room temperature for up to 2 days. If your kitchen runs warm, you can refrigerate them, but let them sit out for a few minutes before serving so they soften a bit. Freezing is possible too. Wrap individual squares well, place them in a freezer-safe container, and thaw at room temperature when ready to eat. For reheating, a few seconds in the microwave can bring back some of that soft, fresh texture.
My Favorite Ways to Serve These
These bars are lovely all on their own, but they are also easy to dress up when you want a little extra flair. Serve them on a platter with fresh fruit for contrast, or pair them with coffee for an afternoon treat that feels a little indulgent.
They also work beautifully on dessert tables because they slice neatly and stack well. For parties, cut them into smaller bite-sized pieces. For a cozier presentation, serve a square with a scoop of vanilla ice cream and let that creamy cold bite play against the chewy texture.
Fun Ideas for Turning Leftovers Into Something New
If you happen to have extras, there are some fun ways to give them a second life. Crumble a square over vanilla yogurt for a sweet crunch. Chop one into small cubes and stir it into ice cream for a playful sundae topping. You can even sandwich a small square between two cookies for a seriously over-the-top dessert.
Another easy idea is to warm a piece slightly and drizzle it with a little melted chocolate for a quick dessert plate. It feels new, but takes almost no effort.
A Few Extra Details That Make Them Shine
Sometimes it is the little things that make a recipe feel especially good. Using good-quality peanut butter gives the flavor more depth, and a fresh box of cereal helps keep the texture nice and crisp. Those tiny choices really do show up in the final result.
You can also cut the bars with a lightly greased knife for smoother slices. And if you love a sweeter finish, a very light sprinkle of flaky salt on top can create a beautiful balance with the marshmallow base.
Easy Ways to Make Them Look Party-Ready
Presentation is simple here, but a few touches can make the pan feel extra special. Slice the bars into even squares and stack them slightly off-center on a white serving plate so the golden color stands out. The crisp edges and soft centers already look inviting, so you do not need much else.
For a festive version, you can add a very light drizzle of melted chocolate across the top after the bars have set. It adds contrast, catches the light nicely, and makes the tray feel celebration-ready without changing the heart of the recipe.
Variations Worth Trying Next Time
Once you make the base version, it is hard not to start imagining little twists.
Chocolate drizzle: Melt a small amount of chocolate and drizzle it over the cooled bars for a richer finish.
Crunchy peanut butter version: Swap creamy peanut butter for crunchy to add bits of peanut texture throughout.
Sea salt finish: Sprinkle a tiny pinch of flaky sea salt on top for a sweet-salty contrast.
Mini chocolate chip mix-in: Fold in a small handful of mini chocolate chips after the mixture cools slightly, so they keep some shape.
Cocoa cereal blend: Replace 1 to 2 cups of the cereal with chocolate crisp rice cereal for a deeper flavor.
FAQ’s
1. Can I use regular marshmallows instead of mini marshmallows?
Yes, you can. Just cut them into smaller pieces if you want them to melt a little faster and more evenly.
2. Why did my bars turn out hard?
This usually happens when the heat is too high or the mixture is pressed too firmly into the pan. Low heat and a gentle touch make a big difference.
3. Can I use crunchy peanut butter?
Absolutely. It adds extra texture and a slightly nuttier bite.
4. Do I need vanilla extract?
Not strictly, but it adds warmth and rounds out the sweetness nicely, so it is a lovely little bonus.
5. Can I double the recipe?
Yes. Use a larger pan, such as a 9×13-inch dish, if you want a bigger batch with slightly thinner bars.
6. How long do these need to set?
Usually about 30 to 45 minutes at room temperature does the trick.
7. Can I refrigerate them to speed things up?
You can, but room temperature setting usually gives the nicest chewy texture.
8. Are these good for parties and bake sales?
Very much so. They are easy to transport, easy to slice, and always popular.
9. Can I add chocolate chips or candies?
Yes, just wait until the mixture cools slightly before adding them so they do not melt too much.
10. What is the best way to cut them cleanly?
Use a sharp knife lightly greased with butter or spray, and wipe it between cuts if needed.
Conclusion
There is a reason these bars never go out of style. They are simple, sweet, chewy, and packed with just enough peanut butter richness to make them feel extra special. Whether you are making them for a family movie night, a party tray, or just because you want something nostalgic and delicious, this recipe brings a lot of joy for very little effort. Trust me, once you make a pan, you will understand why people come back for one more square every single time.
Print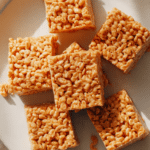
PB Rice Krispie Treats
- Prep Time: 10 minutes
- Cook Time: 5 minutes
- Total Time: 15 minutes
- Yield: 8 servings 1x
- Category: Dessert
- Method: No-Bake
- Cuisine: American
- Diet: Vegetarian
Description
Soft, chewy no-bake cereal bars made with peanut butter, marshmallows, butter, vanilla, and crisp rice cereal. They come together fast and deliver the perfect sweet, salty, crunchy bite.
Ingredients
- 4 tablespoons salted butter
- 10 ounces mini marshmallows, about 5 cups
- 1/2 cup creamy peanut butter
- 1/2 teaspoon vanilla extract
- 6 cups Rice Krispies cereal
Instructions
- Line a 9×9-inch baking dish with parchment paper or lightly coat it with nonstick spray.
- In a large saucepan, melt the butter over low heat.
- Add the mini marshmallows and stir until they begin to melt.
- Stir in the peanut butter and continue mixing until smooth and fully combined.
- Remove the pan from the heat and stir in the vanilla extract.
- Add the Rice Krispies cereal and fold gently until all of the cereal is evenly coated.
- Transfer the mixture to the prepared baking dish and gently press it into an even layer without packing it down too firmly.
- Let the bars set at room temperature for 30 to 45 minutes, then cut into 8 squares and serve.
Notes
- Use low heat to keep the bars soft and chewy.
- Lightly grease your spatula or hands to make spreading easier.
- Do not press the mixture too firmly into the pan or the bars may become dense.
- Store in an airtight container at room temperature for up to 2 days.
Nutrition
- Serving Size: 1 square
- Calories: 321
- Sugar: 21 g
- Sodium: 255 mg
- Fat: 14 g
- Saturated Fat: 6 g
- Unsaturated Fat: 7 g
- Trans Fat: 0 g
- Carbohydrates: 45 g
- Fiber: 1 g
- Protein: 6 g
- Cholesterol: 15 mg
Keywords: peanut butter cereal bars, no-bake dessert, marshmallow treats, crispy rice bars