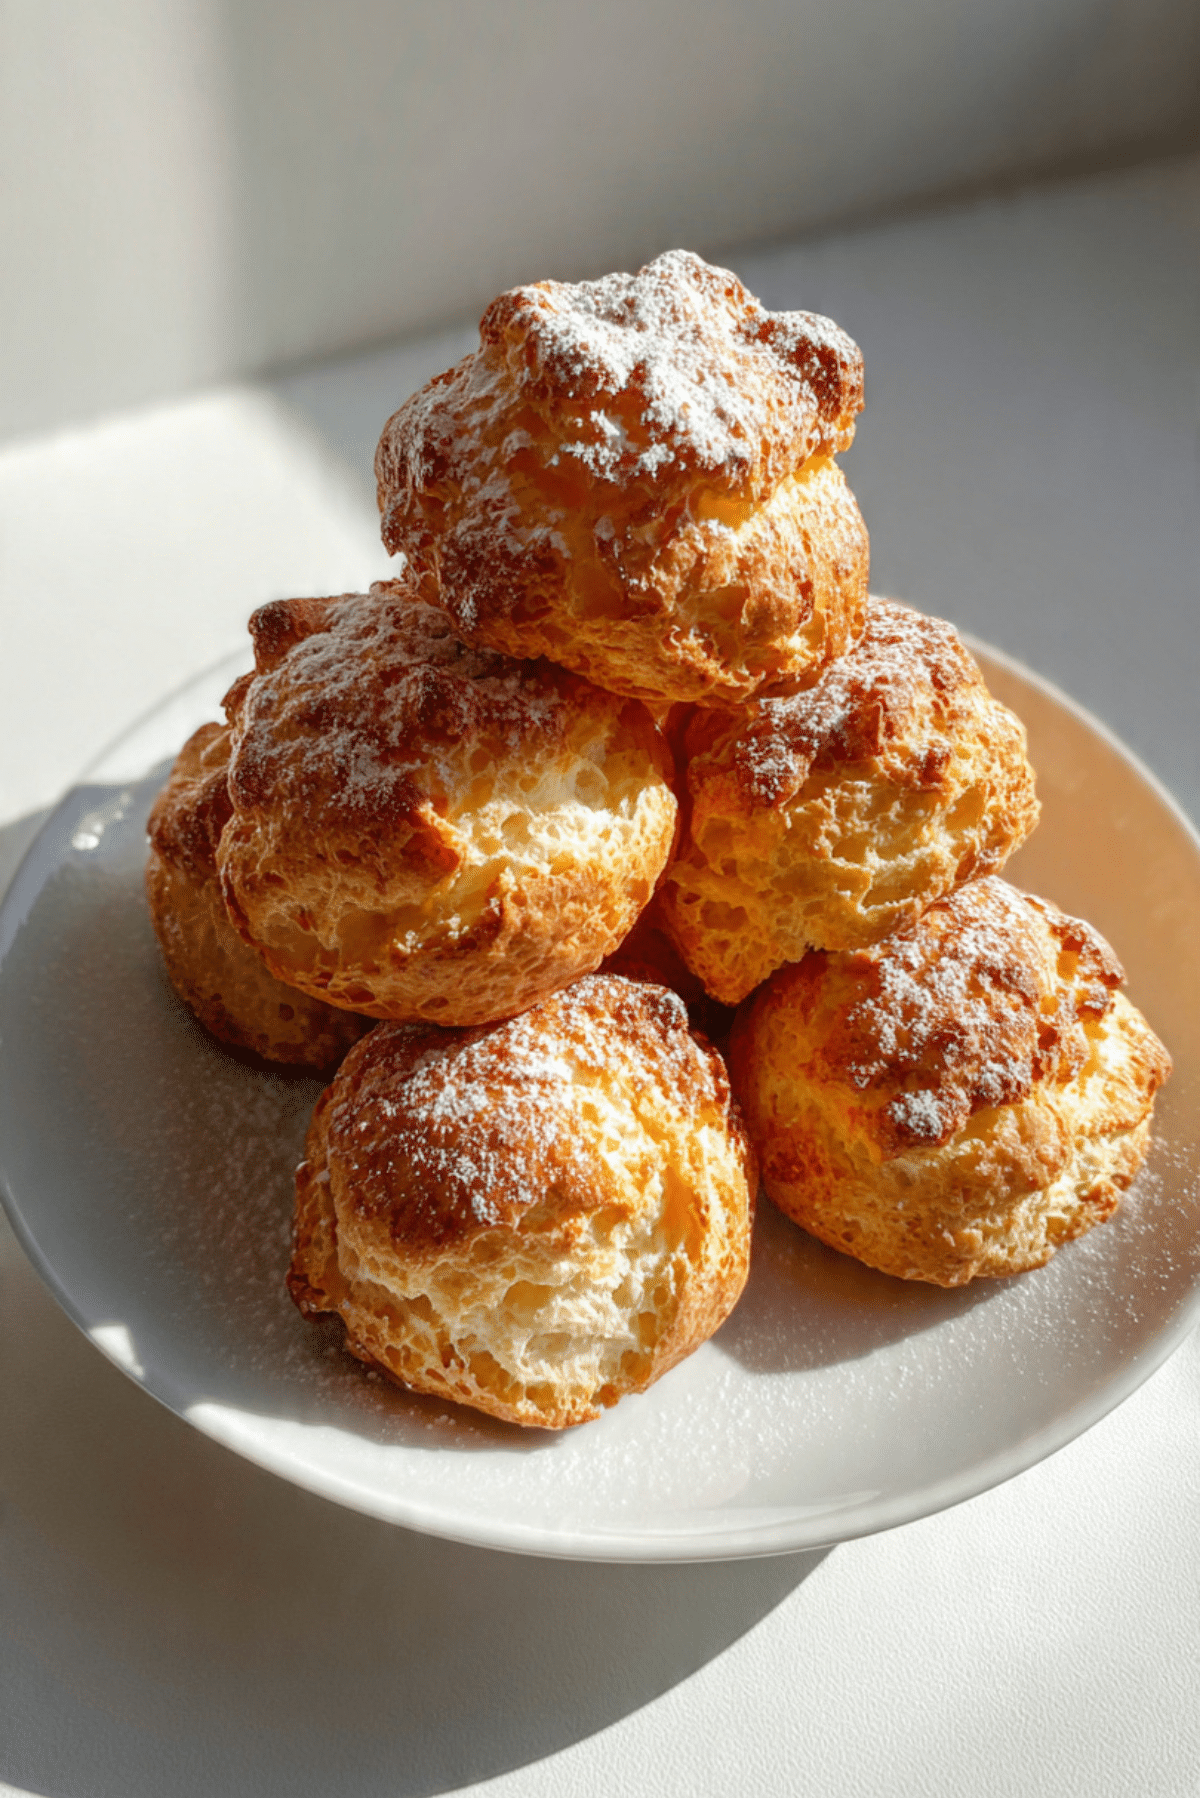
Fried Scones
There’s something irresistibly comforting about the golden crunch of a freshly fried scone. Crispy on the outside, pillowy on the inside, and served warm with butter or jam melting into every bite. Whether you’re enjoying them for breakfast, brunch, or a midday snack, these fried scones are a deliciously satisfying treat that always hits the spot. Trust me, once you make a batch, they’ll disappear quicker than you expect.
Behind the Recipe
I still remember the first time I tasted a fried scone at a cozy diner during a road trip through the Midwest. It was slightly crisp, tender inside, and had just the right amount of buttery richness. That moment stuck with me, and ever since, I’ve been testing and tweaking until I landed on this recipe — the one that brings all that nostalgia right back with each bite. It’s one of those simple joys that instantly feels like home.
Recipe Origin or Trivia
While scones are typically baked, fried scones are a beloved tradition in certain parts of the United States and the UK, especially in Scottish and Utah-based cuisines. In Scotland, fried scones are often cooked on a griddle and served as part of a full breakfast. In Utah, “fry bread” scones are deep-fried, often larger, and enjoyed with honey butter or powdered sugar. This version takes the best of both — the hearty structure of a traditional scone with the crisp, golden edge only frying can give.
Why You’ll Love Fried Scones
They’re not just tasty, they’re super versatile too. Here’s why they’ll become a regular on your table:
Versatile: Great as a breakfast treat, side dish, or even a sweet dessert with toppings.
Budget-Friendly: Made with basic pantry staples you likely already have.
Quick and Easy: No need to heat the oven. Mix, fry, and enjoy in under 30 minutes.
Customizable: Add in herbs, cheese, or even a hint of cinnamon and raisins.
Crowd-Pleasing: Perfect for brunch gatherings or lazy Sunday mornings.
Make-Ahead Friendly: Prepare the dough ahead of time and fry fresh when ready.
Great for Leftovers: Store and reheat for a quick snack or next-day breakfast.
Chef’s Pro Tips for Perfect Results
To get the absolute best fried scones every time, here’s what I’ve learned from many batches:
- Chill your butter before adding it to the flour — it helps create a tender texture.
- Don’t overmix the dough. Just bring it together until it forms.
- Use a heavy-bottomed pan for even frying.
- Keep the oil at a steady medium heat to avoid soggy or burnt scones.
- Let them drain on a paper towel after frying to stay crisp.
Kitchen Tools You’ll Need
No fancy equipment here — just the essentials to get the job done right:
Mixing Bowl: For combining your dry and wet ingredients.
Pastry Cutter or Fork: Helps cut butter into the flour without melting.
Rolling Pin: To flatten the dough before cutting.
Skillet or Deep Frying Pan: Your vessel for frying up those golden beauties.
Slotted Spoon or Tongs: Makes flipping and removing the scones easy and safe.
Paper Towels: To absorb excess oil after frying.
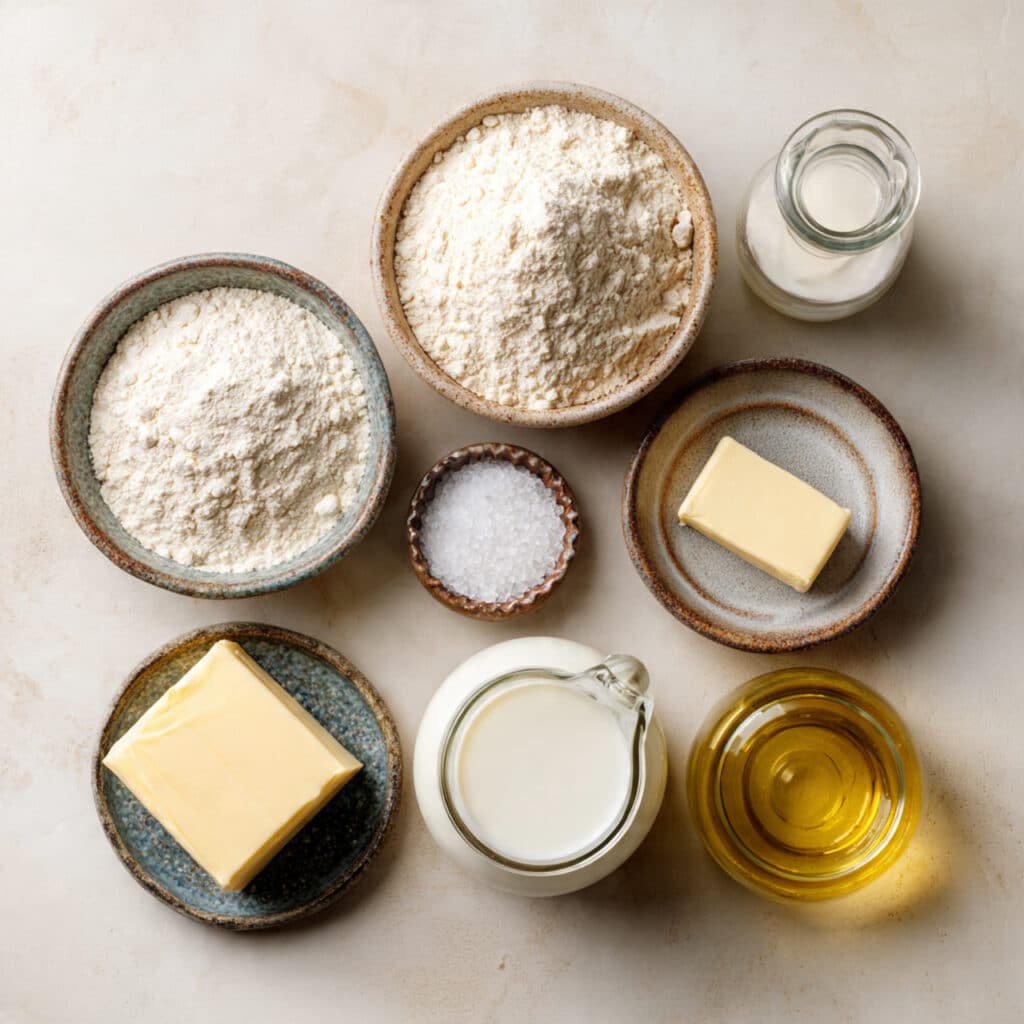
Ingredients in Fried Scones
Each ingredient plays a unique part in making these scones taste just right. Let’s break it down:
- All-purpose Flour: 2 cups — the base that gives the scones structure.
- Baking Powder: 2 ½ teaspoons — provides that light rise and fluffy interior.
- Salt: ½ teaspoon — enhances all the other flavors.
- Unsalted Butter: ¼ cup, cold and cubed — adds rich, flaky texture.
- Granulated Sugar: 2 tablespoons — just enough sweetness.
- Milk: ¾ cup — brings the dough together and adds moisture.
- Vegetable Oil: For frying — gives the scones their golden crust.
Ingredient Substitutions
No stress if you’re missing a thing or two. Here are some easy swaps:
All-purpose flour: Use whole wheat for a nuttier, heartier bite.
Unsalted butter: Salted butter works, just reduce added salt slightly.
Milk: Try buttermilk or a non-dairy alternative like almond or oat milk.
Vegetable oil: Canola or sunflower oil also do the job well.
Granulated sugar: Substitute with honey or maple syrup, adjusting moisture as needed.
Ingredient Spotlight
All-purpose Flour: The foundation of the scone. It creates the body and absorbs the buttery fat for a tender texture.
Butter: Cold butter is key — when it melts during frying, it creates little pockets of air that give the scone a flaky structure.
Instructions for Making Fried Scones
Let’s make magic in the kitchen. These steps are easy to follow and packed with flavor-building goodness.
-
Preheat Your Equipment:
Heat about 2 inches of vegetable oil in a deep frying pan over medium heat until it reaches around 350°F. -
Combine Ingredients:
In a large bowl, whisk together the flour, baking powder, salt, and sugar. Add the cold butter and cut it into the flour until the mixture looks crumbly. Pour in the milk and gently mix until the dough forms. -
Prepare Your Cooking Vessel:
Your skillet should be hot by now. Keep an eye on the oil to maintain the right temperature. Too hot and the scones will burn, too cool and they’ll soak up oil. -
Assemble the Dish:
Turn the dough onto a floured surface. Roll out gently to about ½ inch thickness. Cut into triangles or rounds using a cutter or knife. -
Cook to Perfection:
Fry the scones in batches, 2 to 3 at a time, flipping halfway through until golden brown on both sides, about 2 to 3 minutes per side. -
Finishing Touches:
Remove the scones and let them rest on paper towels to drain excess oil. -
Serve and Enjoy:
Best enjoyed warm with butter, jam, honey, or a dusting of powdered sugar.
Texture & Flavor Secrets
The magic of fried scones lies in their perfect contrast. The outside develops a delicate crunch thanks to the hot oil, while the inside remains soft, fluffy, and slightly chewy. Butter adds richness, while the slight sweetness from sugar balances every bite.
Cooking Tips & Tricks
Getting it just right every time is easier with a few extra tips:
- Use cold ingredients to keep the dough tender.
- Avoid crowding the pan to maintain oil temperature.
- Use a thermometer if possible to track your oil heat.
- Let your dough rest for 10 minutes before rolling for better texture.
What to Avoid
Even the best bakers hit a snag. Here’s what to watch for:
- Overmixing the dough: This leads to tough scones.
- Too hot oil: Burns the outside before the inside cooks.
- Skipping the draining step: Leaves your scones oily instead of crisp.
- Thin dough: Results in flat, less fluffy scones.
Nutrition Facts
Servings: 8
Calories per serving: 250
Note: These are approximate values.
Preparation Time
Prep Time: 10 minutes
Cook Time: 15 minutes
Total Time: 25 minutes
Make-Ahead and Storage Tips
You can absolutely prep ahead. Make the dough the night before and store it wrapped in the fridge. Once fried, scones are best eaten fresh but will keep in an airtight container for 1 to 2 days. Reheat in a toaster oven or air fryer for that crispy bite again. They also freeze well for up to a month.
How to Serve Fried Scones
Serve these scones warm and fresh. Pair with clotted cream and jam for a classic take, or drizzle with honey for a sweet treat. For a savory twist, try them with herbed butter or alongside a bowl of soup.
Creative Leftover Transformations
Got extras? Here’s how to enjoy them in a new way:
- Split and toast with cheese and tomato for a quick mini sandwich.
- Crumble into sweetened yogurt for a fun parfait.
- Warm, slice, and top with ice cream and chocolate sauce for dessert scones.
Additional Tips
Little things make a big difference:
- Use full-fat milk for richer dough.
- Dust with cinnamon sugar for extra flair.
- Try adding orange zest or vanilla to the dough for a flavor twist.
Make It a Showstopper
Presentation matters. Stack scones high on a rustic plate, dust with powdered sugar, and serve with a side of colorful berry jam. A sprig of mint or slice of fruit adds a pop of color for those Instagram-worthy shots.
Variations to Try
Ready to experiment? Here are some tasty spins:
- Cheddar Herb Scones: Add shredded cheese and chopped chives.
- Cinnamon Raisin: Toss in a teaspoon of cinnamon and a handful of raisins.
- Lemon Poppy Seed: Add zest and poppy seeds for brightness.
- Savory Garlic Parmesan: Mix in garlic powder and grated Parmesan.
- Maple Walnut: Sweeten with maple syrup and fold in chopped nuts.
FAQ’s
Q1: Can I bake these instead of frying?
Yes, you can bake them at 400°F for about 15 to 18 minutes until golden, though they won’t be as crispy.
Q2: What kind of oil is best for frying?
Neutral oils like vegetable, canola, or sunflower oil work best.
Q3: Can I use whole wheat flour?
Yes, but expect a denser texture and nuttier flavor.
Q4: How do I know when the oil is hot enough?
Use a thermometer or drop a small piece of dough in — it should sizzle and float.
Q5: Can I freeze the dough?
Absolutely. Wrap tightly and freeze for up to a month. Thaw before frying.
Q6: Why are my scones greasy?
The oil might be too cold. Make sure it’s hot enough before frying.
Q7: Can I add fruit to the dough?
Yes! Blueberries, chopped apples, or dried cranberries work well.
Q8: Do they taste sweet or savory?
They’re slightly sweet but neutral enough to go either way.
Q9: Can I make them dairy-free?
Yes. Use plant-based milk and dairy-free butter alternatives.
Q10: How thick should I roll the dough?
About ½ inch gives the best rise and texture.
Conclusion
These fried scones are a cozy little indulgence that’s so easy to make and even easier to love. Whether you’re savoring one with coffee or serving up a platter for friends, they bring warmth, crunch, and joy to the table. Let me tell you, it’s worth every bite.
Print
Fried Scones
- Prep Time: 10 minutes
- Cook Time: 15 minutes
- Total Time: 25 minutes
- Yield: 8 scones 1x
- Category: Breakfast, Snack
- Method: Frying
- Cuisine: American
- Diet: Vegetarian
Description
Golden, crispy-on-the-outside and fluffy-on-the-inside fried scones that are perfect for breakfast, brunch, or a cozy snack. Made with simple pantry staples, they’re quick to whip up and completely irresistible.
Ingredients
- 2 cups all-purpose flour
- 2 ½ teaspoons baking powder
- ½ teaspoon salt
- ¼ cup unsalted butter, cold and cubed
- 2 tablespoons granulated sugar
- ¾ cup milk
- Vegetable oil, for frying
Instructions
- Heat about 2 inches of vegetable oil in a deep frying pan over medium heat until it reaches around 350°F.
- In a large bowl, whisk together flour, baking powder, salt, and sugar. Cut in the cold butter until the mixture is crumbly.
- Pour in the milk and gently stir until a soft dough forms.
- Turn the dough onto a floured surface and roll to about ½ inch thick. Cut into rounds or triangles.
- Carefully fry the scones in batches, 2 to 3 at a time, for about 2 to 3 minutes per side or until golden brown.
- Remove and drain on paper towels.
- Serve warm with butter, jam, or your favorite topping.
Notes
- Keep butter cold to ensure flakiness.
- Don’t overcrowd the pan while frying.
- For extra flavor, try adding herbs, cheese, or dried fruit to the dough.
Nutrition
- Serving Size: 1 scone
- Calories: 250
- Sugar: 3g
- Sodium: 180mg
- Fat: 12g
- Saturated Fat: 4g
- Unsaturated Fat: 7g
- Trans Fat: 0g
- Carbohydrates: 30g
- Fiber: 1g
- Protein: 4g
- Cholesterol: 15mg
Keywords: fried scones, skillet scones, easy scone recipe, breakfast scones, no bake scones