Corn Syrup-Free Homemade Marshmallows
There’s something whimsical about making marshmallows from scratch. Watching a clear mixture whip into cloud-like fluff feels like a tiny kitchen magic trick. But what if I told you that you don’t need corn syrup to make them? That you could create these sweet, squishy pillows with simple pantry staples instead? Once you try this homemade version, those store-bought ones will never taste the same again. Trust me, you’re going to love this.
Why These Marshmallows Are Worth Making From Scratch
There’s a unique satisfaction in crafting marshmallows with your own hands. You get to control the ingredients, skip the additives, and taste the real, unmasked sweetness of vanilla and sugar. The result is not only more flavorful but also irresistibly tender.
A Sweet Treat With A Bit of History
Marshmallows have quite the journey behind them. Originally made using the root sap of the marshmallow plant in ancient Egypt, they were more medicinal than dessert. As time passed and recipes evolved, French confectioners turned them into the fluffy sweets we know today. The commercial versions brought in corn syrup and stabilizers, but we’re bringing it back to basics, creating the perfect texture with just sugar, gelatin, and a little patience.
What Makes This Recipe So Special Every Time
It’s the kind of treat that feels indulgent, yet simple. With the right balance and technique, these homemade marshmallows always come out like a dream.
Versatile: You can cut them into fun shapes, toast them over fire, or dip them in chocolate.
Budget-Friendly: Uses just a handful of pantry staples, no fancy tools or ingredients.
Quick and Easy: Takes about 30 minutes of hands-on time, then let the magic set.
Customizable: Swap flavors, roll in cocoa powder, or swirl in freeze-dried fruit.
Crowd-Pleasing: These always disappear fast at parties, holidays, or gift baskets.
Make-Ahead Friendly: Prep the night before and let them firm up overnight.
Great for Leftovers: Melt into hot cocoa or slice into cereal treats later.
Insider Tips for Marshmallow Success
To help you master the fluff, here are a few tricks that always work in my kitchen:
- Use a Candy Thermometer: Hitting the right sugar temperature (240°F) is key for setting.
- Prep Your Pan Generously: Dust it with powdered sugar and line it well to prevent sticking.
- Work Quickly: Once the mixture hits the right thickness, transfer it fast before it sets.
- Let Them Cure Fully: Overnight resting ensures the best texture.
- Use a Hot Knife: For clean cuts, dip your knife in hot water and wipe between slices.
Tools You’ll Want On Hand
Making marshmallows doesn’t require much, but a few basics go a long way.
Candy Thermometer: Essential for hitting that soft-ball sugar stage.
Stand Mixer with Whisk Attachment: You’ll need a strong mixer to whip the hot syrup into fluff.
8×8 Baking Pan: The perfect size for a classic batch.
Rubber Spatula: Helps spread the sticky mixture smoothly into the pan.
Fine Mesh Sieve: To dust with powdered sugar evenly.
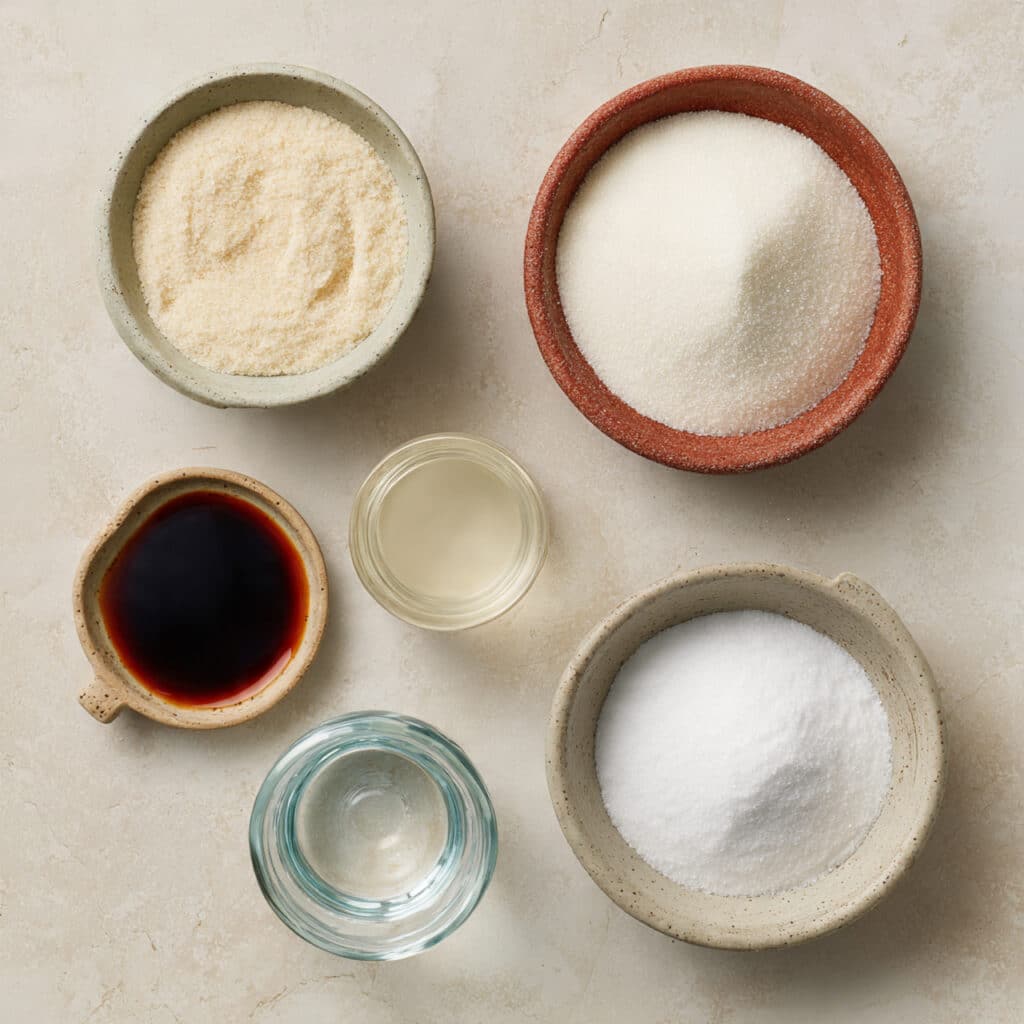
Ingredients You’ll Need For This Fluffy Delight
This short ingredient list delivers big on flavor and texture. When they all come together, you get the pillowy sweetness you crave.
- Granulated Sugar: 2 cups — The base sweetener that helps form the soft structure.
- Gelatin Powder: 2 ½ tablespoons (about 3 envelopes) — The setting agent that gives that bounce.
- Cold Water: 1 cup, divided — Used to bloom the gelatin and also dissolve the sugar.
- Vanilla Extract: 1 tablespoon — Adds that signature warm aroma and flavor.
- Salt: ¼ teaspoon — Balances the sweetness just enough.
- Powdered Sugar: For dusting — Keeps everything from sticking and adds a soft finish.
Ingredient Swaps That Still Work Wonders
Sometimes you’ve got to make do with what’s in your pantry. Here’s how to tweak without worry:
Granulated Sugar: Coconut sugar or maple sugar for a richer, deeper flavor.
Vanilla Extract: Try almond, peppermint, or lemon extract for a twist.
Powdered Sugar: Use a mix of powdered sugar and cornstarch for a drier surface.
Key Ingredients That Steal the Show
Gelatin Powder: This is the heart of the texture. Without it, you won’t get that iconic bounce.
Vanilla Extract: Don’t skimp on quality here. It’s what gives these marshmallows their nostalgic
charm.
Let’s Make Marshmallows – Here Comes the Fun Part
You’re just a few steps away from fluffy, vanilla-scented joy. Let’s get into the rhythm of it.
1. Preheat Your Equipment:
Line an 8×8 baking pan with parchment paper and dust generously with powdered sugar.
2. Combine Ingredients:
In a mixing bowl, sprinkle the gelatin over ½ cup cold water to bloom. In a saucepan, combine granulated sugar, ½ cup water, and salt. Heat over medium until it reaches 240°F.
3. Prepare Your Cooking Vessel:
Once the syrup hits temperature, slowly pour it into the gelatin while mixing on low. Then increase speed and whip for 10–12 minutes until thick, white, and tripled in volume. Mix in vanilla at the end.
4. Assemble the Dish:
Quickly transfer the mixture into your prepared pan. Use a spatula to smooth the top.
5. Cook to Perfection:
Technically no cooking here, but let the pan sit at room temperature uncovered for 6–8 hours or overnight.
6. Finishing Touches:
Dust the top with more powdered sugar. Turn out onto a cutting board and slice with a greased or hot knife.
7. Serve and Enjoy:
Arrange in a bowl, stack on a dessert tray, or add to hot cocoa. You earned this sweet treat.
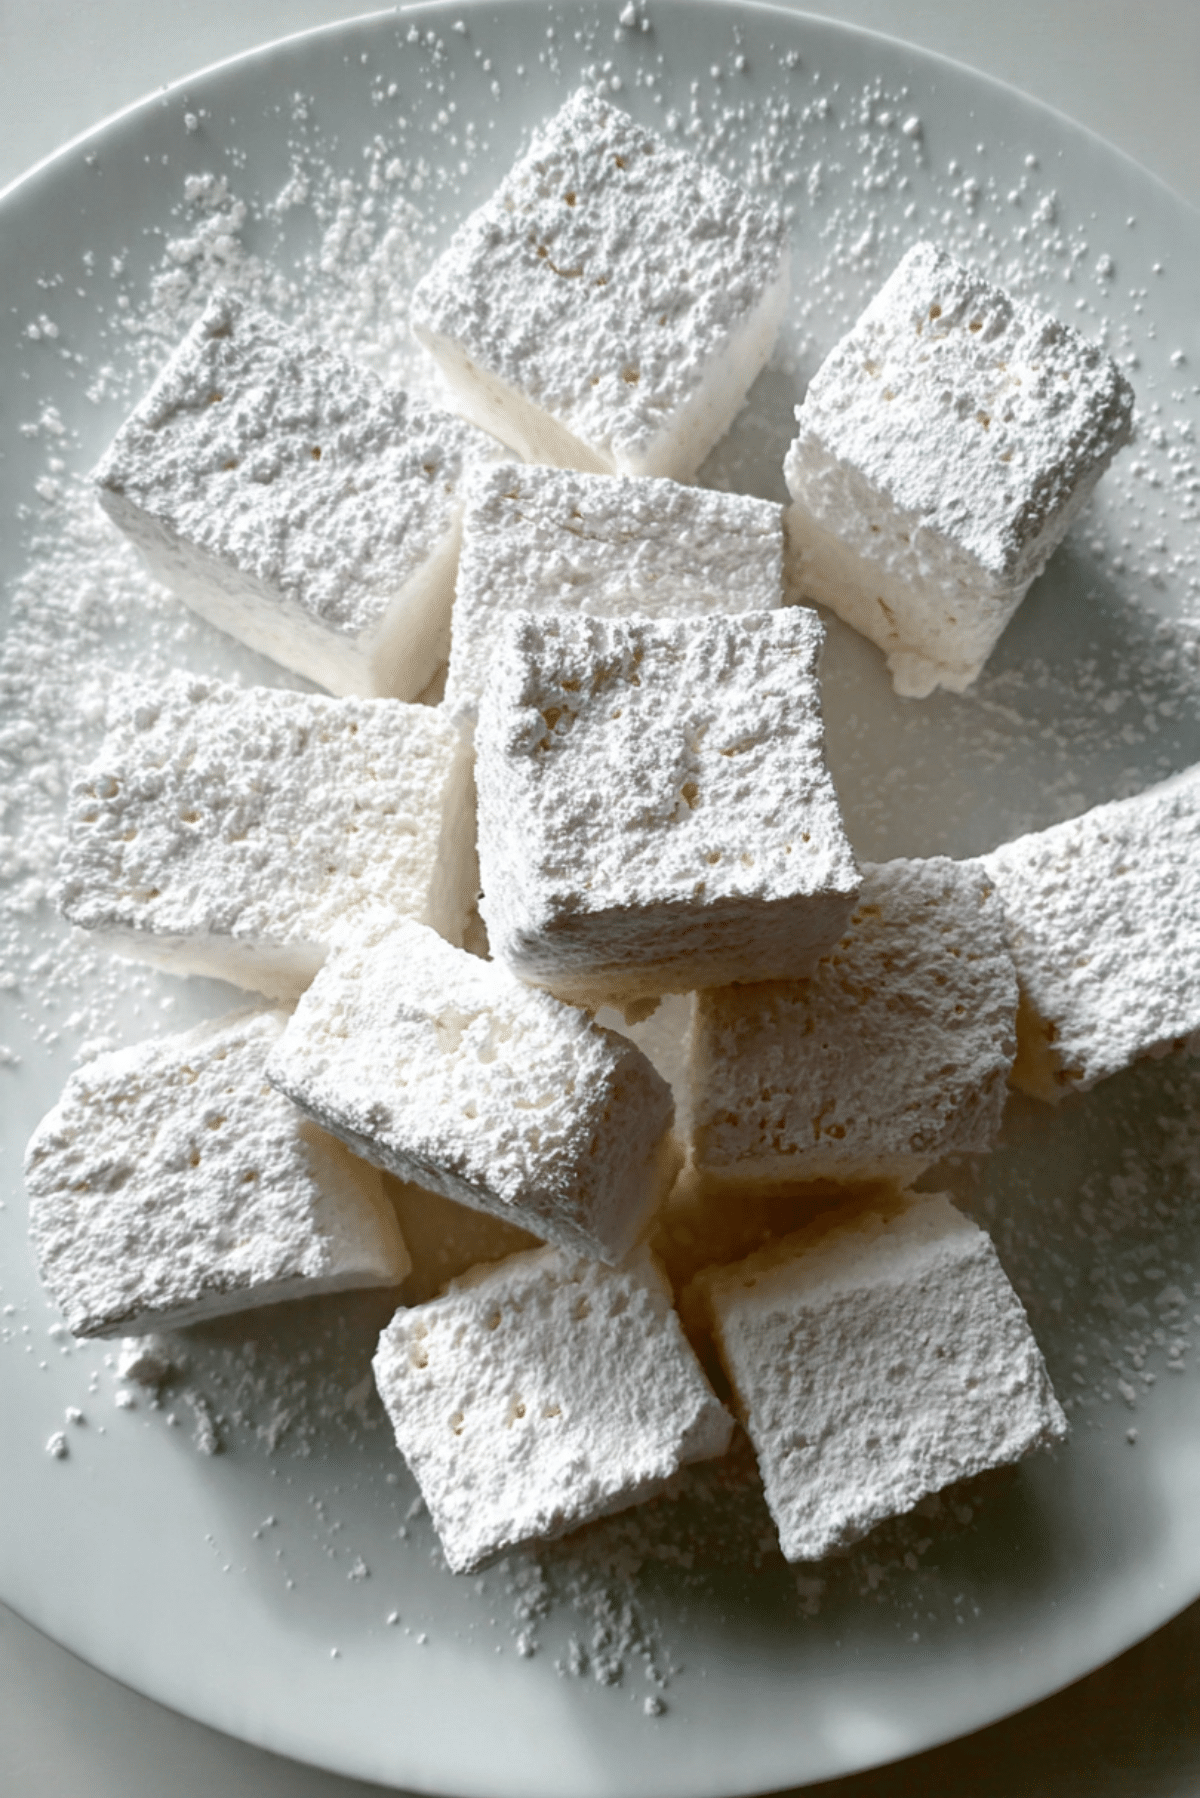
Light as Air, Sweet as a Cloud
The contrast here is delightful — soft and squishy inside, barely crisp from the powdered sugar on the outside. The vanilla hums gently in the background while the sugar melts effortlessly in each bite. It’s the kind of candy that feels like a memory.
Pro Tips to Make It Easier
Making candy can feel intimidating, but these tips smooth out the bumps.
- Use a greased spatula to handle the sticky mixture.
- Don’t skip blooming the gelatin, or it won’t dissolve properly.
- Cool your syrup slightly before pouring into gelatin to avoid splatter.
- Use plenty of powdered sugar to coat the marshmallows on all sides.
Mistakes to Watch For
No judgment — we’ve all had a marshmallow mishap. Here’s how to avoid yours.
- Syrup too hot or cold: Aim for exactly 240°F or it won’t set properly.
- Undermixing: If you stop whipping too early, it won’t hold shape.
- Sticky disaster: Line your pan and use sugar generously.
- Rushing the set time: Let it rest at least 6 hours before slicing.
Nutrition At A Glance
Servings: 16
Calories per serving: 96
Note: These are approximate values.
How Much Time Do You Need?
Prep Time: 25 minutes
Cook Time: 10 minutes
Total Time: 35 minutes
Make-Ahead and Storage Tips
The best part about marshmallows is how well they store. You can absolutely make these in advance.
Store in an airtight container at room temperature for up to 2 weeks. Avoid the fridge, as it adds moisture. You can also freeze them layered with parchment paper for up to 2 months. Let them thaw at room temp before using.
Best Ways to Serve These Pillowy Treats
The options are endless. Here are a few ways I love to share and serve them:
- Drop into a mug of hot cocoa for the perfect melt.
- Skewer and toast over a fire for that golden crust.
- Dip half in melted chocolate and roll in crushed nuts.
- Use in homemade s’mores for that real gooey pull.
Leftover Marshmallows? Here’s What To Do
If you happen to have any leftovers, they can easily be transformed into something new.
- Chop and stir into Rice Krispies for marshmallow cereal bars.
- Melt into your coffee for an indulgent morning treat.
- Mix into trail mix with nuts and chocolate chips.
- Use as cupcake toppings or fill cookie sandwiches.
Additional Tips to Level Up
- Add food coloring for fun holiday versions.
- Sprinkle with cocoa or cinnamon for extra flavor.
- Use cookie cutters for shapes and themed gifts.
- Mix in extracts like mint or orange for flavor play.
How to Make Them Look as Good as They Taste
Presentation matters, especially when gifting or sharing.
- Cut into uniform squares using a ruler for straight lines.
- Stack them in glass jars with ribbon for charming gifts.
- Dust lightly with edible glitter or colored sugar.
- Arrange on a dessert platter with contrast textures like nuts or fruit.
Variations to Try
Change up the flavor or feel with a few creative spins.
- Peppermint Swirl: Add red coloring and peppermint extract.
- Chocolate Chip: Fold mini chocolate chips in before setting.
- Lavender Honey: Use lavender extract and a hint of honey.
- Cinnamon Roll: Add cinnamon and vanilla bean paste.
- Lemon Zest: Use lemon extract and zest for a citrusy twist.
FAQ’s
Q1: Can I make these without a stand mixer?
Yes, but it’s tough. A hand mixer works, but it’ll take longer and require some stamina.
Q2: Is it safe to use raw gelatin?
Yes. The boiling syrup melts and activates the gelatin, making it safe to eat.
Q3: Can I use agar agar instead?
You can try, but the texture will be firmer and less bouncy.
Q4: Why is my mixture not thickening?
Either the syrup didn’t reach temperature or you didn’t whip it long enough.
Q5: How long do they really last?
Up to 2 weeks if stored properly in an airtight container.
Q6: Do they melt like store-bought marshmallows?
Yes, they toast beautifully and melt into drinks.
Q7: Can I flavor these with fruit puree?
Yes, but reduce the liquid elsewhere in the recipe.
Q8: Are these gluten-free?
Yes, all the listed ingredients are naturally gluten-free.
Q9: Do I need to refrigerate them?
No, they store best at room temperature.
Q10: Why avoid corn syrup?
Many prefer to avoid processed sweeteners or just don’t have it on hand.
Conclusion
Once you whip up a batch of these corn syrup-free marshmallows, you’ll wonder why you didn’t try it sooner. They’re simple, soft, and endlessly fun to make. Whether it’s for your next cocoa night or a sweet homemade gift, these will definitely steal the show. Go ahead and try it — it’s worth every bite.
Print
Corn Syrup-Free Homemade Marshmallows
- Prep Time: 25 minutes
- Cook Time: 10 minutes
- Total Time: 35 minutes
- Yield: 16 servings 1x
- Category: Dessert
- Method: No-Bake
- Cuisine: American
- Diet: Gluten Free
Description
Fluffy, pillowy homemade marshmallows made without corn syrup. These sweet treats are perfect for cocoa, s’mores, or snacking straight from the jar.
Ingredients
- 2 cups granulated sugar
- 2 ½ tablespoons (3 envelopes) gelatin powder
- 1 cup cold water, divided
- 1 tablespoon vanilla extract
- ¼ teaspoon salt
- Powdered sugar, for dusting
Instructions
- Line an 8×8 baking pan with parchment paper and generously dust with powdered sugar.
- In a stand mixer bowl, sprinkle gelatin over ½ cup cold water and let bloom.
- In a saucepan, combine granulated sugar, remaining ½ cup water, and salt. Heat over medium heat until it reaches 240°F (use a candy thermometer).
- Carefully pour the hot syrup into the bloomed gelatin while mixing on low speed. Then increase to high and whip for 10–12 minutes until thick, white, and fluffy. Mix in vanilla extract.
- Quickly spread the mixture into the prepared pan using a greased spatula and smooth the top.
- Let sit uncovered at room temperature for 6–8 hours or overnight until firm.
- Dust top with powdered sugar, remove from pan, and cut into squares using a greased or hot knife.
- Coat each piece with additional powdered sugar to prevent sticking.
Notes
- Use a candy thermometer for best accuracy when boiling the sugar syrup.
- Store in an airtight container at room temperature for up to 2 weeks.
- To avoid sticking, be generous with powdered sugar during dusting and cutting.
- Add flavored extracts or food coloring to customize your marshmallows.
Nutrition
- Serving Size: 1 piece
- Calories: 96
- Sugar: 16g
- Sodium: 20mg
- Fat: 0g
- Saturated Fat: 0g
- Unsaturated Fat: 0g
- Trans Fat: 0g
- Carbohydrates: 24g
- Fiber: 0g
- Protein: 1g
- Cholesterol: 0mg
Keywords: homemade marshmallows, no corn syrup marshmallows, easy marshmallows, gelatin marshmallows