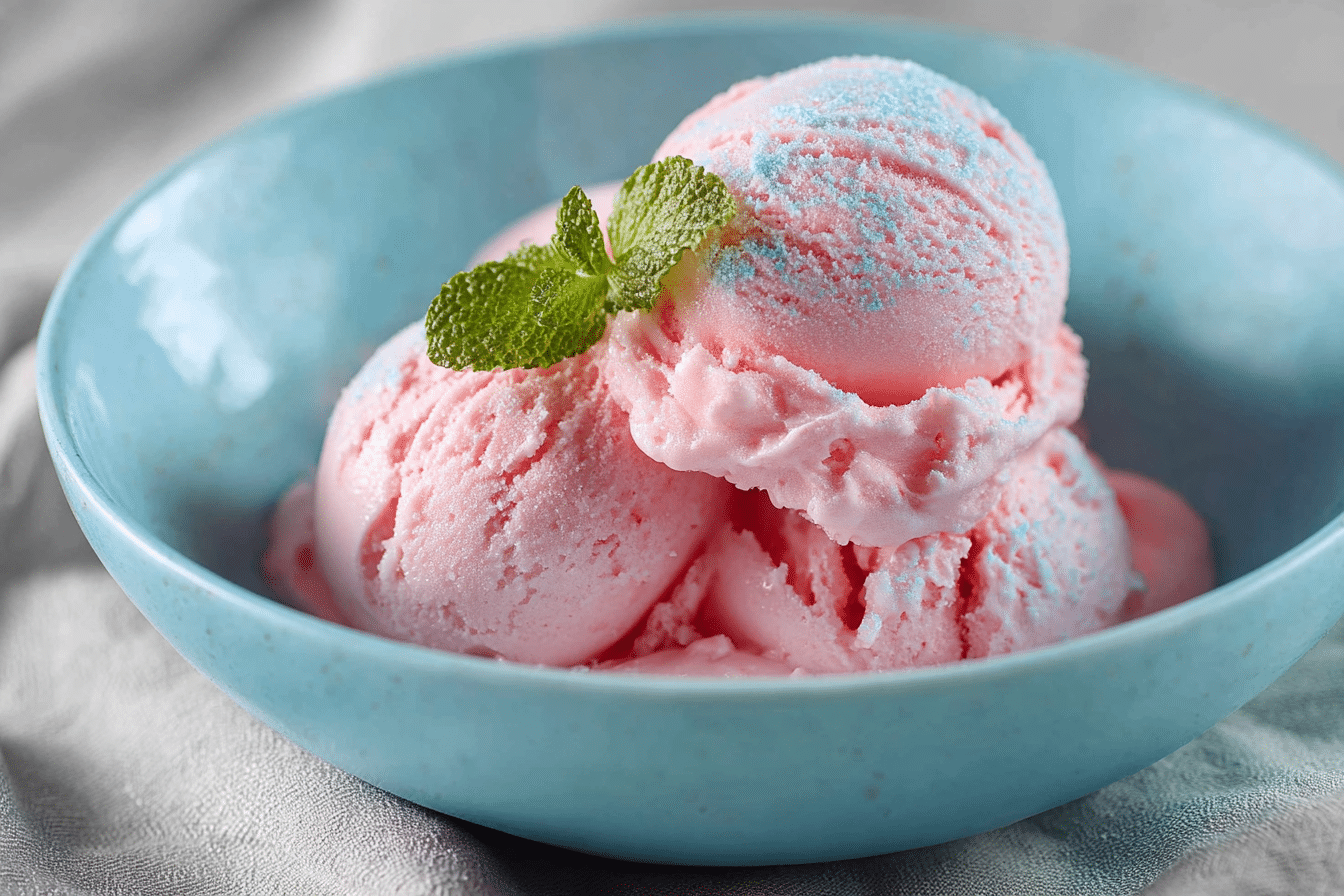
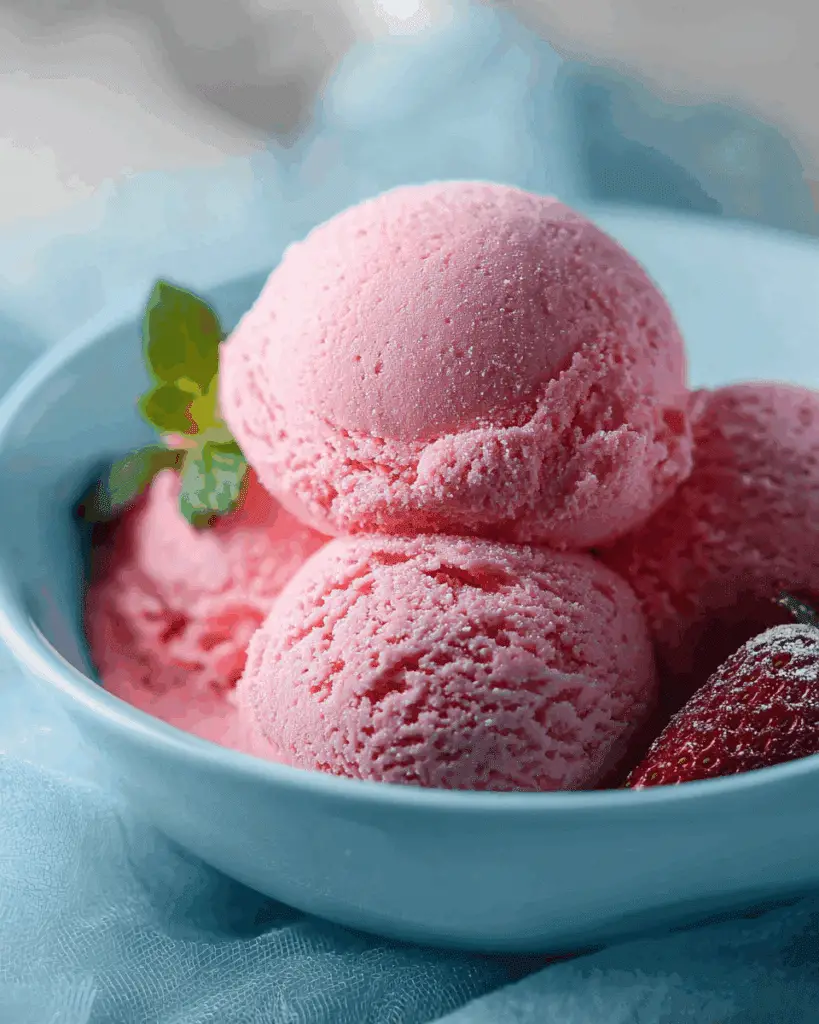
Cotton Candy Ice Cream
Close your eyes and imagine strolling through the fair—bright lights, laughter in the air, and the unmistakable smell of spun sugar swirling around. That’s exactly what this Cotton Candy Ice Cream tastes like. Sweet, fluffy, and oh-so-whimsical, it’s a carnival treat you can scoop straight from your freezer.
This recipe is smooth, creamy, and loaded with the playful sweetness of cotton candy syrup. Whether you’re making it for a kid’s birthday party, a summer get-together, or just to relive your own childhood memories, it’s guaranteed to make you smile. Trust me, one bite and you’ll feel like a kid again.
Why You’ll Love This Recipe
Fun & Nostalgic: Tastes just like cotton candy from the fair.
No Fancy Machines Needed: Works great in an ice cream maker, but I’ll share no-churn tips too.
Customizable: Add food coloring for a magical swirl of pink and blue—or keep it simple and classic.
Family-Friendly: Kids love it, but let’s be honest—adults go crazy for it too.
Make-Ahead Treat: Perfect for prepping a few days before a party or special occasion.
Kitchen Tools You’ll Need
- Medium saucepan
- Mixing bowl
- Whisk
- Ice cream maker (or loaf pan + freezer for no-churn method)
- Measuring cups & spoons
- Spatula
Cotton Candy Ice Cream
- Prep Time: 10 minutes
- Cook Time: 0 minutes
- Total Time: 4 hours 10 minutes (includes freezing)
- Yield: 6 servings 1x
- Category: Dessert
- Method: Churned/No-Churn
- Cuisine: American
- Diet: Vegetarian
Description
This homemade cotton candy ice cream is sweet, creamy, and fun with its nostalgic carnival flavor. Made with real cotton candy syrup, it’s the perfect colorful treat for kids and adults alike.
Ingredients
- 2 cups heavy whipping cream
- 1 cup whole milk
- 3/4 cup granulated sugar
- 1/2 cup cotton candy syrup (such as Jelly Belly Cotton Candy Syrup)
- 1 teaspoon vanilla extract
- 1 pinch salt
- Food coloring (optional)
Instructions
- In a large mixing bowl, whisk together heavy whipping cream, whole milk, granulated sugar, cotton candy syrup, vanilla extract, and salt until the sugar is dissolved.
- If desired, add a few drops of food coloring and stir until evenly combined.
- Pour the mixture into an ice cream maker and churn according to the manufacturer’s instructions until thick and creamy.
- Transfer the ice cream to a freezer-safe container, smooth the top, and cover tightly.
- Freeze for at least 4 hours, or until firm.
- Scoop and serve with extra cotton candy or sprinkles for garnish, if desired.
Notes
- If you don’t have an ice cream maker, you can pour the mixture into a freezer-safe dish, stir every 30 minutes until frozen for a no-churn version.
- Food coloring is optional but makes the ice cream look more festive.
- Top with cotton candy for a fun presentation when serving at parties.
Nutrition
- Serving Size: 1/2 cup
- Calories: 240
- Sugar: 24g
- Sodium: 55mg
- Fat: 14g
- Saturated Fat: 9g
- Unsaturated Fat: 4g
- Trans Fat: 0g
- Carbohydrates: 26g
- Fiber: 0g
- Protein: 3g
- Cholesterol: 50mg
Keywords: cotton candy ice cream, homemade ice cream, carnival desserts, summer treats, no churn ice cream
Chef’s Pro Tips for Perfect Results
- Chill the mixture before churning. Cold base = creamier ice cream.
- Don’t skip the salt. Just a pinch balances the sweetness perfectly.
- Go bold with colors. Split the mixture into two bowls, tint one pink and one blue, then swirl together for a true cotton candy vibe.
- Freeze long enough. Overnight freezing gives you scoop-shop texture.
Ingredients in Cotton Candy Ice Cream
Heavy Whipping Cream: The base of any creamy, dreamy ice cream.
Whole Milk: Lightens the richness for the perfect balance.
Granulated Sugar: Sweetens and smooths the ice cream base.
Cotton Candy Syrup: The star of the show—brings that nostalgic carnival flavor.
Vanilla Extract: Rounds out the flavor and adds depth.
Salt: Just a pinch enhances all the sweetness.
Food Coloring (optional): For that signature pink-and-blue carnival look.
(Note: the full ingredients list with measurements is provided in the recipe card above.)
Instructions
Make the Base: In a saucepan, whisk together cream, milk, sugar, cotton candy syrup, vanilla, and salt. Heat gently over medium until the sugar dissolves (don’t let it boil).
Chill the Mixture: Pour into a bowl, cover, and refrigerate for at least 2 hours (or overnight) until completely cold.
Add Food Coloring (Optional): If using, divide the mixture into two bowls and add pink food coloring to one and blue to the other.
Churn the Ice Cream: Pour into your ice cream maker and churn according to the manufacturer’s instructions until thick and creamy.
No-Churn Method: Whip the cream separately until soft peaks form. Stir in the milk, syrup, vanilla, and sugar. Layer in a loaf pan, swirling pink and blue with a knife. Freeze until solid (about 6 hours).
Freeze to Set: Transfer to a container and freeze for 4–6 hours, or until scoopable.
Serve & Enjoy: Scoop into cones or bowls, top with sprinkles if you’re feeling fancy, and enjoy a taste of childhood magic!
Nutrition Facts (approximate)
Servings: 8
Calories per serving: ~270
Preparation Time
Prep Time: 15 minutes
Chill Time: 2+ hours
Churn/Freeze Time: 4–6 hours
Total Time: 6–8 hours (mostly hands-off)
How to Serve Cotton Candy Ice Cream
- Classic Cones: Serve in sugar or waffle cones for the full carnival experience.
- Colorful Sundaes: Top with whipped cream, sprinkles, and a drizzle of extra cotton candy syrup.
- Birthday Parties: Pair with cupcakes or cake for the ultimate celebration treat.
- Creative Desserts: Sandwich between cookies for cotton candy ice cream sandwiches.
Make-Ahead and Storage Tips
- Store in a freezer-safe container with a lid for up to 2 weeks.
- Press a piece of parchment or plastic wrap directly on top of the ice cream to prevent ice crystals.
- Let sit on the counter for 5 minutes before scooping for best texture.
Variations to Try
- Add mini marshmallows for extra carnival flair.
- Mix in crushed cotton candy-flavored candy or rock candy for crunch.
- Swirl in strawberry or raspberry syrup for a fruity twist.
- Make it rainbow with multiple food coloring swirls.
FAQ Section
Q1: Can I make this without an ice cream maker?
A1: Yes! Use the no-churn method with whipped cream and a loaf pan.
Q2: Can I use skim or low-fat milk?
A2: You can, but the texture won’t be as creamy. Whole milk is best.
Q3: Where do I find cotton candy syrup?
A3: Check the coffee syrup aisle, online, or specialty stores (like Jelly Belly).
Q4: Can I use real cotton candy instead of syrup?
A4: Fun idea, but it dissolves too quickly and won’t give enough flavor. Stick to syrup.
Q5: How long does it last in the freezer?
A5: About 2 weeks for best texture and flavor.
Q6: Can I make this sugar-free?
A6: Try using a sugar substitute and sugar-free syrup, though texture may change slightly.
Q7: Can I swirl in actual cotton candy pieces?
A7: They’ll melt in, but you can sprinkle them on top right before serving.
Q8: How do I make the pink and blue swirl?
A8: Divide the base, color separately, then layer and swirl gently with a knife before freezing.
Q9: Can I use half-and-half instead of cream?
A9: It works, but it won’t be quite as rich and creamy.
Q10: Can I double the recipe?
A10: Absolutely—just make sure your ice cream maker (or loaf pan) can handle the volume.
Conclusion
Cotton Candy Ice Cream is more than just dessert—it’s pure joy in a bowl. It’s creamy, colorful, and brings back all the best carnival memories with every single bite. Whether you’re making it for kids, guests, or just yourself (no judgment here), this recipe is guaranteed to bring big smiles.
So grab your sprinkles, swirl in those magical colors, and get ready for a treat that feels like summer in every scoop.