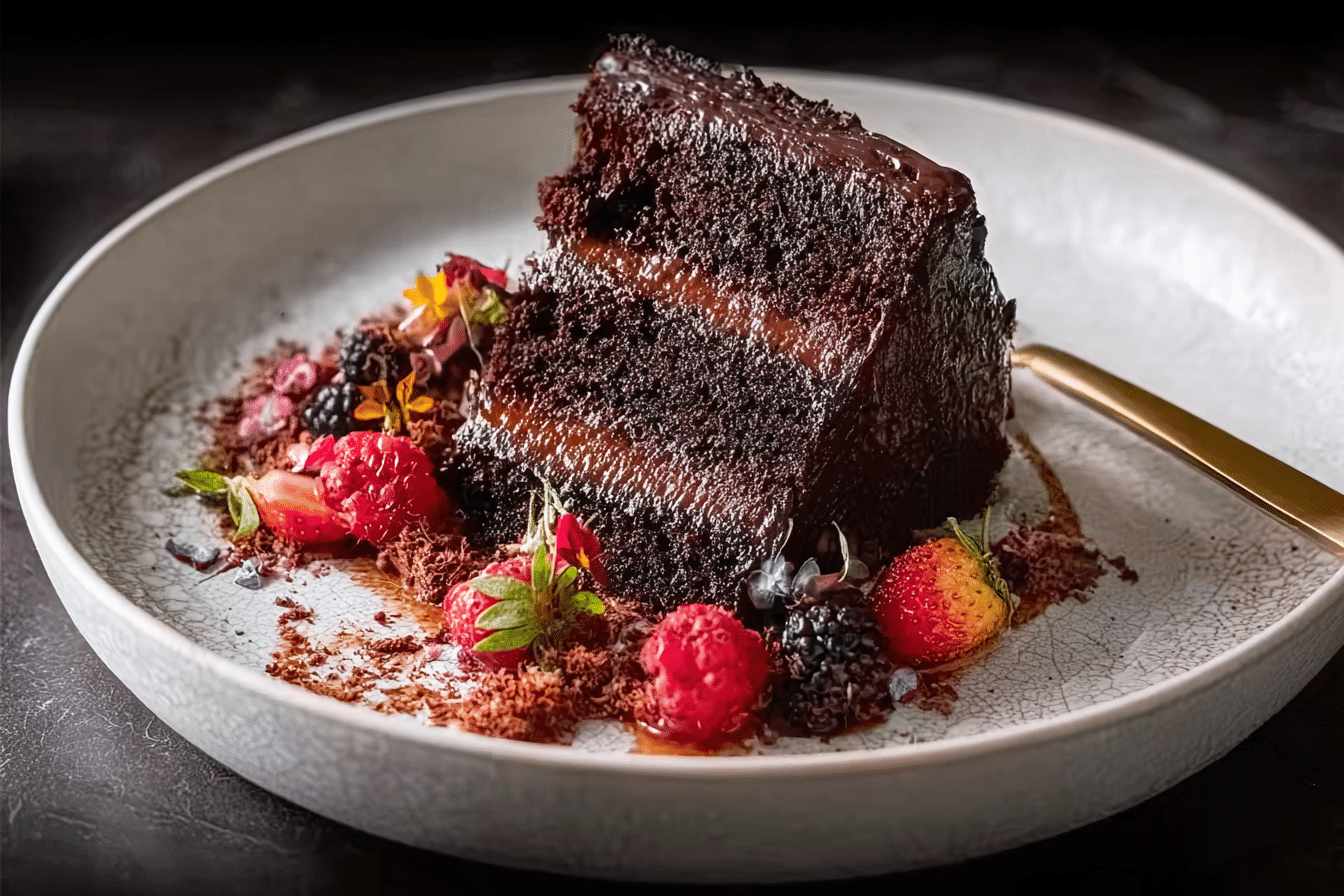
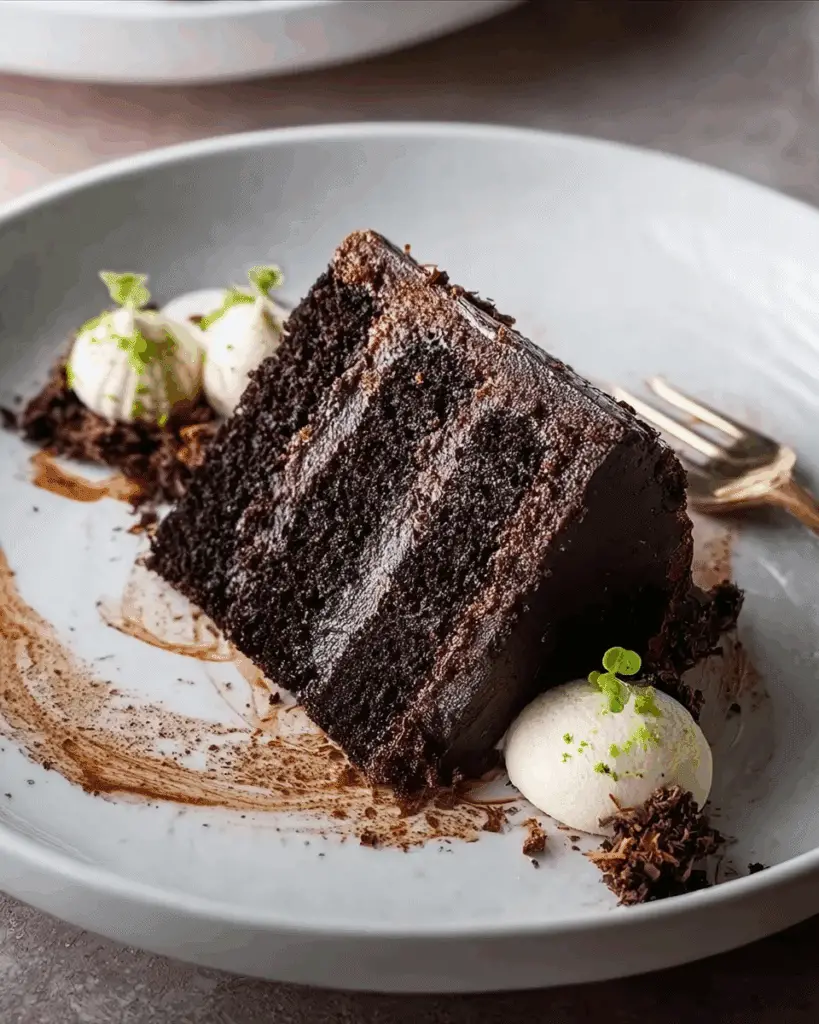
Oil-Based Moist Chocolate Cake
There’s something incredibly comforting about a slice of moist chocolate cake, especially when it’s rich, tender, and practically melts in your mouth. This oil-based version guarantees that velvety softness in every bite, staying fresh and delicious even days after baking. Imagine the aroma of cocoa filling your kitchen, the glossy batter swirling in the bowl, and the anticipation of that first decadent slice — trust me, you’re going to love this.
Behind the Recipe
This cake holds a special place in my kitchen. I remember baking it for the first time on a rainy afternoon, the kind where you crave something warm and indulgent. Unlike butter-based cakes that can feel a little dense, this oil-based version came out so airy and moist that I knew it was a keeper. It’s the kind of recipe that turns an ordinary day into a celebration, with every forkful tasting like a hug in dessert form.
Recipe Origin or Trivia
Chocolate cake has traveled the globe and nestled into nearly every culture, but oil-based cakes have their roots in the need for longer-lasting moisture. Butter cakes can dry out quickly, but using oil gives the crumb a tender texture that feels luxurious. Many bakers around the world prefer this method for its reliability — especially in warm climates where butter melts too fast. Fun fact: oil-based chocolate cakes became especially popular during the mid-20th century as households discovered how well they held up in lunchboxes and gatherings.
Why You’ll Love Oil-Based Moist Chocolate Cake
There are plenty of reasons to fall in love with this recipe, and here’s exactly why it’s worth every bite:
Versatile: Perfect for birthdays, casual get-togethers, or a quiet evening treat with coffee.
Budget-Friendly: Made with pantry staples you likely already have on hand.
Quick and Easy: Simple mixing, no fancy equipment needed, and the batter comes together fast.
Customizable: Add fillings, frostings, or flavor twists like espresso or orange zest.
Crowd-Pleasing: Loved by both kids and adults, it disappears from the table in no time.
Make-Ahead Friendly: Bake a day before, and it’s just as moist the next day.
Great for Leftovers: Keeps its softness beautifully, even when stored for several days.
Oil-Based Moist Chocolate Cake
- Prep Time: 20 minutes
- Cook Time: 35 minutes
- Total Time: 55 minutes
- Yield: 12 servings
- Category: Dessert
- Method: Baking
- Cuisine: American
- Diet: Vegetarian
Description
An ultra-moist, oil-based chocolate cake with a tender crumb, deep cocoa flavor, and a glossy, silky batter that bakes up into a rich, melt-in-your-mouth slice. Trust me, you’re going to love this.
Ingredients
- All-Purpose Flour: 1 3/4 cups (220 g)
- Unsweetened Cocoa Powder: 3/4 cup (65 g)
- Granulated Sugar: 2 cups (400 g)
- Baking Powder: 1 1/2 teaspoons
- Baking Soda: 1 1/2 teaspoons
- Salt: 1 teaspoon
- Eggs: 2 large
- Whole Milk: 1 cup (240 ml)
- Vegetable Oil: 1/2 cup (120 ml)
- Vanilla Extract: 2 teaspoons
- Boiling Water or Hot Coffee: 1 cup (240 ml)
Instructions
- Preheat Your Equipment: Preheat oven to 350°F (175°C). Grease and line two 9-inch round cake pans with parchment.
- Combine Ingredients: Whisk flour, cocoa, sugar, baking powder, baking soda, and salt. In another bowl whisk eggs, milk, oil, and vanilla. Combine wet into dry, then stir in hot water or coffee until smooth.
- Prepare Your Cooking Vessel: Divide batter evenly between prepared pans and tap gently to release air bubbles.
- Assemble the Dish: Smooth the tops for even baking.
- Cook to Perfection: Bake 30 to 35 minutes, until a toothpick inserted in the center comes out clean.
- Finishing Touches: Cool in pans 10 minutes, then turn out onto a rack to cool completely.
- Serve and Enjoy: Frost as desired or dust with powdered sugar and slice.
Notes
- Use room-temperature eggs for a smoother batter and better rise.
- Sift cocoa powder to remove lumps and boost flavor distribution.
- Do not overmix after adding flour to keep the crumb tender.
- Hot brewed coffee enhances chocolate depth, water works well too.
- Chill cooled layers before frosting for clean, sharp edges.
- Wrap layers tightly to keep moisture if making ahead.
Nutrition
- Serving Size: 1 slice
- Calories: 320
- Sugar: 32 g
- Sodium: 300 mg
- Fat: 14 g
- Saturated Fat: 3 g
- Unsaturated Fat: 10 g
- Trans Fat: 0 g
- Carbohydrates: 46 g
- Fiber: 3 g
- Protein: 4 g
- Cholesterol: 35 mg
Keywords: oil-based chocolate cake, moist chocolate cake, easy chocolate cake, no butter chocolate cake, coffee chocolate cake, cocoa cake, tender crumb cake
Chef’s Pro Tips for Perfect Results
Before we dive into the details, here are some insider secrets to guarantee your cake comes out perfect every single time:
- Use room-temperature eggs for a smoother batter and better rise.
- Always sift the cocoa powder to avoid lumps and ensure even flavor.
- Don’t overmix after adding flour, as this can make the cake dense.
- A touch of hot water or coffee intensifies the chocolate flavor beautifully.
Kitchen Tools You’ll Need
A few trusty tools will make your baking journey smoother:
Mixing Bowls: For combining wet and dry ingredients separately.
Whisk and Spatula: Essential for mixing and folding.
Measuring Cups and Spoons: Accuracy matters in baking.
9-inch Round Cake Pans: Standard size for even baking.
Cooling Rack: To cool the cake without trapping moisture.
Ingredients in Oil-Based Moist Chocolate Cake
Every ingredient works together like a beautiful symphony, each playing a role in creating the cake’s moist, tender crumb and rich flavor.
- All-Purpose Flour: 1 and 3/4 cups (220g) provides the structure while keeping the crumb soft.
- Unsweetened Cocoa Powder: 3/4 cup (65g) brings deep chocolate flavor and a rich color.
- Granulated Sugar: 2 cups (400g) sweetens and balances the bitterness of cocoa.
- Baking Powder: 1 and 1/2 teaspoons helps the cake rise with a fluffy texture.
- Baking Soda: 1 and 1/2 teaspoons ensures a perfect lift and reacts well with the cocoa.
- Salt: 1 teaspoon enhances the chocolate flavor and balances sweetness.
- Eggs: 2 large bind the batter and add richness.
- Whole Milk: 1 cup (240ml) gives moisture and tenderness.
- Vegetable Oil: 1/2 cup (120ml) guarantees lasting moistness.
- Vanilla Extract: 2 teaspoons adds warmth and depth of flavor.
- Boiling Water or Hot Coffee: 1 cup (240ml) intensifies chocolate notes and creates a silky batter.
Ingredient Substitutions
Sometimes you need a swap, and here’s how to keep the magic alive:
All-Purpose Flour: Use cake flour for an even softer crumb.
Granulated Sugar: Swap with brown sugar for a deeper caramel undertone.
Whole Milk: Use buttermilk for tang or plant-based milk for a dairy-free version.
Vegetable Oil: Replace with coconut oil for a hint of tropical flavor.
Boiling Water or Coffee: Warm milk can be used for a gentler flavor.
Ingredient Spotlight
Cocoa Powder: The star of the cake, it transforms the batter into a deep, velvety delight with earthy richness.
Vegetable Oil: Unlike butter, it keeps the cake tender and moist for days without becoming heavy.
Instructions for Making Oil-Based Moist Chocolate Cake
Now let’s get to the fun part — baking this irresistible cake step by step.
- Preheat Your Equipment: Preheat oven to 350°F (175°C). Grease and line two 9-inch round cake pans with parchment paper.
- Combine Ingredients: In one bowl, whisk flour, cocoa powder, baking powder, baking soda, salt, and sugar. In another, whisk eggs, milk, oil, and vanilla. Gradually combine the wet and dry mixtures. Stir in hot water or coffee until the batter is smooth.
- Prepare Your Cooking Vessel: Divide the batter evenly between prepared pans. Tap lightly to remove air bubbles.
- Assemble the Dish: Smooth the tops for even baking.
- Cook to Perfection: Bake for 30–35 minutes until a toothpick inserted comes out clean.
- Finishing Touches: Let cakes cool in pans for 10 minutes, then transfer to a wire rack.
- Serve and Enjoy: Frost with your favorite icing or enjoy plain with a dusting of powdered sugar.
Texture & Flavor Secrets
What makes this cake unforgettable is the play between textures and flavors. The crumb is soft yet sturdy enough to hold frosting, while the oil keeps it velvety. Cocoa’s bitterness mingles with sugar’s sweetness, and if you add coffee, it adds a layer of sophistication. Every bite feels like a melt-in-your-mouth indulgence.
Cooking Tips & Tricks
Little tricks go a long way:
- Always use fresh baking soda and powder for proper rise.
- For extra richness, substitute half the water with hot brewed coffee.
- Chill the cake layers before frosting for a cleaner finish.
What to Avoid
To keep your cake flawless, steer clear of these pitfalls:
- Overbaking, which can dry out the cake. Check at 30 minutes.
- Skipping parchment paper, which can cause sticking.
- Overmixing, which makes the crumb tough instead of tender.
Nutrition Facts
Servings: 12
Calories per serving: 320
Note: These are approximate values.
Preparation Time
Prep Time: 20 minutes
Cook Time: 35 minutes
Total Time: 55 minutes
Make-Ahead and Storage Tips
The beauty of this cake is how well it keeps. You can bake the layers a day in advance and wrap them tightly in plastic. Store at room temperature for 3 days or in the fridge for up to a week. It also freezes beautifully — just wrap in plastic and foil. To reheat, a quick zap in the microwave brings back that just-baked warmth.
How to Serve Oil-Based Moist Chocolate Cake
Serve with a swirl of chocolate or vanilla buttercream, a drizzle of ganache, or even a dollop of whipped cream. Pair with a cup of espresso for adults or a glass of cold milk for kids. You can also stack it into a layered celebration cake with fruits or sprinkles.
Creative Leftover Transformations
Leftovers? Lucky you! Crumble the cake into parfaits with cream and berries, use it as a base for trifle, or roll it into cake pops dipped in chocolate.
Additional Tips
Keep your cocoa stored in an airtight container to preserve its bold flavor. If you’re planning to frost, double-wrap the cooled layers in plastic before chilling to avoid dryness.
Make It a Showstopper
For a stunning presentation, frost with silky ganache and top with chocolate curls. Add fresh raspberries or edible flowers for color contrast. Dusting with powdered sugar just before serving also creates a simple yet elegant look.
Variations to Try
- Add a teaspoon of cinnamon for a spiced chocolate cake.
- Stir in chocolate chips for extra gooey bites.
- Swap vanilla for peppermint extract for a holiday twist.
- Add orange zest and a touch of juice for a citrusy lift.
- Use coconut milk and shredded coconut for a tropical variation.
FAQ’s
Q1: Can I make this cake gluten-free?
Yes, swap all-purpose flour with a gluten-free blend, and it still turns out beautifully.
Q2: Can I use butter instead of oil?
You can, but the cake will be denser and may dry out faster.
Q3: How do I prevent the cake from doming?
Bake at the center rack and avoid overmixing the batter.
Q4: Can I bake this in a single pan?
Yes, but adjust the baking time to 40–45 minutes and check for doneness.
Q5: Can I reduce the sugar?
Yes, though it may affect texture. Try reducing by 1/4 cup at first.
Q6: Can I make cupcakes instead?
Absolutely, bake at 350°F for 18–20 minutes.
Q7: Can I freeze frosted cake?
Yes, just freeze uncovered until solid, then wrap well to prevent smudging.
Q8: What frosting pairs best?
Chocolate ganache, cream cheese frosting, or classic buttercream are all perfect choices.
Q9: Can I use almond milk instead of dairy?
Yes, almond milk works well without altering the texture much.
Q10: How long does it stay fresh?
Up to 5 days when stored properly at room temperature or refrigerated.
Conclusion
This Oil-Based Moist Chocolate Cake is proof that sometimes the simplest swaps create the most unforgettable results. With its tender crumb, rich flavor, and endless versatility, it’s the kind of cake that wins hearts at first bite. Bake it once, and you’ll keep coming back to it again and again — because let me tell you, it’s worth every bite.
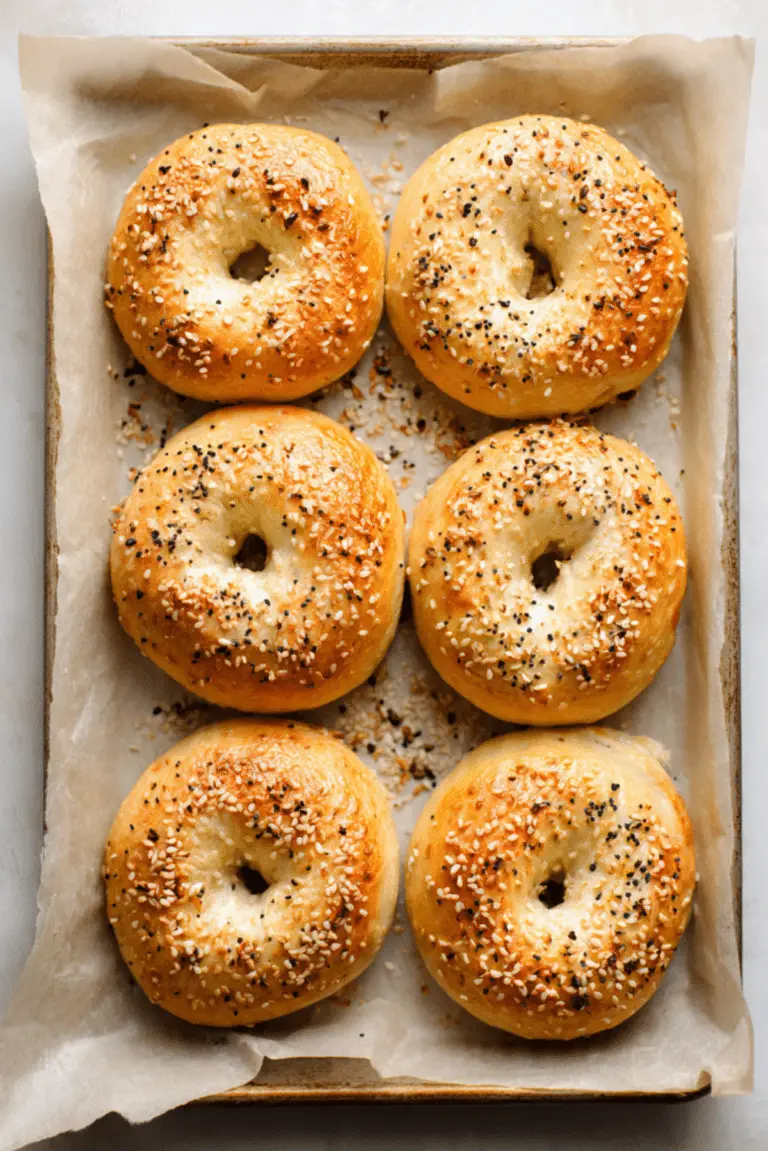
Do you want me to generate the tasty card JSON for this recipe now?There’s nothing quite like the warm aroma of fresh bread filling your kitchen. This sesame bread is soft, pillowy, and incredibly fluffy, with a golden sesame seed crust that gives each bite a gentle crunch. The best part? You don’t even need an oven. With just a stovetop or skillet, you’ll have a loaf that tastes just as delightful as traditional baked bread.
Behind the Recipe
This recipe was born out of those cozy moments when you crave homemade bread but don’t want to heat up the oven or spend hours waiting. It’s inspired by simple, old-world breadmaking traditions where bread was cooked in pans or clay pots, giving it that rustic, earthy character. Making this bread feels like reconnecting with the roots of baking, but with the convenience of modern simplicity.
Recipe Origin or Trivia
Sesame seeds have been sprinkled on breads for centuries, especially in Middle Eastern and Mediterranean cuisines. In many cultures, sesame is considered a symbol of good luck and abundance. Cooking bread on the stovetop is also not new, as flatbreads and skillet breads have been staples in kitchens around the globe for generations. What we’re doing here is bringing those traditions together—soft fluffy bread with a sesame crust, cooked without an oven.
Why You’ll Love Sesame Bread – Soft, Fluffy & No Oven Needed!
Versatile: Perfect for breakfast, a sandwich base, or even alongside soups and stews.
Budget-Friendly: Uses pantry staples like flour, yeast, and sesame seeds that won’t break the bank.
Quick and Easy: No oven, minimal effort, and ready in less time than traditional bread.
Customizable: Add herbs, spices, or even cheese for a fun twist.
Crowd-Pleasing: Everyone loves the aroma and taste of fresh, warm bread.
Make-Ahead Friendly: You can prepare the dough in advance and cook when ready.
Great for Leftovers: Tastes amazing toasted the next day with butter or spreads.
Chef’s Pro Tips for Perfect Results
To make sure your sesame bread turns out bakery-worthy, here are some insider secrets:
- Let the dough rise fully so it’s airy and fluffy inside.
- Use a heavy-bottomed skillet with a lid for even cooking.
- Brush the dough with a little milk or water before sprinkling sesame seeds so they stick beautifully.
- Keep the heat on medium-low to avoid burning the bottom while ensuring the bread cooks through.
Kitchen Tools You’ll Need
Before diving in, gather a few essential tools:
- Mixing Bowl: To bring your dough together.
- Wooden Spoon or Spatula: For mixing.
- Skillet with Lid: Essential for cooking without an oven.
- Pastry Brush: To apply milk or water before adding sesame seeds.
- Clean Kitchen Towel: To cover the dough as it rises.
Ingredients in Sesame Bread – Soft, Fluffy & No Oven Needed!
Bread is all about balance, and each ingredient plays its role in creating soft, golden perfection. Here’s what you’ll need:
- All-Purpose Flour: 3 cups – The base of the bread, giving structure and softness.
- Warm Water: 1 cup – Activates the yeast and binds the dough.
- Active Dry Yeast: 2 ¼ teaspoons (1 packet) – Helps the dough rise and makes it fluffy.
- Sugar: 1 tablespoon – Feeds the yeast and adds a touch of sweetness.
- Salt: 1 teaspoon – Balances the flavors and strengthens the dough.
- Olive Oil: 2 tablespoons – Adds richness and tenderness to the crumb.
- Sesame Seeds: 2 tablespoons – Provide nutty flavor and a golden crust.
- Milk or Water: 1 tablespoon (for brushing) – Helps sesame seeds stick before cooking.
Ingredient Substitutions
Sometimes you may want to swap things out. Here’s how you can:
- All-Purpose Flour: Substitute with bread flour for extra chewiness.
- Olive Oil: Use vegetable oil or melted butter.
- Sugar: Honey or maple syrup can be used for a subtle twist.
- Sesame Seeds: Swap with poppy seeds, nigella seeds, or even sunflower seeds.
Ingredient Spotlight
Sesame Seeds: Tiny but mighty, sesame seeds add a nutty crunch, toasty aroma, and beautiful golden topping to the bread.
Olive Oil: This brings moisture and richness, ensuring the bread stays soft long after cooking.
Instructions for Making Sesame Bread – Soft, Fluffy & No Oven Needed!
Cooking this bread is as fun as eating it. Let’s walk through the steps:
- Preheat Your Equipment: Place a heavy skillet with a lid on the stove over medium-low heat.
- Combine Ingredients: In a bowl, mix warm water, sugar, and yeast. Let it sit until foamy, then stir in flour, salt, and olive oil until a soft dough forms.
- Prepare Your Cooking Vessel: Lightly oil the skillet or line with parchment if preferred.
- Assemble the Dish: Shape dough into a round loaf, brush with milk or water, and sprinkle sesame seeds generously on top.
- Cook to Perfection: Place dough in the skillet, cover with lid, and cook on low heat for 20–25 minutes per side, turning carefully, until golden brown and cooked through.
- Finishing Touches: Let the bread rest for 10 minutes before slicing to keep it fluffy.
- Serve and Enjoy: Slice warm, spread with butter, or pair with your favorite dish.
Texture & Flavor Secrets
The magic of this bread lies in its contrast: a soft, pillowy inside that pulls apart with ease and a slightly crisp, nutty crust from the sesame seeds. As the bread cooks slowly in the skillet, the sesame seeds toast gently, creating a rich aroma that makes each bite irresistible.
Cooking Tips & Tricks
Here are a few more helpful hints:
- Keep the lid closed during cooking for even steam and fluffiness.
- If unsure whether it’s cooked, tap the bread—it should sound hollow.
- For extra color, quickly toast the sesame-topped side before removing from skillet.
What to Avoid
Don’t worry, mistakes happen! Here’s what to watch out for:
- Cooking on high heat, which burns the crust before the inside cooks.
- Adding too much flour, which makes the bread dense instead of fluffy.
- Skipping the rise, which results in flat bread.
Nutrition Facts
Servings: 8
Calories per serving: 210
Note: These are approximate values.
Preparation Time
Prep Time: 15 minutes
Cook Time: 40 minutes
Total Time: 55 minutes
Make-Ahead and Storage Tips
This bread is perfect for making ahead. You can prepare the dough a day in advance and refrigerate it. Leftover bread keeps well in an airtight container for 2–3 days, and you can freeze it for up to a month. To reheat, simply warm in a skillet or toaster for that fresh-baked feel.
How to Serve Sesame Bread – Soft, Fluffy & No Oven Needed!
Enjoy it warm with butter, dip it into olive oil and balsamic, or use it as the base for hearty sandwiches. It’s also perfect alongside soups, curries, or salads.
Creative Leftover Transformations
- Slice and toast into crispy croutons for salads.
- Use as the base for mini pizzas.
- Make it into French toast for a delightful breakfast twist.
Additional Tips
For even fluffier bread, let it rise twice. You can also mix sesame seeds into the dough for extra nuttiness.
Make It a Showstopper
Present your bread on a wooden cutting board, sprinkle extra sesame seeds around, and slice it in front of your guests. A drizzle of olive oil nearby adds rustic charm.
Variations to Try
- Add garlic powder and parsley to the dough for a herby version.
- Sprinkle with black sesame seeds for contrast and visual appeal.
- Mix in shredded cheese for a savory twist.
- Add a hint of honey for a slightly sweeter bread.
FAQ’s
Q1: Can I make this bread without yeast?
Yes, you can use baking powder for a quicker version, though the texture will be denser.
Q2: What kind of skillet works best?
A heavy-bottomed cast iron skillet gives the best results.
Q3: Can I make it gluten-free?
Yes, substitute with a gluten-free flour blend designed for bread.
Q4: Do I need to flip the bread?
Yes, flipping ensures both sides cook evenly and prevents burning.
Q5: Can I use whole wheat flour?
You can, but mix it with some all-purpose flour to keep it fluffy.
Q6: Can I bake it in the oven instead?
Absolutely, bake at 375°F (190°C) for about 25–30 minutes.
Q7: Do I need to knead the dough a lot?
Just a few minutes of kneading is enough to develop structure.
Q8: Can I make smaller rolls instead of one loaf?
Yes, divide the dough into smaller balls and cook individually.
Q9: How do I know when it’s cooked inside?
It should sound hollow when tapped, or you can check with a toothpick.
Q10: Can I add toppings besides sesame seeds?
Definitely! Try nigella seeds, sunflower seeds, or even grated cheese.
Conclusion
This sesame bread proves that baking doesn’t need to be complicated or require an oven. With its soft, fluffy crumb and golden, nutty crust, it’s a bread that brings warmth and comfort to any table. Trust me, you’re going to love this, and once you try it, it might just become your go-to homemade bread.