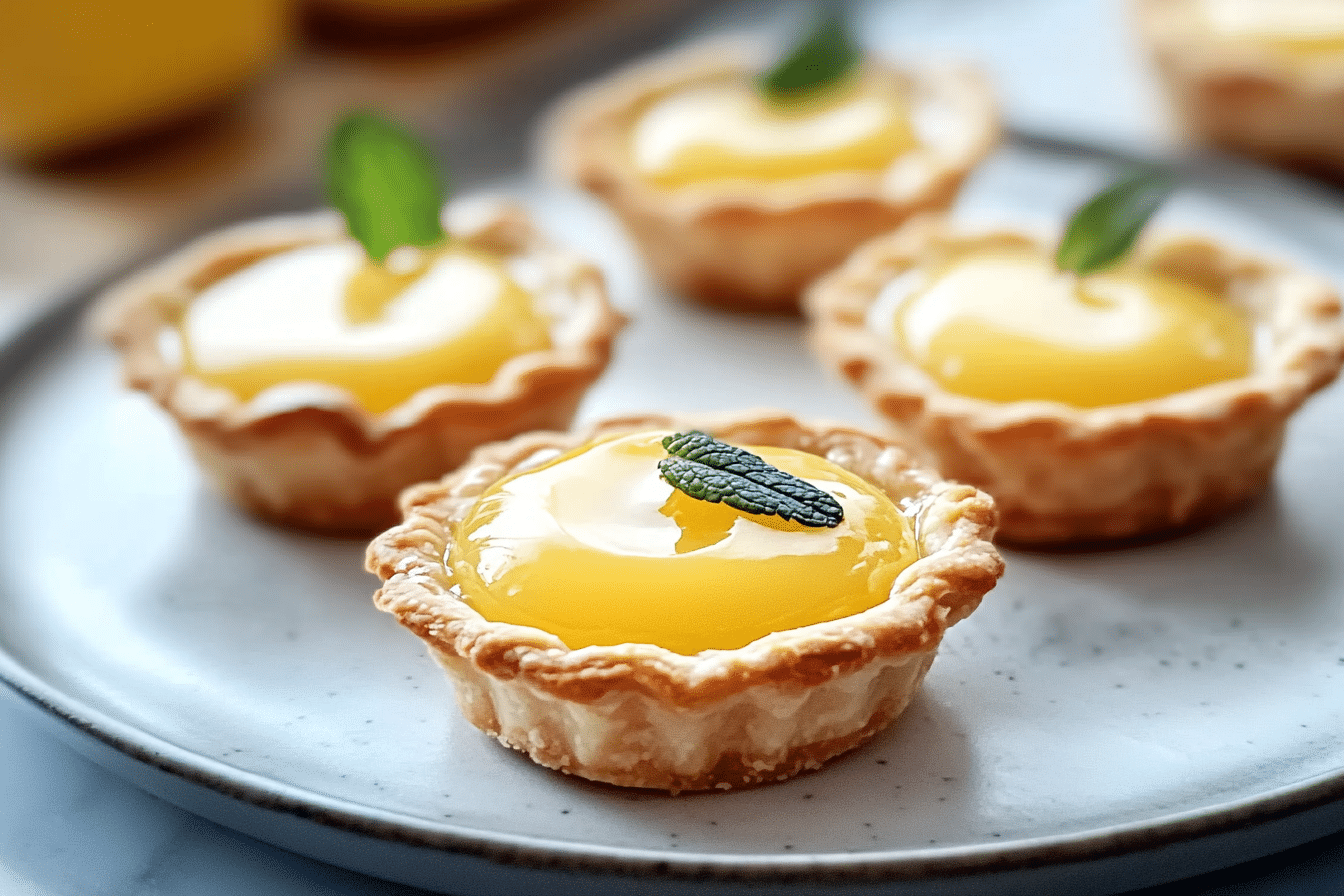
Lemon Curd Tartlets
Hey there, dessert enthusiast! Get ready to discover a recipe that’s about to become a staple in your kitchen and a star on your dinner table. I’m talking about a treat that whispers elegance, shouts vibrant flavor, and effortlessly brings smiles all around. These Lemon Curd Tartlets aren’t just a dessert; they’re a burst of sunshine after a long day, a joyous centerpiece for celebrations, and frankly, a secret weapon in your culinary arsenal. Trust me, you’re going to absolutely adore this one a game-changer!
Why You’ll Love These Lemon Curd Tartlets
This recipe isn’t just about the ingredients; it’s about creating moments. Whether you’re preparing for a sophisticated tea party, a casual family brunch, or simply indulging in some bright, comforting flavors for yourself, these tartlets are versatile enough to fit the occasion. Here’s why they’re a favorite:
Bright & Zesty Flavor
The star of the show is the homemade lemon curd, bursting with tangy, sweet citrus notes that are incredibly refreshing and satisfying. It’s a true delight for lemon lovers!
Perfect Portions
Tartlets are inherently charming and perfectly portioned, making them ideal for gatherings where individual servings are appreciated. No need for slicing a large tart!
Versatile
While classic lemon is always a hit, the curd can be flavored with other citrus like lime, orange, or even grapefruit for delightful variations. The crust can also be adapted to your preference.
Make-Ahead Friendly
Both the tartlet shells and the lemon curd can be made in advance, making assembly a breeze on the day of serving. This saves you time and stress, especially when entertaining.
Crowd-Pleasing Elegance
These little gems look incredibly fancy and impressive, yet they are surprisingly simple to make. They’re guaranteed to draw compliments and disappear quickly!
Ingredients
Here’s the magic of these lemon curd tartlets—they’re made with just a few pantry staples, but the result is so much more than the sum of its parts. Let’s break it down:
For the Sweet Pastry Crust (Pâte Sucrée)
- All-Purpose Flour: The base of our tender, crumbly, and subtly sweet crust.
- Unsalted Butter (cold, cubed): Creates flakiness and richness in the pastry. Keeping it cold is key for a tender crust.
- Granulated Sugar (or powdered sugar): Adds sweetness and contributes to the crisp texture.
- Large Egg (or egg yolk + a little cold water): Binds the dough together without making it tough.
- Pinch of Salt: Balances the sweetness and enhances the flavors.
For the Lemon Curd
- Large Eggs (whole eggs + egg yolks): Provide richness and act as the primary thickener for the curd, creating a silky-smooth texture. Using extra yolks can yield a richer, deeper yellow curd.
- Granulated Sugar: Sweetens the tartness of the lemons and helps the curd set.
- Fresh Lemon Juice: The vibrant, tangy heart of the curd. Freshly squeezed is essential for the best flavor.
- Lemon Zest: Adds intense lemon aroma and flavor, complementing the juice beautifully. Use a microplane for fine zest, avoiding the bitter white pith.
- Unsalted Butter (cold, cubed): Whisked in at the end, it adds luxurious richness, smoothness, and helps the curd emulsify and set.
(Note: the full ingredients list, including measurements, is provided in the recipe card directly below.)

Instructions
Let’s dive into the steps to create this flavorful masterpiece:
1. Prepare the Sweet Pastry Crust
- Mix Dough: In a food processor, pulse the flour, sugar, and salt until combined. Add the cold, cubed butter and pulse until the mixture resembles coarse breadcrumbs. Add the egg (or egg yolk/water mixture) and pulse just until the dough comes together. Do not overmix. If mixing by hand, cut the butter into the dry ingredients with a pastry cutter or your fingertips, then mix in the egg until just combined.
- Chill Dough: Gather the dough into a disc, wrap tightly in plastic wrap, and refrigerate for at least 30 minutes (or up to 24 hours) to chill and relax the gluten. This prevents shrinking during baking and makes it easier to handle.
- Roll and Cut: On a lightly floured surface, roll out the chilled dough to about 1/8-inch (3-4 mm) thickness. Using a round cookie cutter (slightly larger than your tartlet molds, typically 2.5-3 inches for mini muffin tins), cut out circles.
- Form Tartlet Shells: Gently press each dough circle into the wells of a mini muffin tin or individual tartlet molds, pressing firmly against the bottom and sides to create an even shell. Prick the bottoms a few times with a fork to prevent puffing.
- Chill Again: Place the muffin tin with the formed shells in the freezer for 15-30 minutes. This pre-baking chill helps prevent the shells from shrinking.
- Bake Crusts (Blind Bake): Preheat your oven to 180°C (350°F). Line each shell with a small piece of parchment paper or foil and fill with pie weights, dried beans, or rice. Bake for 10-12 minutes, then remove the weights and parchment/foil and bake for another 5-8 minutes, or until the shells are lightly golden and dry. This “blind baking” prevents a soggy crust. Remove from oven and let cool completely on a wire rack.
2. Make the Lemon Curd
- Combine Ingredients: In a medium, non-reactive saucepan (stainless steel or ceramic is best), whisk together the egg yolks, whole eggs (if using), sugar, and fresh lemon juice until well combined. Stir in the lemon zest.
- Cook Curd: Cook the mixture over medium-low heat, whisking constantly, until it thickens to a custard-like consistency that coats the back of a spoon (it should reach about 80-82°C / 176-180°F, but a thermometer isn’t strictly necessary if you watch for the coating consistency). Do not boil, or the eggs may curdle.
- Add Butter: Remove the pan from the heat. Add the cold, cubed butter, one piece at a time, whisking constantly until each piece is melted and fully incorporated, creating a smooth and glossy curd.
- Strain (Optional): For an extra silky-smooth curd, press the hot curd through a fine-mesh sieve into a clean bowl to remove any zest or small cooked egg bits.
- Chill Curd: Cover the surface of the lemon curd directly with plastic wrap (to prevent a skin from forming) and refrigerate for at least 3-4 hours, or until thoroughly chilled and set.
3. Assemble the Tartlets
- Fill Shells: Once both the tartlet shells are completely cooled and the lemon curd is chilled and set, spoon or pipe the lemon curd into each tartlet shell. Fill them almost to the brim.
- Chill Again (Optional but Recommended): For the curd to fully set in the tartlet, it’s best to chill the assembled tartlets for another 1-2 hours before serving.
4. Garnish and Serve
- Garnish: Just before serving, garnish your tartlets with fresh raspberries, blueberries, a small sprig of mint, a dusting of powdered sugar, or a dollop of sweetened whipped cream or meringue.
- Serve: Serve immediately and enjoy!
Notes:
- Yields: Approximately 24 mini tartlets (depending on mold size).
- Prep Time: 45 minutes
- Cook Time: 20-30 minutes (for crusts and curd)
- Chill Time: 30 minutes + 3-4 hours (for curd) + 1-2 hours (assembled tartlets)
- Total Time: Approximately 6-8 hours (mostly hands-off chilling)
- Calories per serving: Approximately 150-200 per tartlet (varies with size and exact ingredients).
How to Serve These Lemon Curd Tartlets
These elegant tartlets are a delightful addition to any occasion. Here are a few serving suggestions:
- Dessert Course: Serve them as a light and refreshing end to a meal.
- Tea Parties & Brunches: Their petite size makes them perfect for a dessert spread.
- Buffets: Easy for guests to pick up and enjoy.
- Edible Gifts: Package them beautifully for a charming homemade gift.
Additional Tips
- Fresh Lemon is Key: Do not use bottled lemon juice; the flavor will not be the same.
- Non-Reactive Cookware: Always use stainless steel, glass, or ceramic pans for making lemon curd, as the acidity of the lemon can react with other metals, causing a metallic taste or discoloration.
- Don’t Overcook Curd: Overcooking the curd can lead to a lumpy or scrambled egg texture. Cook it gently over low heat, whisking constantly, until it thickens. If it does curdle, you can try blending it with an immersion blender or straining it through a fine-mesh sieve, though texture might still be compromised.
- Preventing Soggy Crust: Blind baking the crust thoroughly is the most important step. You can also brush the pre-baked crust with a thin layer of egg white and bake for another 2-3 minutes to create a seal before filling.
- Cool Completely: Ensure both the crusts and the curd are completely cooled before assembling to prevent a soggy crust.
FAQ’s
- Can I use store-bought tartlet shells?
Yes, absolutely! Using pre-made mini phyllo shells or shortbread tart shells will significantly reduce your prep time, making this an even quicker dessert. - Can I make the lemon curd without zest?
You can, but the zest contributes a lot of the intense lemon aroma and flavor. Omitting it will result in a milder, less complex lemon taste. - How long do lemon curd tartlets last?
Store assembled tartlets in an airtight container in the refrigerator for up to 2-3 days. The crusts may soften slightly over time. - Can I freeze lemon curd tartlets?
It’s generally best to freeze the unbaked tartlet shells and the lemon curd separately. Once thawed, bake the shells, then fill with thawed curd. Assembled and frozen tartlets may have a slightly softer crust upon thawing. - What if my lemon curd is too thin?
Return it to the saucepan and cook it gently over low heat, whisking constantly, until it thickens further. Be patient and don’t rush it. A small amount of cornstarch or arrowroot powder (1/2 to 1 teaspoon dissolved in a tablespoon of cold water) can be whisked in and cooked for an extra minute to aid thickening if needed, but it’s usually not necessary for a properly cooked curd. - Can I make a larger lemon curd tart instead of tartlets?
Yes, this recipe can be scaled up to make a single large lemon tart (e.g., in a 9-inch tart pan). Baking times for the crust and curd will need to be adjusted. - What other fruits pair well with lemon curd?
Raspberries and blueberries are classic pairings. Strawberries, blackberries, or even thin slices of kiwi can also work beautifully. - Can I make the lemon curd less tart?
You can reduce the amount of lemon juice slightly or increase the sugar, but the signature of lemon curd is its delightful tang. - Why did my pastry shrink when baking?
This usually happens if the dough wasn’t chilled enough before baking, or if it was overworked, developing too much gluten. Always ensure adequate chilling time. - What’s the best way to get juice from lemons?
Roll the lemons firmly on the counter before cutting and juicing. You can also microwave them for 10-20 seconds to help them release more juice.
Conclusion
There you have it your ticket to a truly delightful dessert that’s as elegant as it is satisfying. These Lemon Curd Tartlets are more than just a recipe; they’re a canvas for your culinary creativity, a budget-friendly superstar, and a guaranteed crowd-pleaser that will have everyone asking for seconds. So go on, gather your ingredients, fire up that oven, and get ready to create some delicious memories. Happy baking, my friend, and enjoy every comforting bite!
Print
Lemon Curd Tartlets
- Prep Time: 45 minutes
- Cook Time: 30-40 minutes (for crusts and curd)
- Total Time: 2 hours 45 minutes – 4 hours 45 minutes (includes chilling)
- Yield: 12–24 mini tartlets (depending on pan size) 1x
- Category: Dessert, Pastry
- Method: Baking, No-Bake (curd)
- Cuisine: French, American
- Diet: Vegetarian
Description
These miniature tarts feature a buttery, flaky shortbread crust filled with a vibrant, intensely flavored homemade lemon curd. They are a perfect balance of sweet and tart, ideal for a special occasion, tea party, or a bright individual dessert.
Ingredients
- For the Shortbread Tartlet Shells:
- 1 ½ cups (180g) all-purpose flour
- ½ cup (60g) powdered sugar
- ¼ teaspoon salt
- ½ cup (113g) unsalted butter, very cold and cubed
- 1 large egg yolk, cold
- 1–2 tablespoons ice water (as needed)
- For the Lemon Curd:
- ¾ cup (180ml) fresh lemon juice (from 3–4 lemons)
- 1 tablespoon lemon zest (from 1–2 lemons, avoid white pith)
- ¾ cup (150g) granulated sugar
- 4 large egg yolks
- 2 large whole eggs
- ½ cup (113g) unsalted butter, cut into small pieces
- Optional Garnish:
- Fresh berries (raspberries, blueberries)
- Dusting of powdered sugar
- Meringue (for a Lemon Meringue Tartlet variation)
- Small sprigs of fresh mint
Instructions
- I. Make the Shortbread Tartlet Shells:
- **Combine Dry Ingredients:** In a large bowl, whisk together the flour, powdered sugar, and salt.
- **Cut in Butter:** Add the cold, cubed butter to the dry ingredients. Using a pastry blender, your fingertips, or a food processor, cut the butter into the flour mixture until it resembles coarse crumbs with some pea-sized pieces of butter remaining.
- **Add Egg Yolk & Water:** Add the cold egg yolk and 1 tablespoon of ice water. Mix until the dough just comes together. If it’s too dry, add the second tablespoon of ice water, a teaspoon at a time, until it forms a cohesive dough. Do not overmix.
- **Chill Dough:** Gather the dough into a disc, wrap tightly in plastic wrap, and refrigerate for at least 30 minutes (or up to 2 days).
- **Prepare Tartlet Pans:** Lightly grease a mini muffin tin or individual tartlet pans (fluted or plain, 2-3 inch diameter).
- **Form Shells:** On a lightly floured surface, roll out the chilled dough to about 1/8-inch thickness. Use a round cookie cutter slightly larger than your tartlet molds to cut out circles. Gently press each circle into a tartlet mold, pressing firmly against the bottom and sides. Alternatively, divide the chilled dough into small, equal portions and press each portion directly into the molds.
- **Blind Bake (Crucial for preventing soggy bottoms!):** Prick the bottom of each tartlet shell several times with a fork. Line each shell with a small piece of parchment paper or foil, and fill with pie weights, dried beans, or rice. Bake in a preheated oven at 375°F (190°C) for 10-12 minutes, or until the edges are lightly golden. Remove from oven, carefully lift out the parchment/weights, and continue baking for another 5-7 minutes, or until the bottom of the crust looks dry and lightly golden. Remove shells from oven and let them cool completely in the pans before gently removing.
- II. Make the Lemon Curd:
- **Prepare Double Boiler:** Fill a saucepan with about 1-2 inches of water and bring to a gentle simmer over medium-low heat. Place a heatproof bowl (glass or stainless steel) over the simmering water, ensuring the bottom of the bowl does not touch the water.
- **Combine Ingredients:** In the heatproof bowl, whisk together the lemon juice, lemon zest, granulated sugar, egg yolks, and whole eggs until well combined and slightly pale.
- **Cook Curd:** Continue to whisk constantly over the simmering water. As it heats, the mixture will thicken. This can take 10-15 minutes. The curd is done when it coats the back of a spoon thickly and reaches about 175°F (79°C) on an instant-read thermometer. **Do not boil or the eggs will scramble.**
- **Add Butter & Strain:** Remove the bowl from the heat. Add the cold butter pieces, one at a time, whisking until each piece is fully melted and incorporated. The curd will become smooth and glossy. For an extra smooth curd, strain it through a fine-mesh sieve into a clean bowl.
- **Chill Curd:** Cover the surface of the lemon curd directly with plastic wrap (this prevents a skin from forming). Refrigerate for at least 2 hours, or until thoroughly chilled and thickened.
- III. Assemble and Serve:
- **Fill Tartlet Shells:** Once the tartlet shells are completely cool and the lemon curd is chilled and firm, spoon or pipe the lemon curd into each tartlet shell. Fill them almost to the brim.
- **Chill Again:** Refrigerate the assembled tartlets for at least 30 minutes, or until the curd is fully set.
- **Garnish and Serve:** Just before serving, garnish with fresh berries, a dusting of powdered sugar, or a small sprig of mint.
Notes
- **Lemon Quality:** Use fresh lemons for the best flavor. Zest before juicing.
- **Preventing Soggy Crusts:** Blind baking the crust until it’s fully dry and golden is the most critical step. For extra protection, you can brush the warm, blind-baked shells lightly with a beaten egg white and return to the oven for 1-2 minutes until set.
- **Curd Consistency:** The curd will thicken significantly as it cools. Don’t worry if it seems a bit thin when warm.
- **Storage:** Store finished lemon curd tartlets in an airtight container in the refrigerator for up to 3-4 days. Unfilled tartlet shells can be stored at room temperature in an airtight container for up to 3 days, or frozen for longer. Lemon curd can be made ahead and stored in the refrigerator for up to 1 week.
- **Variations:** For Lemon Meringue Tartlets, pipe meringue onto the filled tartlets and briefly torch with a kitchen torch or bake under a broiler until lightly browned.
Nutrition
- Serving Size: 1 tartlet (approx. 50-70g)
- Calories: 200-300 (varies based on size and ingredients)
- Sugar: 20-30g
- Sodium: 50-100mg
- Fat: 12-20g
- Saturated Fat: 7-12g
- Unsaturated Fat: N/A
- Trans Fat: 0g
- Carbohydrates: 20-35g
- Fiber: 0-1g
- Protein: 3-5g
- Cholesterol: 70-120mg
Keywords: Lemon Curd, Tartlets, Mini Tarts, Shortbread, Dessert, Baking, Sweet and Tart, Individual Desserts